Yard Work, Summer 2011
Small Shed Pad Prep - July-August 2011
I was planning to build a small shed for the lawn tractor, lawnmowers and other yard equipment, but a sale at Canadian Tire convinced me that a small metal shed would cost far less than anything I could build. Having used these sheds in Calgary, I knew they would be totally adequate and so purchased one and brought it home.
Although the shed kit came with a base kit, close examination showed this was merely a bunch of metal 2x3 "studs" that would be bolted together, laid on prepared ground and then... either covered with thick plywood or filled with concrete. I actually built the outer frame and set it in place in the yard to extablish location before realizing that it was actually much more work than just pouring a proper concrete pad. With that out of the way, it was time to locate and prepare for the concrete pad.
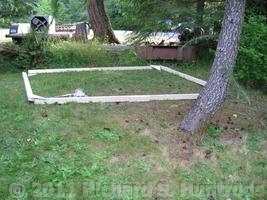
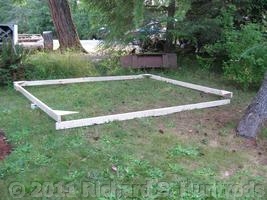
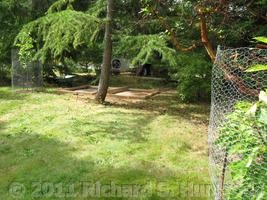
Location proved trying. My preferred location did not allow sufficient room for the shed walls as various trees and bushes would interfere. Finally, we decided to place the shed on the front lawn near the propery line behind the arbutus tree and cherry trees. With the location set, I built the frame / forms from 2x4 lumber. As the shed is 10'x8', I chose to add 6" on each edge as a boundary and so created a frame that is 9' by 11'. To create strength and retain the square corners while doing prep work, I added plywood gussets to the corners. These will be removed before the concrete is poured.
Small Shed Pad Prep - July-August 2011
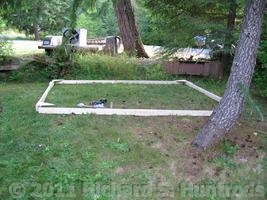
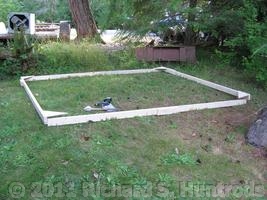
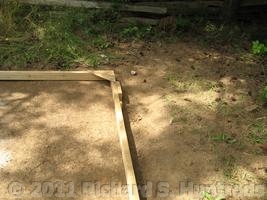
With the frame built, I set it in place to finalize the location. That done, I used some spray paint to lay out the boundary, then established level on the frame to see what had to be done. One corner was higher than the others, so material would have to be cleared. I removed the frame to allow the bobcat room to do this work. With the frame gone (but the painted lines remaining), it was short work to get the bobcat to do the sod and soil removal and coarse levelling. I then put the frame back in place and continued to level the area by hand.
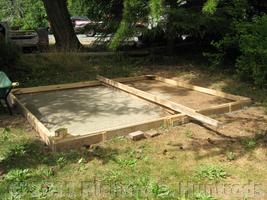
Once the overall level was set, it was clear that I would either have to dig one corner significantly below grade, or otherwise raise the other corner. Talking to Bill my neighbor (and concrete contractor), he recommended levelling the frame, then adding cribbing to prevent concrete flowing out below the raised frame. Then fill is added to the center of the form to keep the overall depth to 3.5" except at the edge of the frame. This way, the concrete forms a footing capturing the fill but without having major areas of deep concrete.
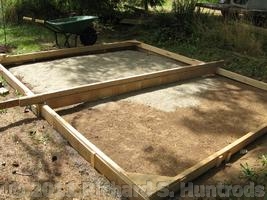
Acting on Bill's advice, I grabbed some plywood strips that I had kept after last year's front pad concrete job where they had been used as forms in the complex curved shape that was the front pad. I trimmed them as required then attached them to the main 2x4 frame to form cribbing walls to close any gaps to the ground. That done, I built a levelling screed (2x4 with plywood extensions to set the depth of fill), then added sand to the interior of the form until the level was correct. Water and tamping and the form is ready for concrete.

Septic System Overhaul - July 2011
Starting in mid July, we started having some sewer problems. Water draining from the main bathtub started to fill the lower level shower, plus the lower toilet would mysteriously fill then quickly be sucked dry. Fearing a sewage catastrophe, I called the local septic sucking services for a consultation. They agreed that at 5 years, the system was probably due for emptying, and further examination would likely indicate if there was any other problem.
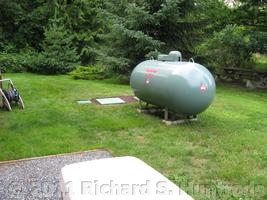
Fortunatly there was a truck in the area, and so later that day the truck arrived to pump the tanks. In preparation, I dug out the area where the tanks were located, trying to find the lids. This was successful, though I did uncover almost all the tank in the process. Our tanks are an older two-chamber concrete tank with concrete buried lids. Once exposed, the septic person was able to easily pump out the tanks.
His assessment was everything was operating perfectly, and things could have waited even another year before needing to be pumped. As to the drain problem, he indicated it could be a blockage at the tank inlet. Turns out I had not uncovered the inlet cover, so I quickly did this while he pumped the main tank and second tank.
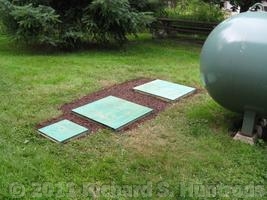
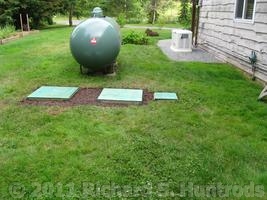
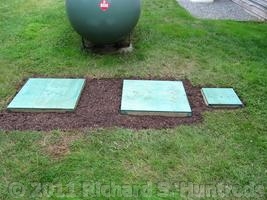
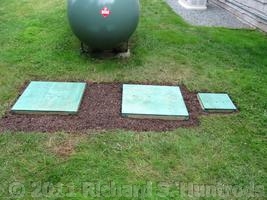
Once uncovered and opened, it was obvious there was a "guck" blockage in the inlet. This was not sewage, but grey water and detergent "stuff". A quick application with the suction nozzle and the system was immediately and completely cleared. A discussion of tanks and lids indicated modern systems use a collar and lids at ground level. I liked this idea and decided to implment my own solution.
With the tanks drained and service truck gone, I took some pressure-treated (PT) 2x6 lumber I had and created collars for the three lids, with clearance to work. I used some scrap 2x3s to join the collars into one unit, then used the pressure treat end liquid to coat all the lumber before buring the collars in pea gravel, sand and then garden soil. Some grass seed completed the landscaping. I then built new "surface mount" lids from 5/8" plywood, painting them with the same PT liquid before attaching them to the collars with stainless screws. It not only looks good, it provides easy access to the septic system including inlet for future pumping and maintenance.