Ever since the Raspberry Pi was announced, I was interested. I was sure I would be getting one as soon as they were available, but several months went by as availabilily never seemed to arrive for Canadian shoppers, so I continued without one.
In September, I was reading articles on microcontroller on Zite, and came across an intriguing article talking about creating a parallel 'supercomputer' at the University of Southampton (UK)using 64 Raspberry Pi computers housed in a rack made of Lego. Now I was hooked. I had to replicate this feat in some fashion myself.
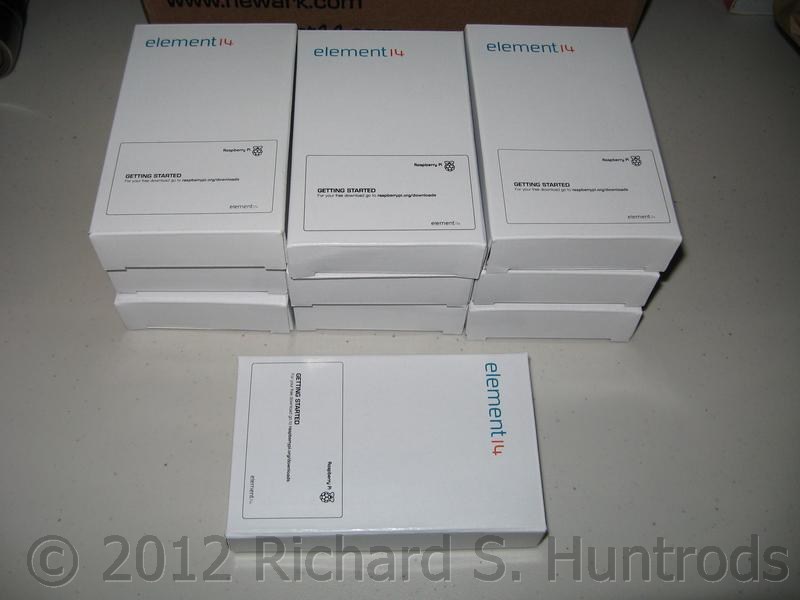
After checking the Raspberry Pi website and finding purchase links to two other websites, I chose Element 14 as the price was slightly better for Canadian buyers. I promptly ordered 10 units, figuring to create a cluster of 8 or 9 with one or two 'loose' to play with on other projects.
Links:
After placing the order, all I had to do was wait. While waiting, I read the University of Southampton's "Raspberry Pi Supercomputer 'how to". I following links found on that site to other documents and blogs, as well as sources for the required software. The main software image for the operating system is called Rasbpian and is a version of Debian Linux specially created for the Raspberry Pi. In addition, for parallel computing various compiler packages would have to be downloaded and installed. However, the 'how to' indicated these steps were carried out on the running Pi.
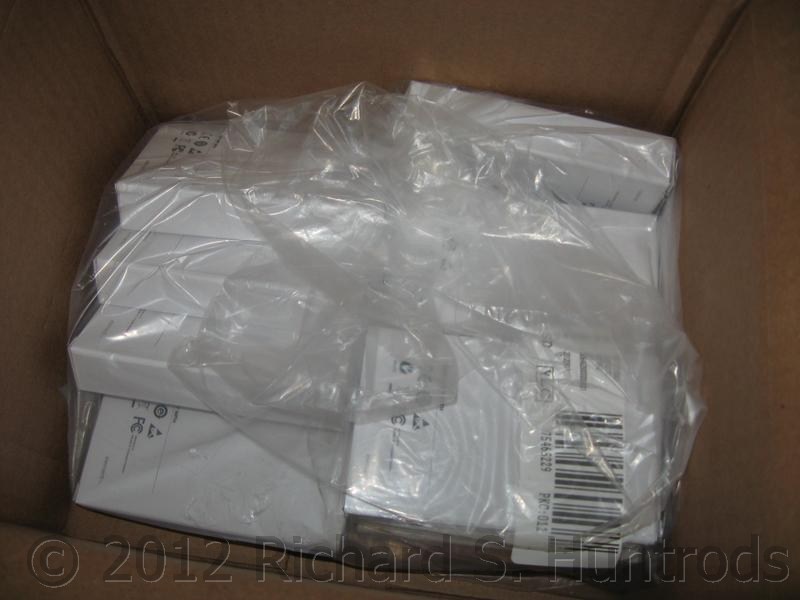
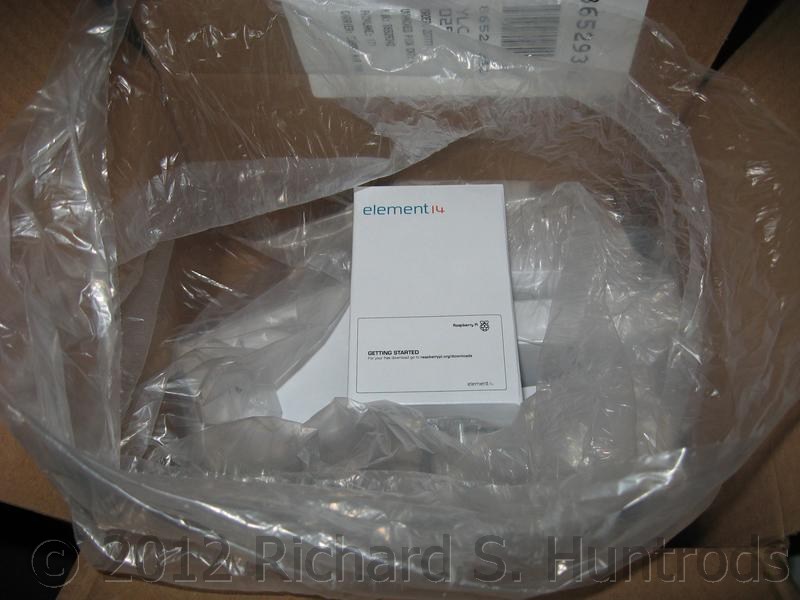
Quickly the Raspberry Pi's arrived. Below are photos taken of the unboxing of my Pis.
Links:
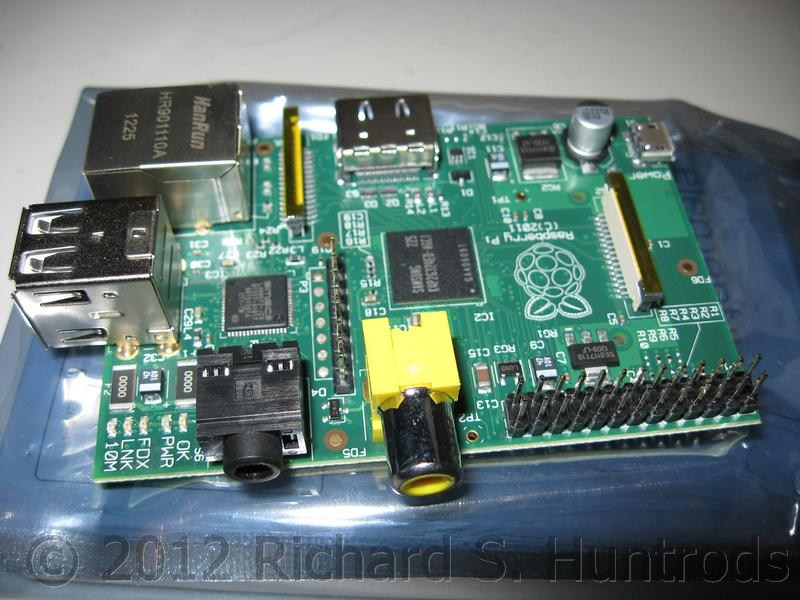
The Raspberry Pi does not work 'out of the box'. Each board requires a power supply and a SD memory card. The SD card acts as the primary boot drive for the Raspberry Pi. A minimum size of 4 gigabytes is recommended by the Raspberry Pi site. Power for the Raspberry Pi is supplied via a USB micro connector from a powered USB device. This can be a dedicated USB power supply like that for powering iPhones etc., or a powered USB hub, or a computer with powered USB ports. This also means each Pi requires a USB cable with the micro connector on one end.
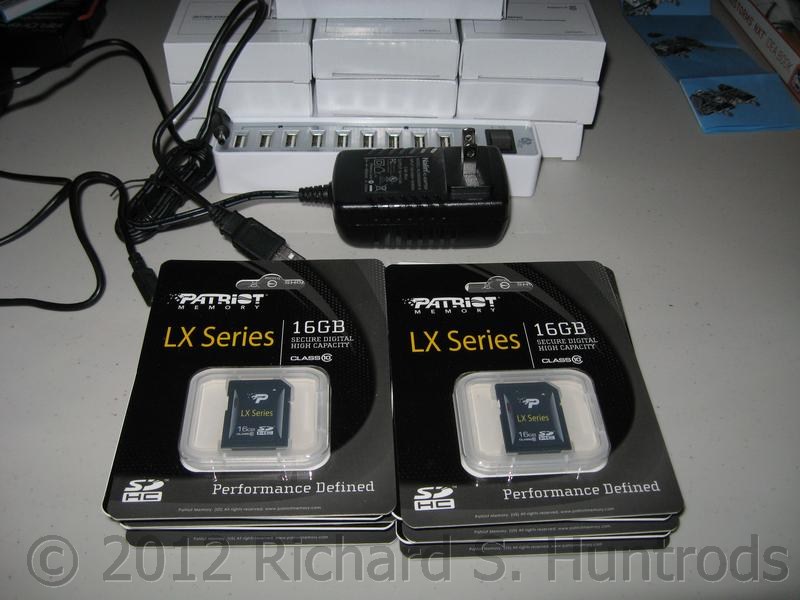
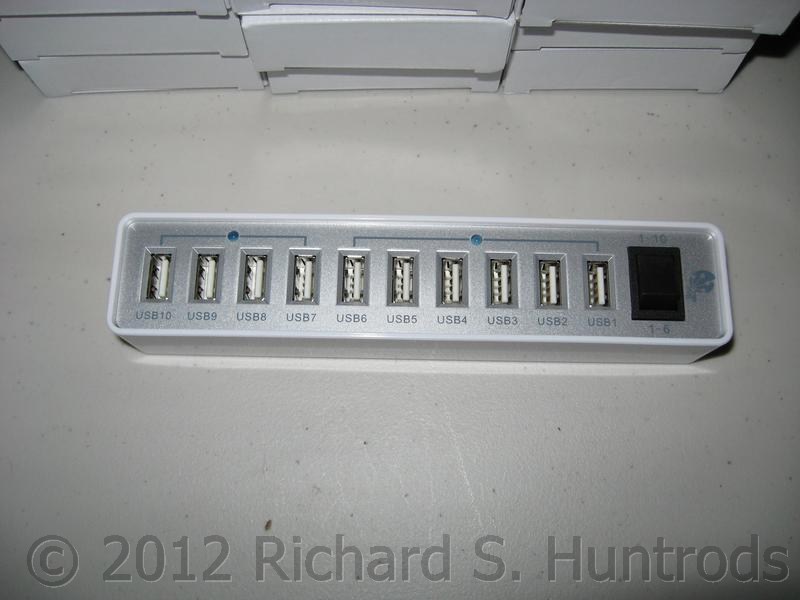
I decided to order a dedicated 10 port powered USB hub for all my Pis. Checking the Pi website hardware page indicated a 2A power supply was a minimum. I found the perfect powered USB hub at London Drugs (TreeFrog brand).
The Southampton site recommended a 16 gigabyte SD memory card, and I found one on sale at NCIX.com. I also purchased 10 USB cables (A-micro) inexpensively.
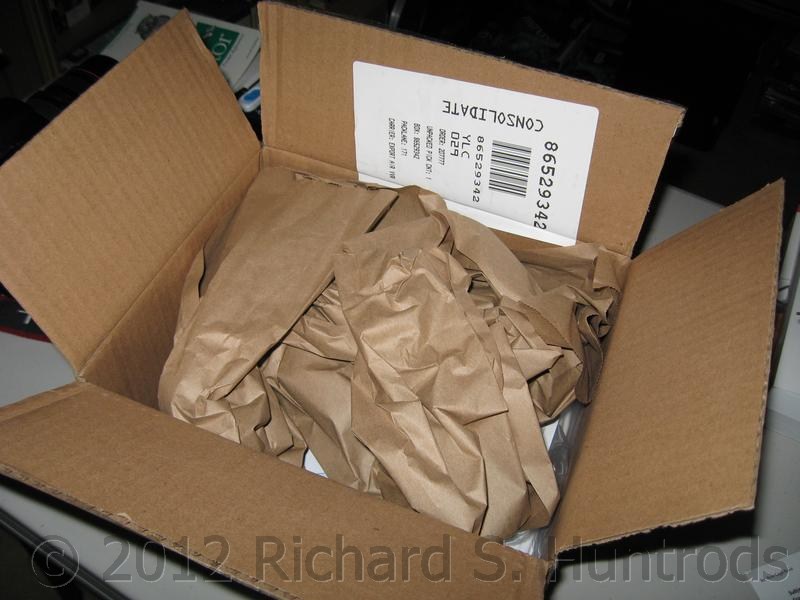
Below are some of the components as they are unboxed.
Links:
Time to fire up one of the Raspberry Pi units and create a 'master disk' image for the cluster. There are several steps to this process:
- Download software to write the Raspian Linux image onto the SD card. Different programs are used for Linux computers, Macs or Windows. After much reading (and some testing) I found that "win32diskmanager" worked the best on Windows 7 (64 bit).
- Write the Raspian image to the SD card.
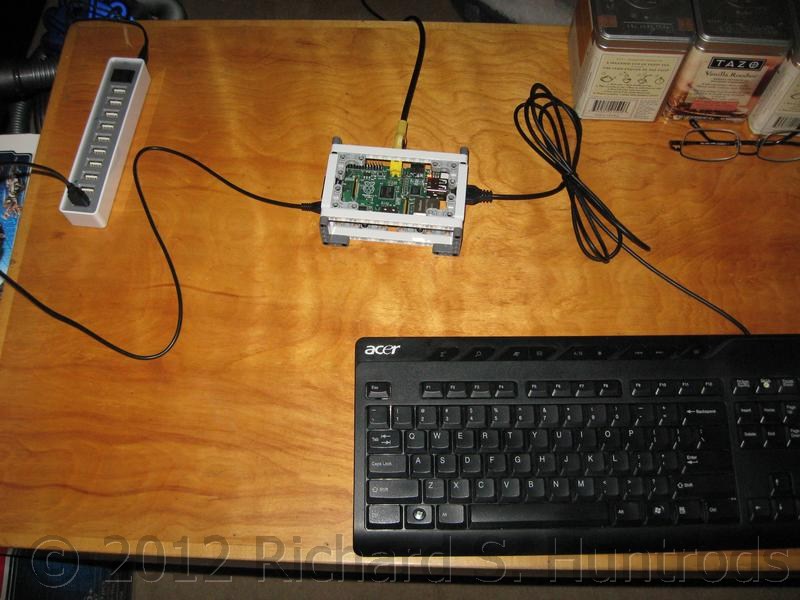
- Connect a USB keyboard to the Raspberry Pi. A USB mouse is also recommended, but I prefer command line work so didn't bother.
- Connect the Pi to a video device. I chose to use the composite output with an RCA video cable to connect the Pi to my TV's AUX IN.
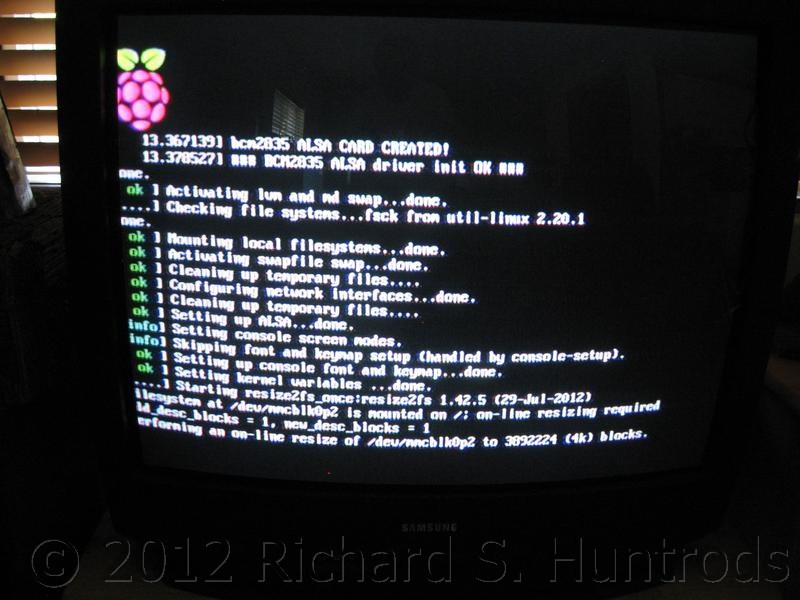
- Connect the USB power to the Pi.
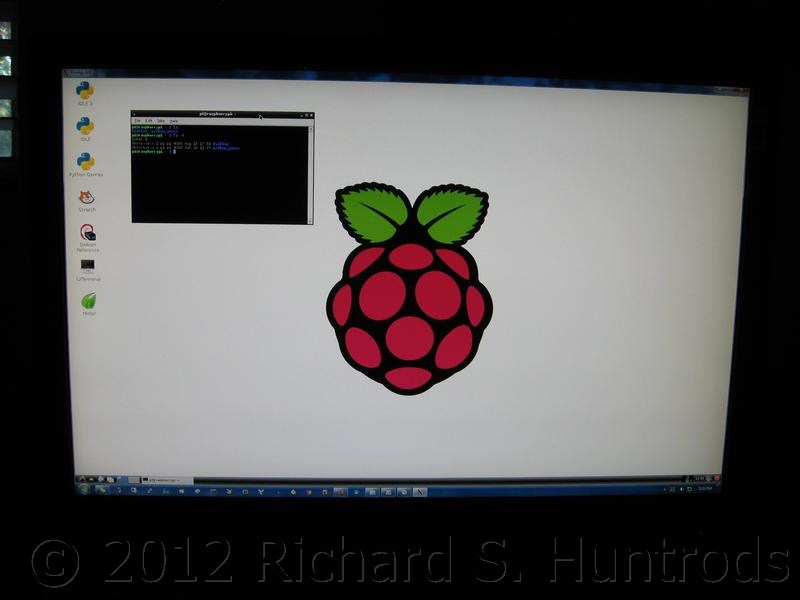
At this point the Raspberry Pi came up on the TV. Following the Southampton guide, I configured the Pi and installed the software necessary for parallel cluster computing. I wrote my own document on this process, found in the links below.
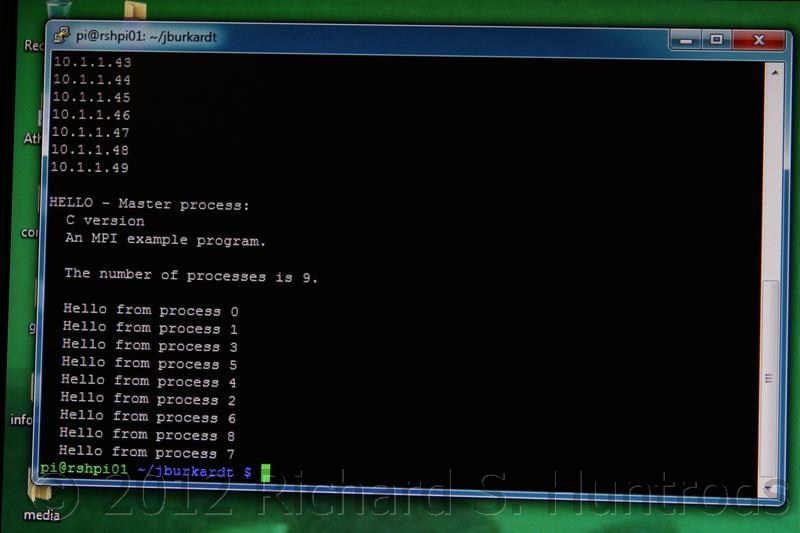
After configuring the master node, I shut it down and moved it nearer my main PC, then plugged it back in without keyboard or video and instead connected it to my network switch. After verifying that my configuration was correct and I could SSH into the Raspberry Pi from my PC, I shut it down, removed the SD card and copied it back to my PC as the master SD image for my cluster.
Links:
- pi supercomputer rsh (pdf document)
- pi supercomputer programming rsh (pdf document)


With the master SD image for my cluster stored on my PC, I proceeded to create one copy to begin my cluster. As each node will begin life as a copy of the master node, it has to be connected to the network and reconfigured with the actual master node not on the network.
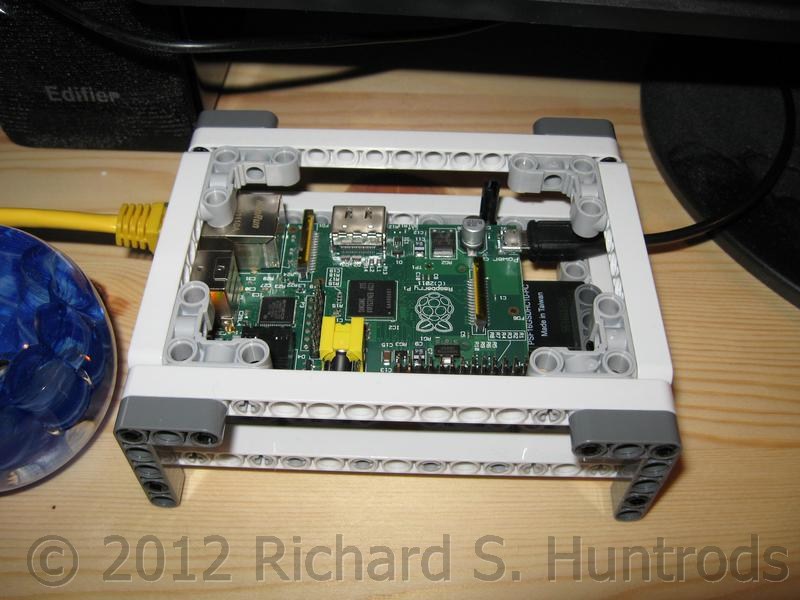
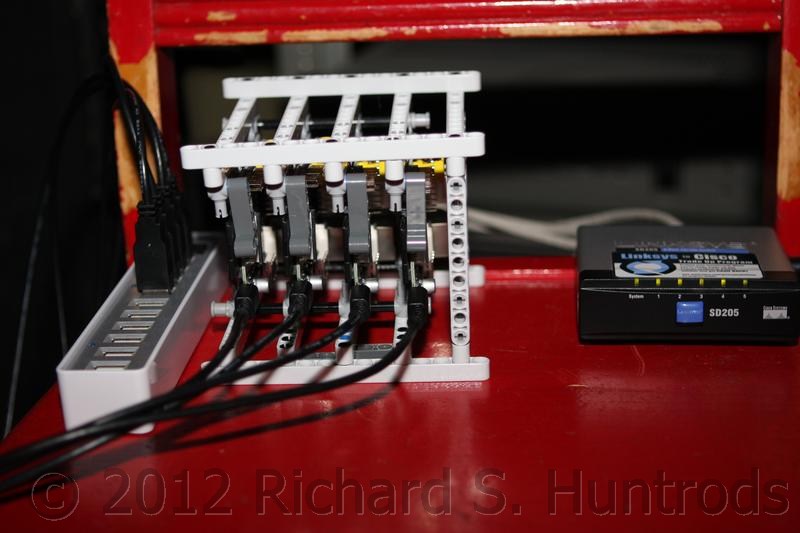
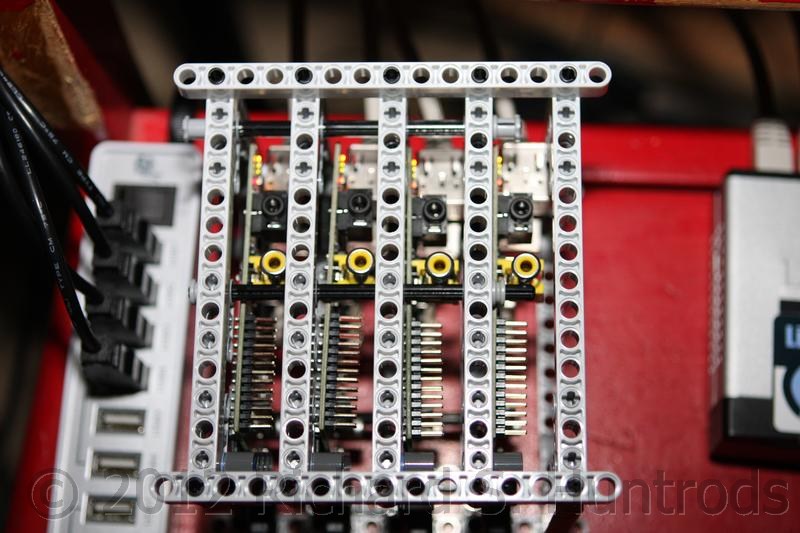
The physical cluster itself took shape using LEGO Mindstorms components to create a small rack, seen below. I stared with two Pis. Once both were installed in the rack, I connected the second Pi to network and power. Once up I used SSH to log in and configure it for it's place in the cluster. As Gene Wilder exclaimed in "Young Frankenstein", "It's ALIVE!!!!!"
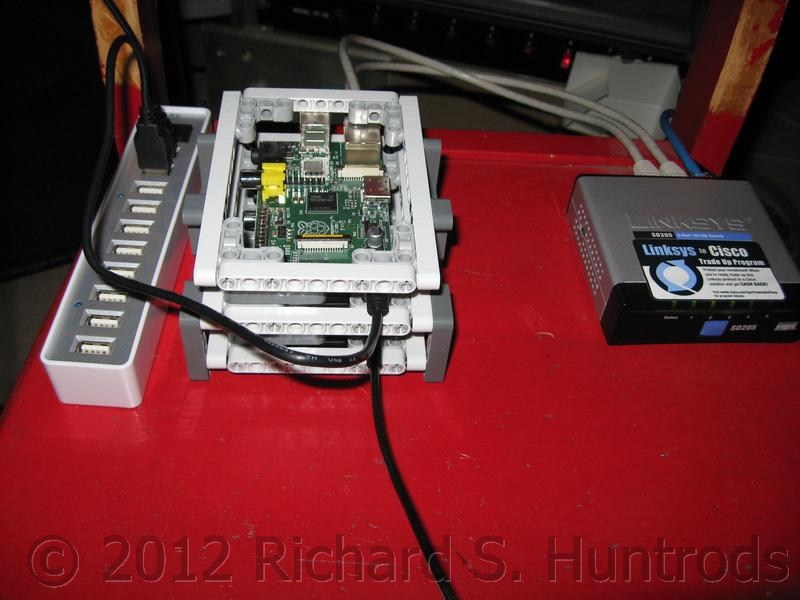
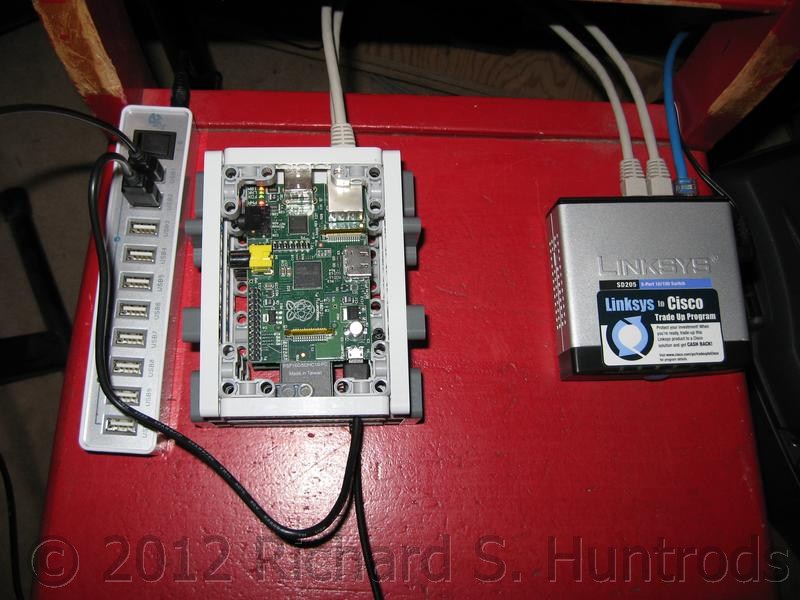
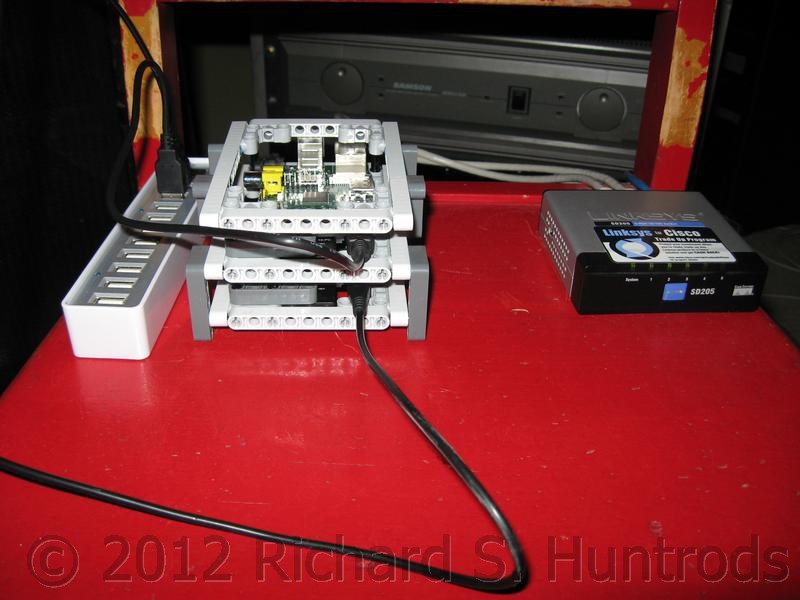
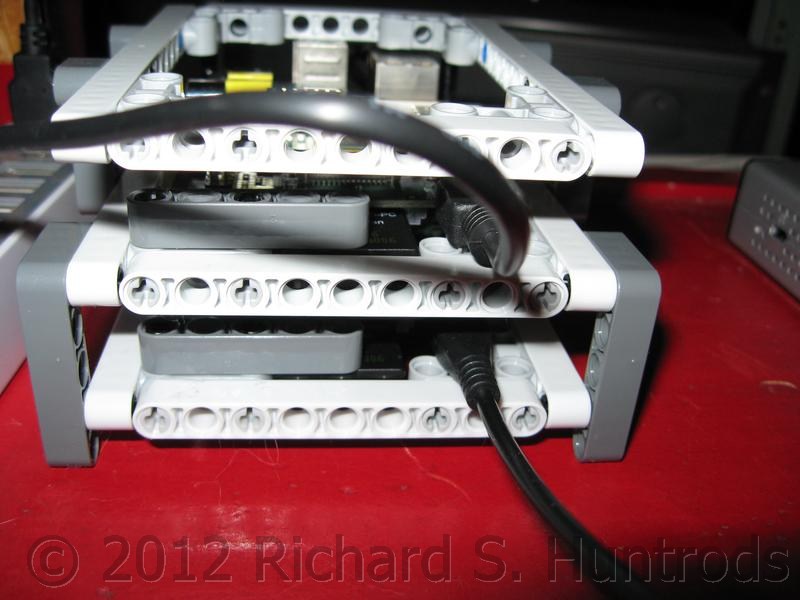
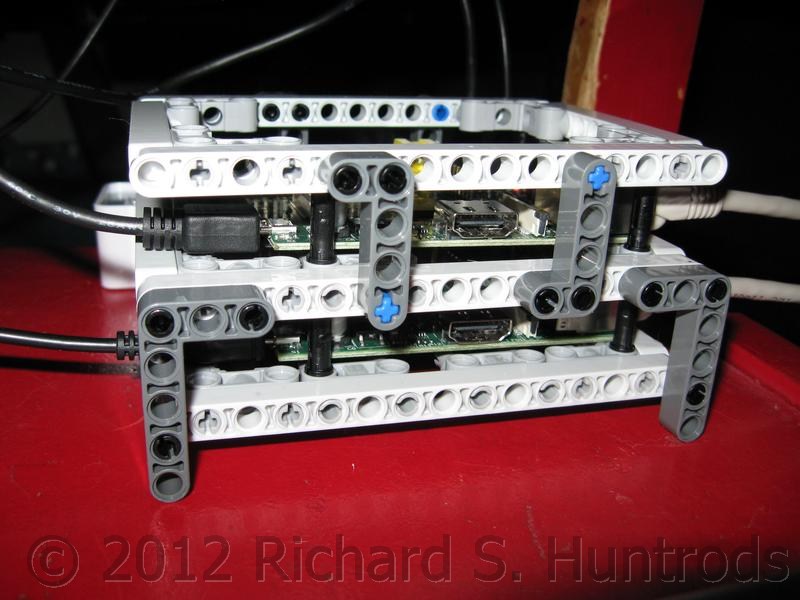
I wasn't thrilled with my first Lego rack, so spent some time designing a second rack that would hold 4 Pis in a vertical orientation. After building this rack, I followed the same process to create the needed SD card images, power up the new nodes and configure them. Once done, I had a working four node Raspberry Pi 'supercomputer' (well, actually just a small parallel cluster).
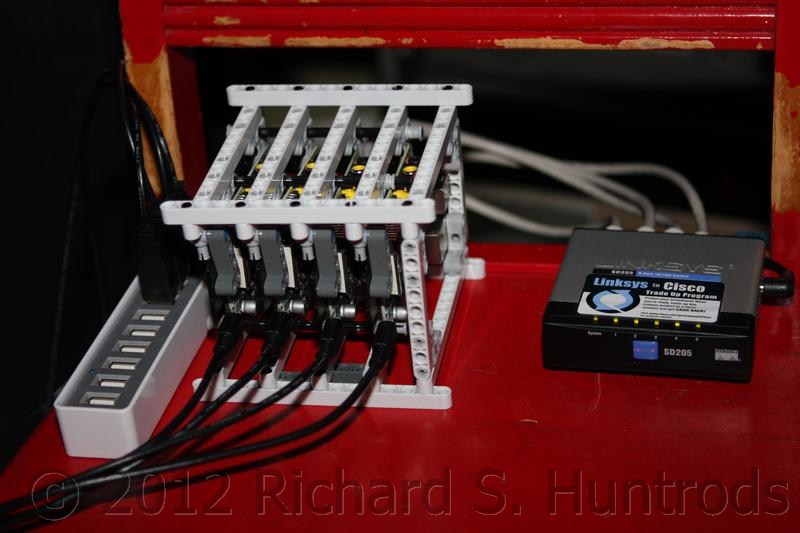
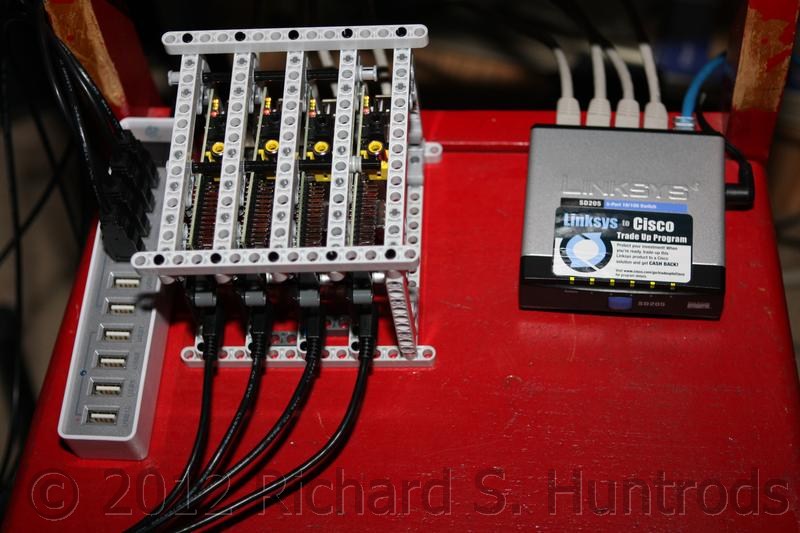
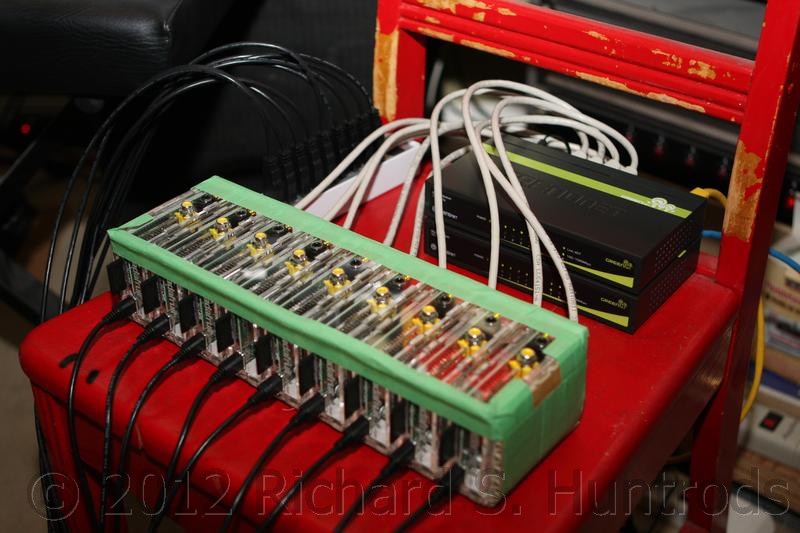
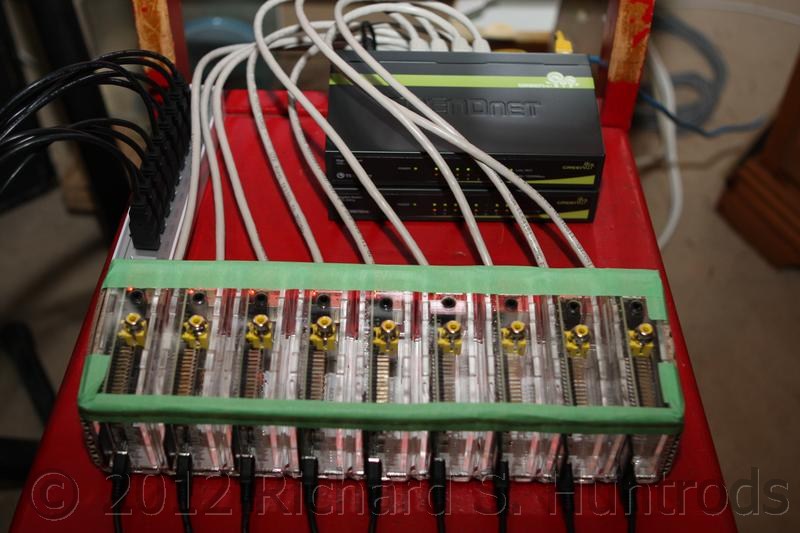
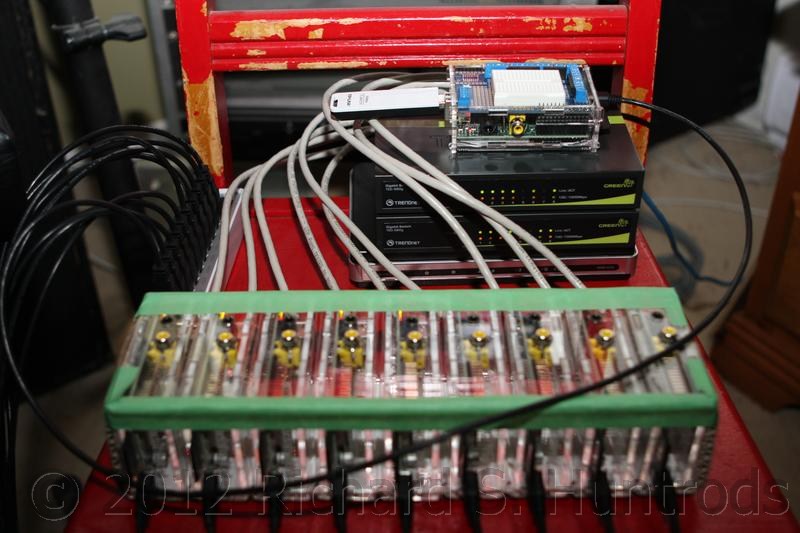
In order to extend my cluster beyond four Pis, I required a network switch with more than 5 ports, More network cables and a different rack system. The current rack was great, but I'd run out of Lego components and could not add more nodes.
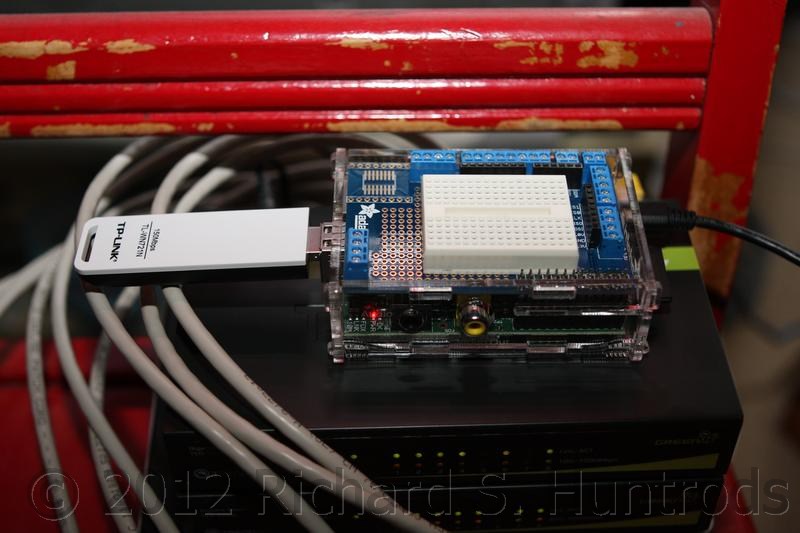
NCIX had 8-port gigabit switches on sale (Trendnet TEG-S80g), so I bought a few. I also bought a USB Wifi card that was recommended in the Raspberry Pi hardware page (TPLink TL-WN721N).
As I needed some other method of holding the boards in my cluster, I ended up choosing the clear acrylic case made and sold by Adafruit. It's a very nice looking case, and the boxy shape made it perfect for forming into a cluster in some fashion. The cases are frequently out of stock, so you have to check back frequently
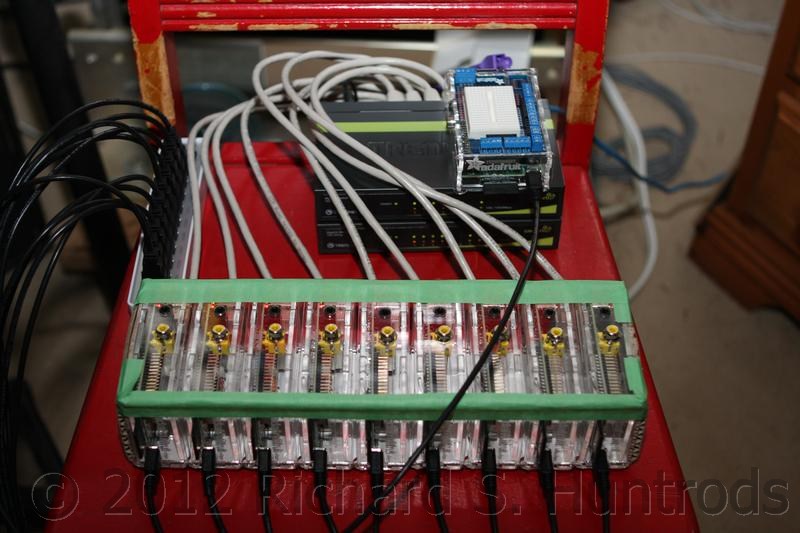
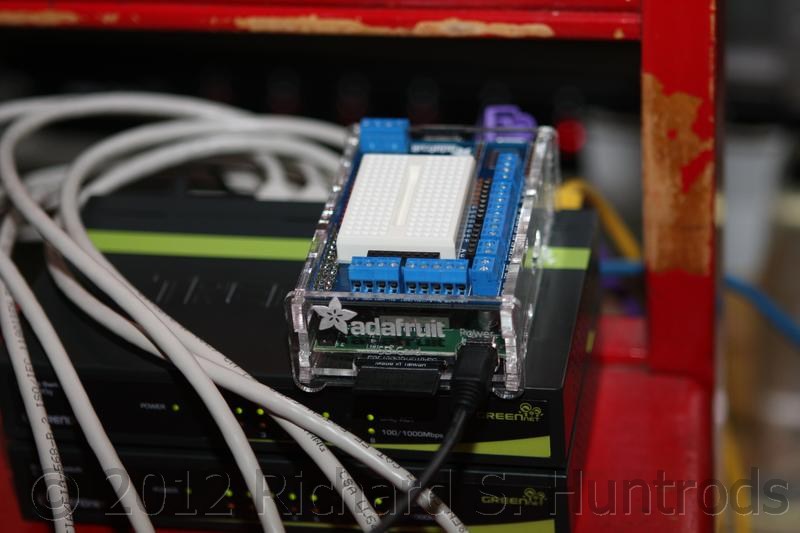
Also from Adafruit, I purchased a 'breakout board' kit for the 10th Raspberry Pi that would allow me to experiment with hardware connected to the various control lines of the Raspberry Pi. I also purchased plug-in wires and a mini-breadboard from Adafruit for use with this kit. The kit does require some soldering, but isn't too difficult.
Once the components arrived, I began assembling cases and mounting the Raspberry Pis. Creating a holder for the cases is still a work in progress, but I have had success using a piece of cardboard cut to size and taped in place with green painters tape. I think the final case will be either wood or aluminum sheet.
The final components in the images below are the 10th Pi with it's prototyping board and USB Wifi (no ethernet cable). I also found and older DLink Wifi router in my stash of stuff which has been resurrected to serve for the 10th Pi. Configuring Wifi on the Pi was an adventure in itself, which is documented in the last link below.
Links: