Sculpture Class - Richard & Linda in Victoria (Fall 2008)
One Saturday in August 2008, Linda was reading the Victoria newspaper and noticed an advertisement for the Victoria College of Art and Design (VCAD). The ad mentioned a fall sculpture class which mentioned many techniques that sounded quite interesting. We discussed the class and decided to sign up. The class would occur in the Fall of 2008 in Victoria, which meant a weekly Saturday drive over the Malahat into downtown Victoria to take the class, but we were up for the challenge!
This page shows the work we created in the class, with some discussion of the techniques and challenges for each week.
The class will culminate in a "grad show" December 12-14 in Victoria.
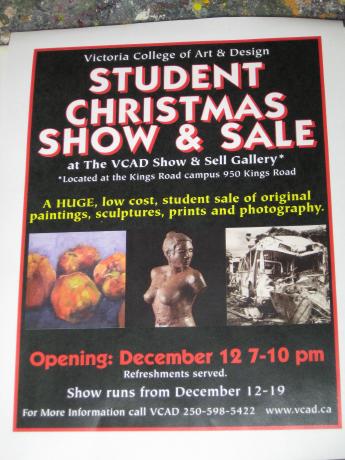
Show (December 12-19)
The final show takes place from December 12 - 19 in Victoria at the VCAD Show Gallery, located at the King's Road Campus, 950 Kings Road.
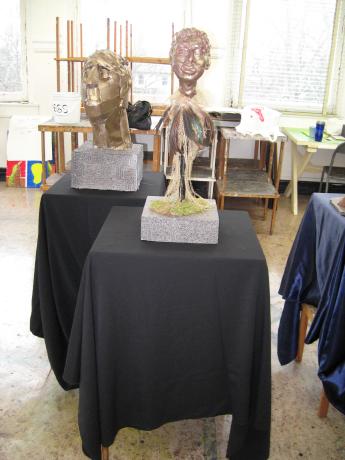
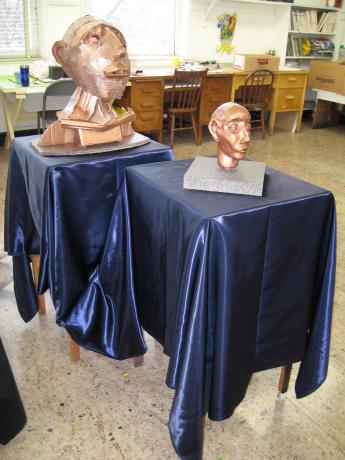
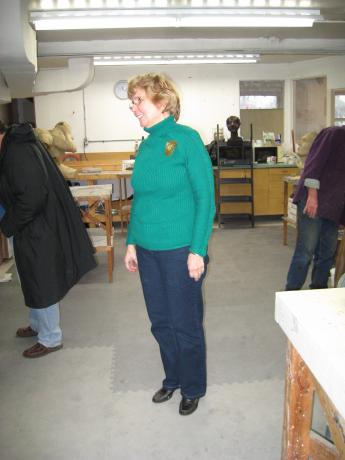
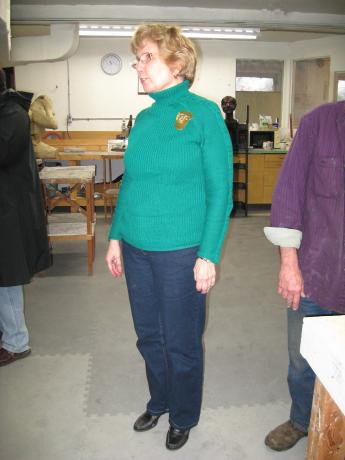
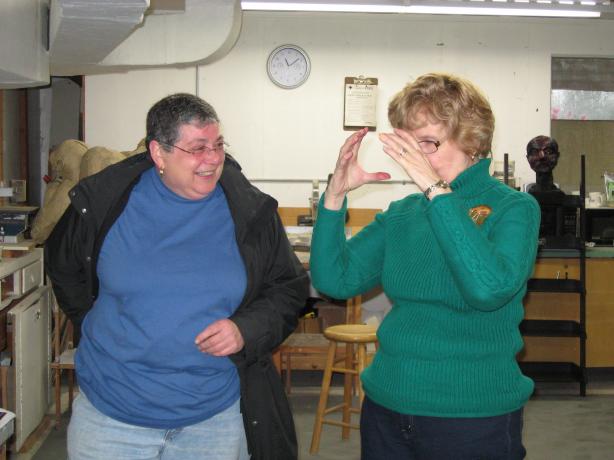
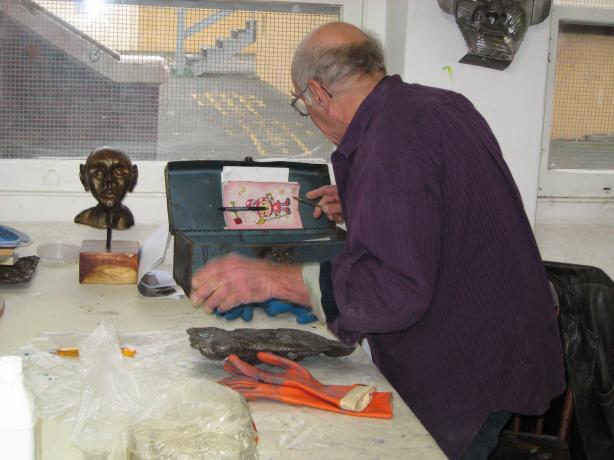
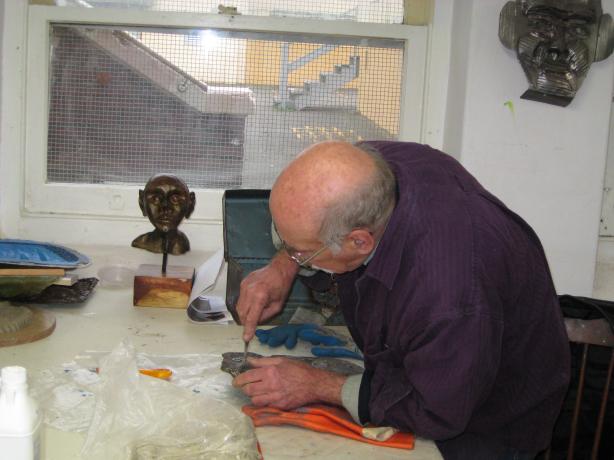
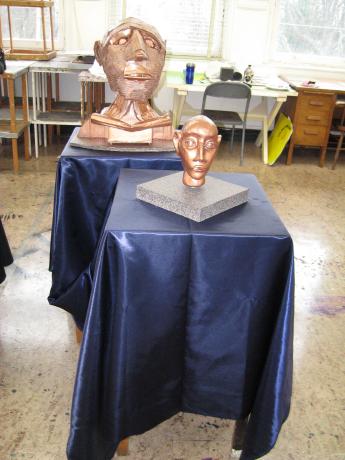
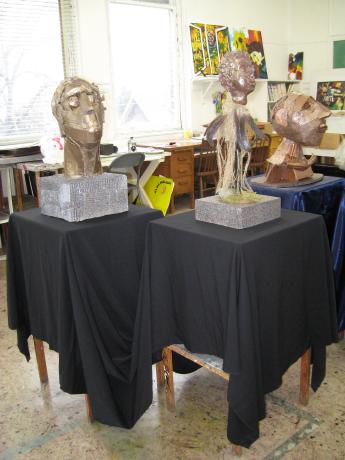
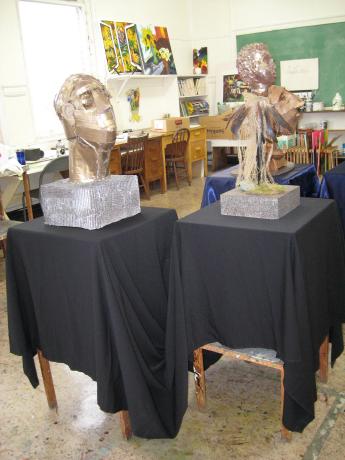
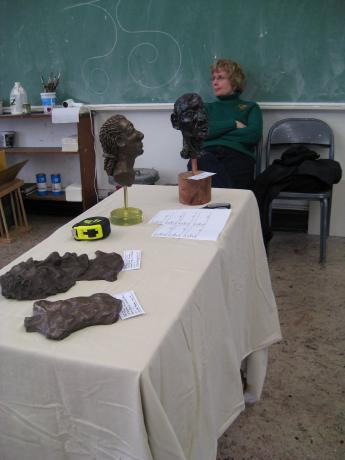
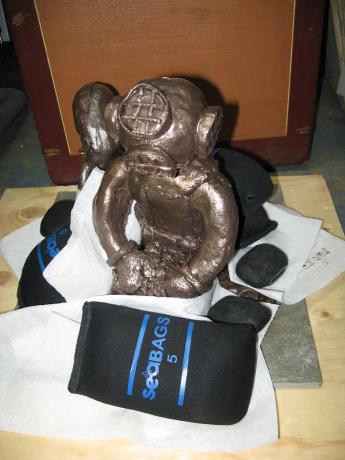
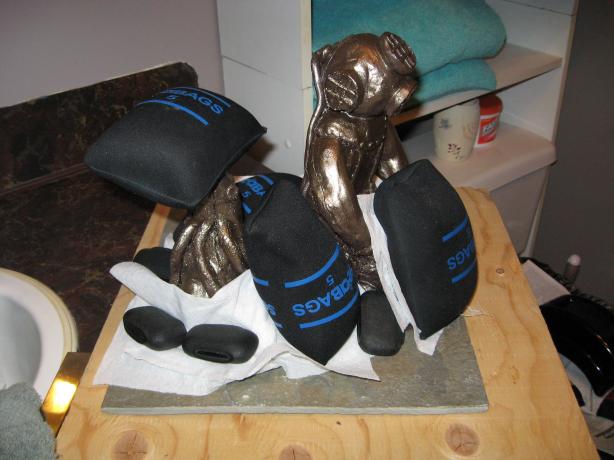
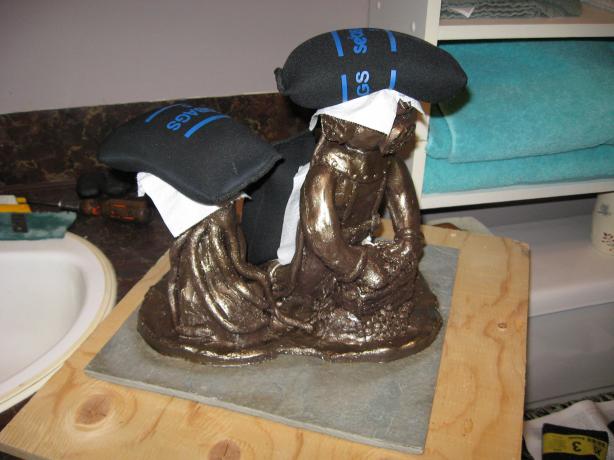
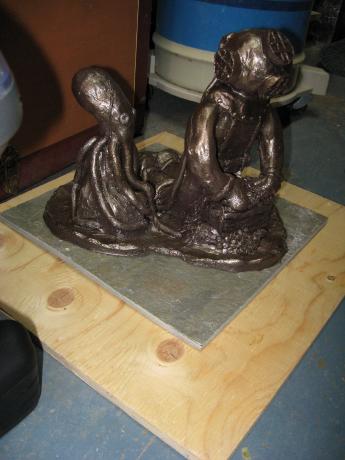
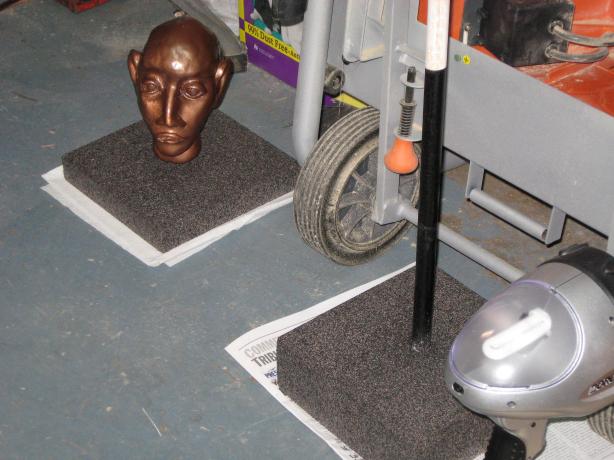
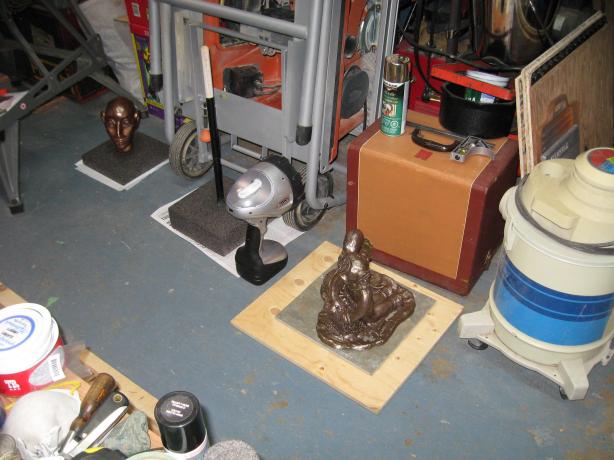
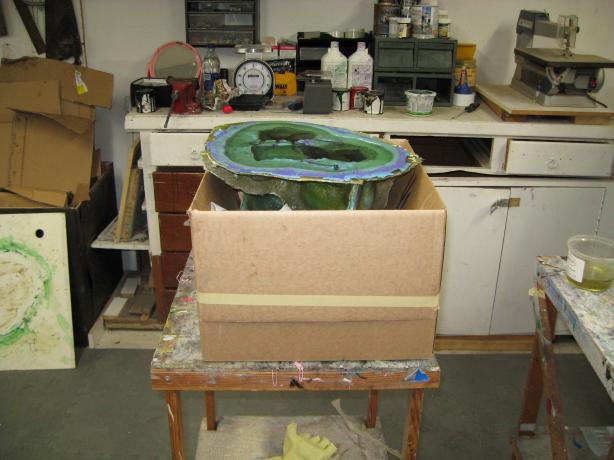
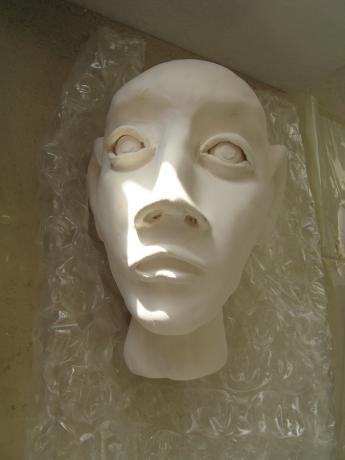
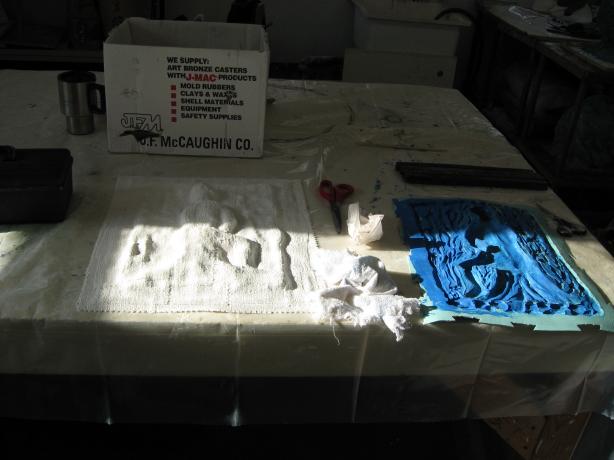
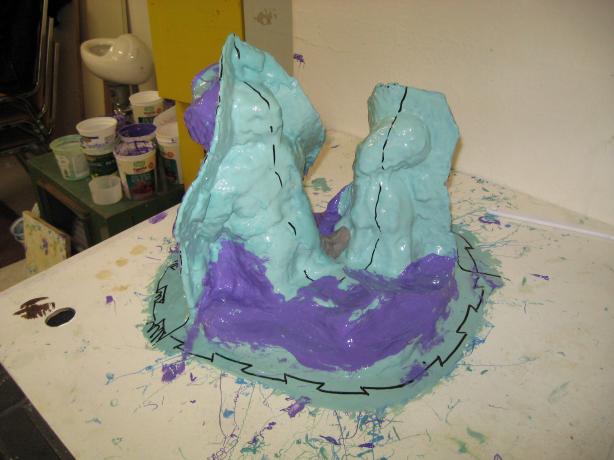
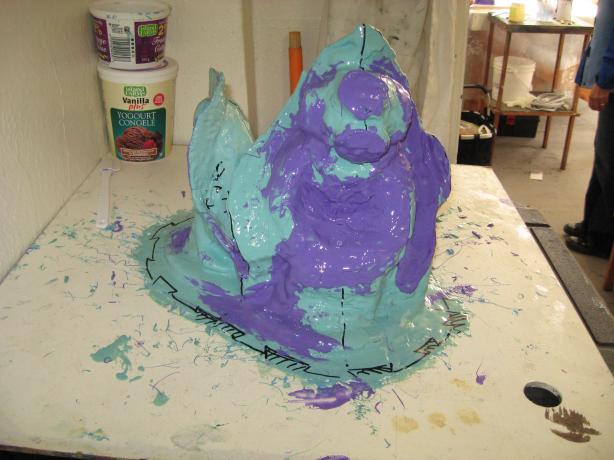
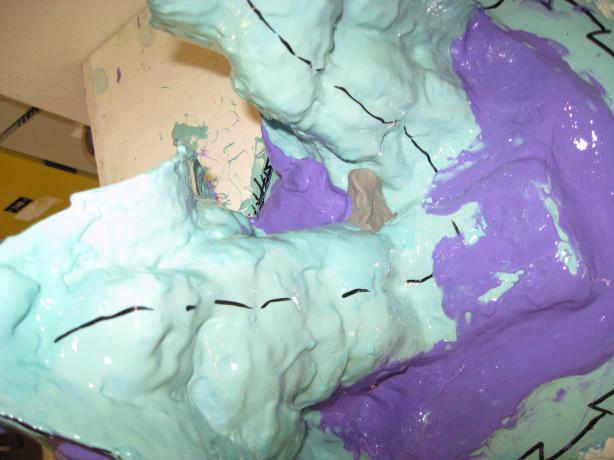
Linda and I cannot attend, but we each have two pieces in the show. Pictures are from the 'dress rehearsal' setup during the final class on December 6.
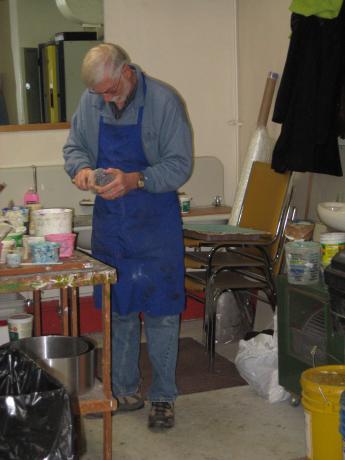
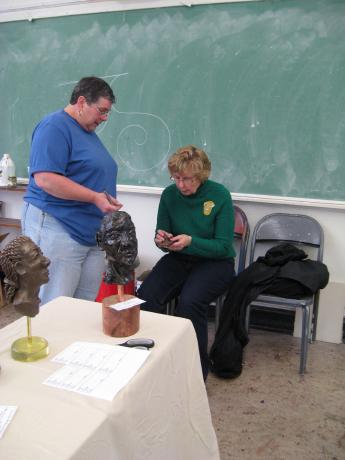
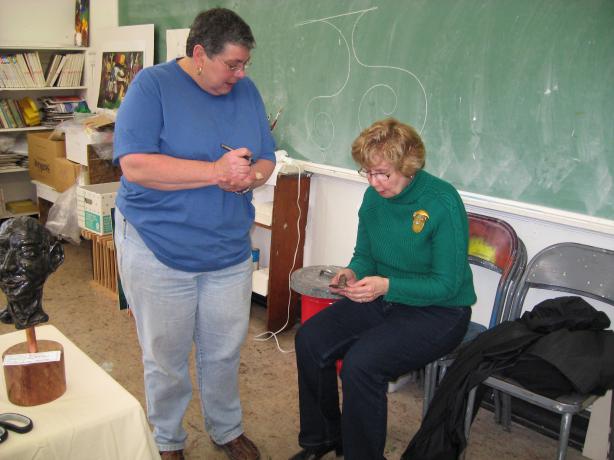
Week 12 (December 6)
Today was the last sculpture class - a day of final preparations for the show that runs from Dec 12-19 in Victoria.
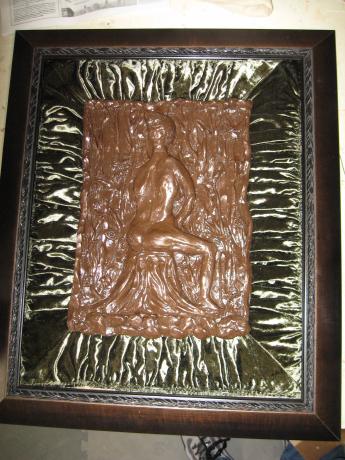
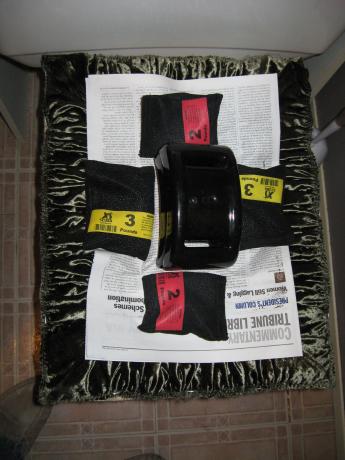
Linda and I drove down a bit later than usual, after a slight disaster in preparation. Many of the items glued with PL400 had cured or begun to cure during the night, but Linda's relief did not. While I was attaching the frame to the backing, the resin figure fell off the backing, glue still very soft. I managed to get the figure back on, but attaching the frame was out of the question, as was putting the piece in the show.
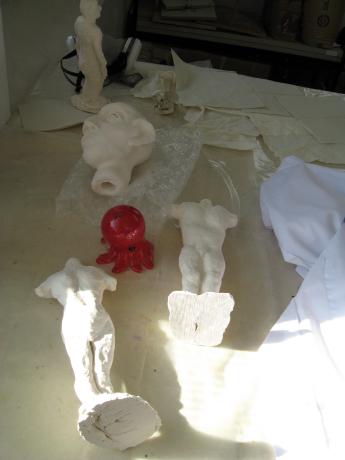
Still, we took all of our work except the 2-D cardboard faces down to Victoria for "show and tell", accompanied by a chocolate cake for coffee time. After everyone oohed and aahed all the work that everyone had done, we arranged our cardboard heads and clay heads on pedestals with draped cloth to show how they would be set up for the show.
All went to lunch, and then we packed up the remaining artwork (Linda's figure, my diver and fish), said our goodbyes and wished everyone well, and headed back home.
Best wishes to all in the class for the upcoming show, and Happy Christmas and Merry New Year!


Friday (December 5)
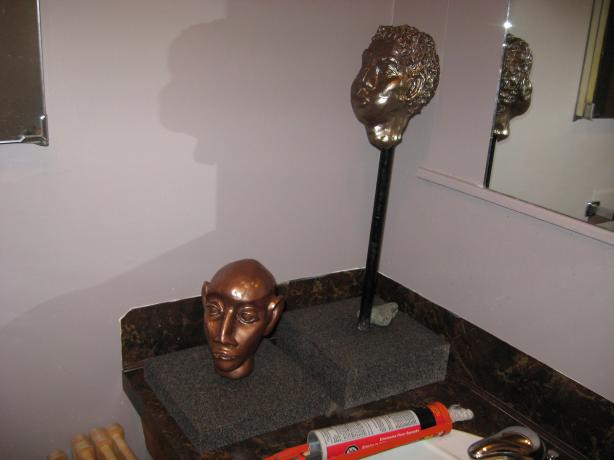
Today was "final prep" day, so I began by gluing the heads on the base rods using PL400 adhesive. Then I glued the rock on the base of Linda's head. Then I glued the diver sculpture to the slate tile, again using PL400. The glue can take from 1-24 hours to set, and the thicker amound of glue seems to take longer in the 15C garage (certainly more than 1 hour).
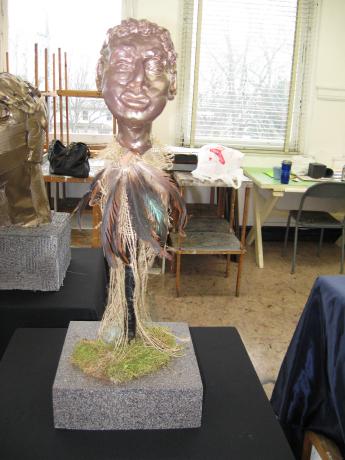
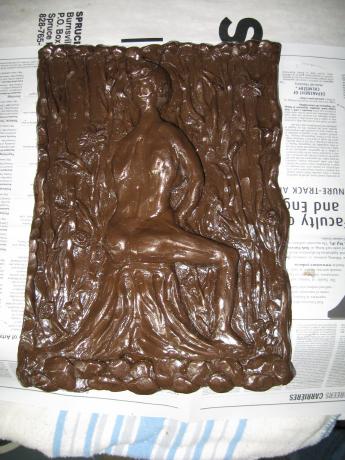
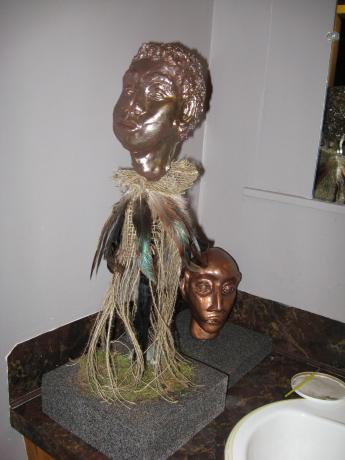
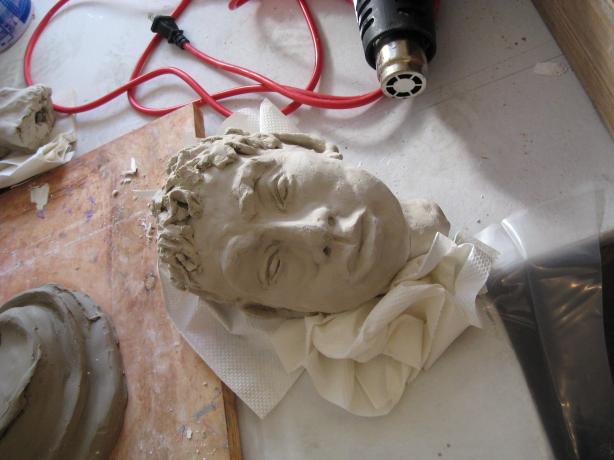
I gave Linda's figure another good buffing with steel wool, then washed and dried it. I finished it off with a coat of shellac to give it a nice glossy finish.
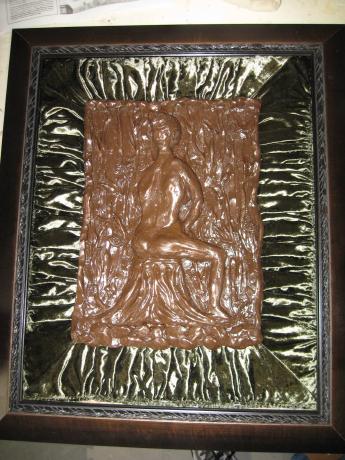
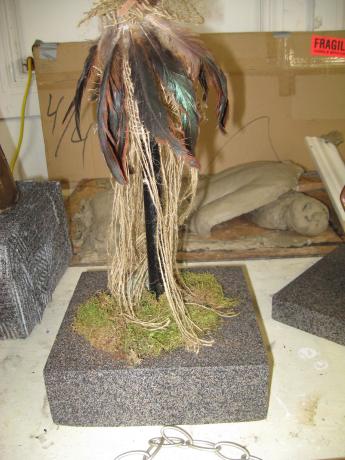
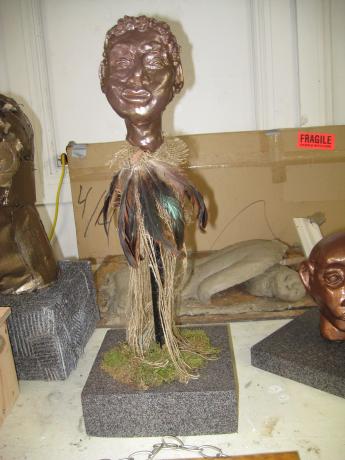
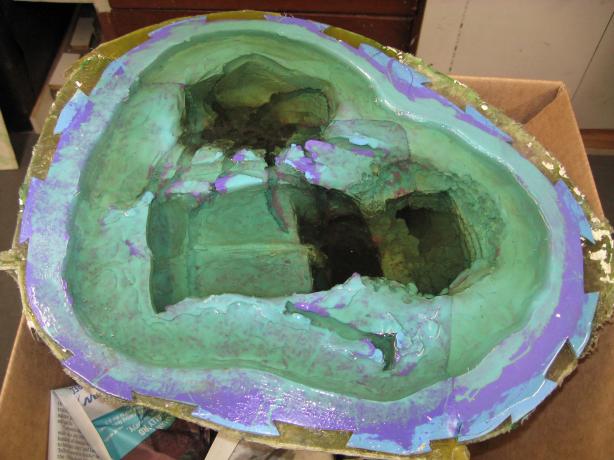
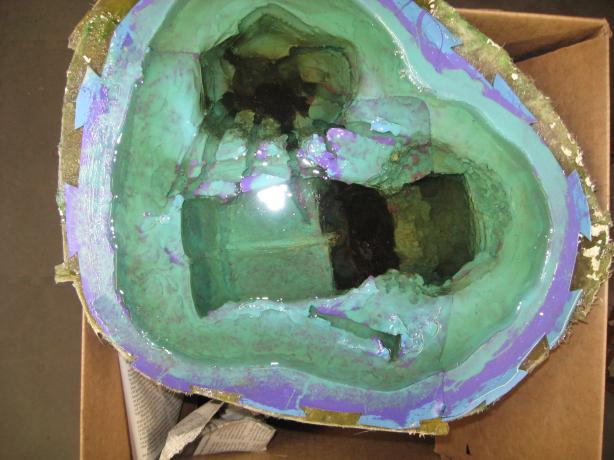
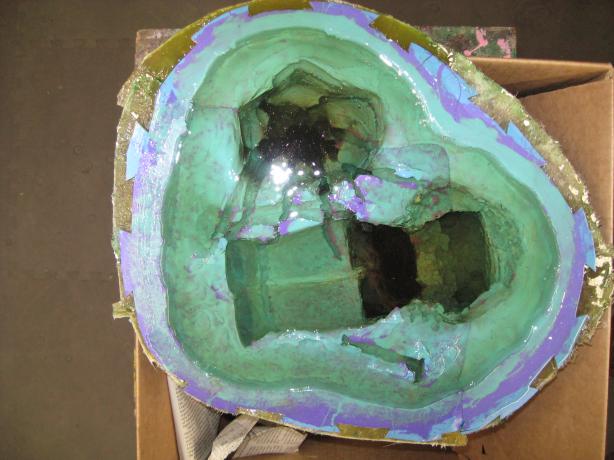
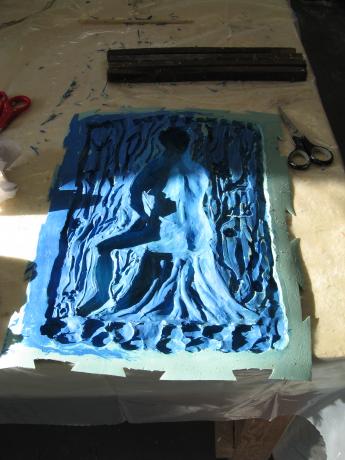
Linda finished her fabric backing for the figure frame, and glued it in place using spray-on adhesive. I added staples to the edges to hold the bond firmly. Then we glued the figure to the frame using PL400, and placed weights on the figure to hold it in place while things set.
I attached a chain to the fish mounting board to give a rustic final look to the piece, and attached hanging hooks to the frame for Linda's figure. The hanging wire for Linda's frame will come after the figure's glue has dried thoroughly.
Mid-Week (December 3 & 4)
Week 12 is the day to turn in all our work for the final show, so Linda and I had to have everything completed before Saturday.
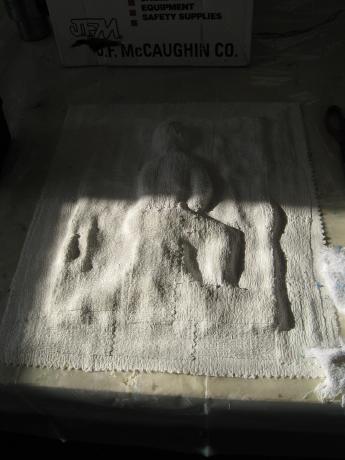
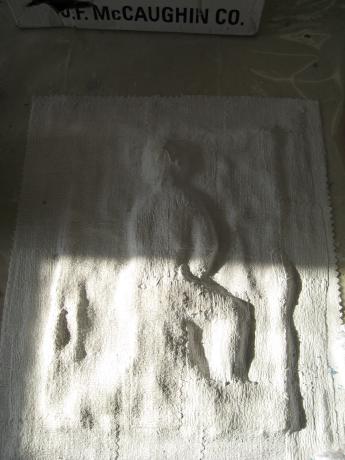
Linda wanted to place her relief figure in a frame, surrounded by some cloth, so she went shopping for a frame, a wood backing, and the cloth. A nice velvet was chosen, and Linda set to work designing and creating the fabric background.
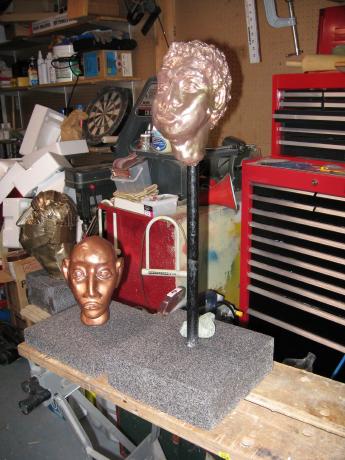
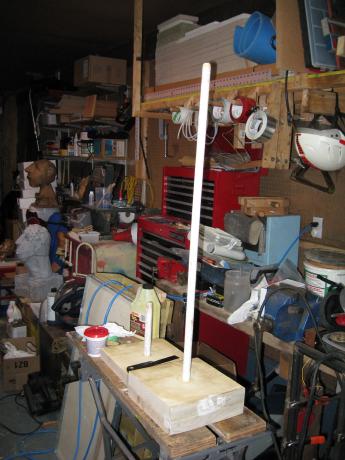
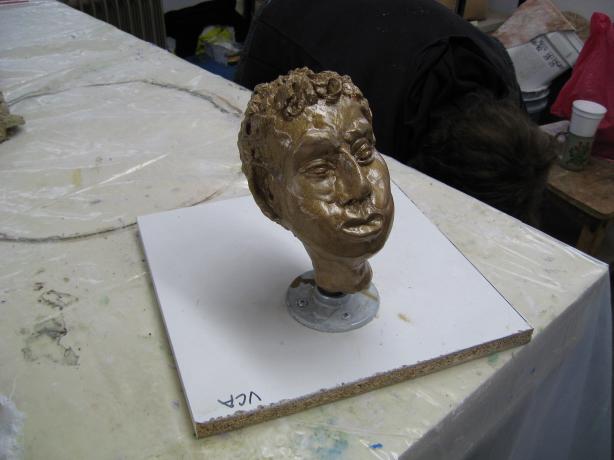
We had purchased various tins of spraypaint some time before, so I set to work cutting a 2x10 plank into 9" squares for the clay head bases. Linda wanted two boards glued together with a 14" rod to hold the head, while I wanted a single board with a 6" rod. You can see these both in process and completed in the photos. Glue and screws held Linda's two boards together, then a bit of drywall compound to fill voids and some sanding completed the base. I drilled 7/8" holes in both bases for the rod, a very old spare broomhandle I had saved. I then glued the rod into the hole with wood glue. Final finish for both was the "textured rock" spray paint
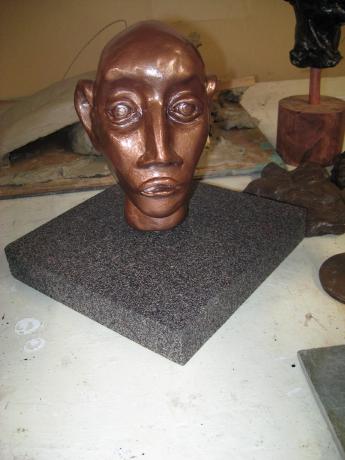
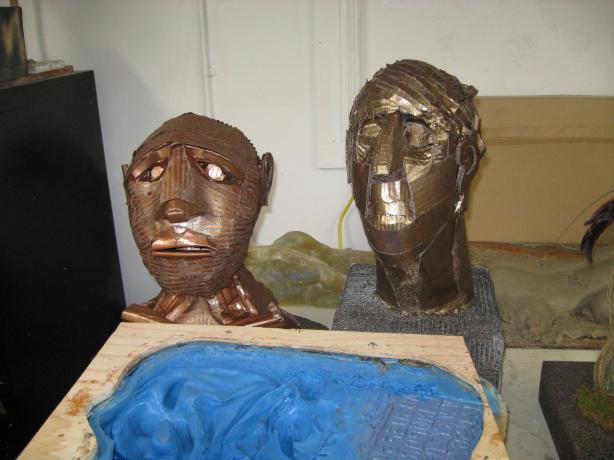
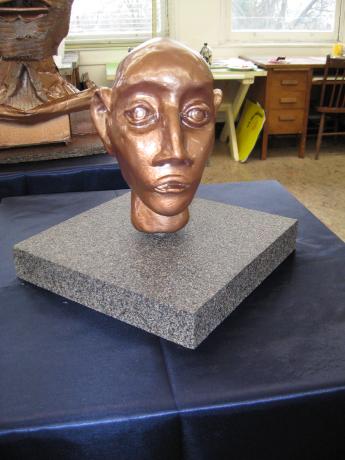
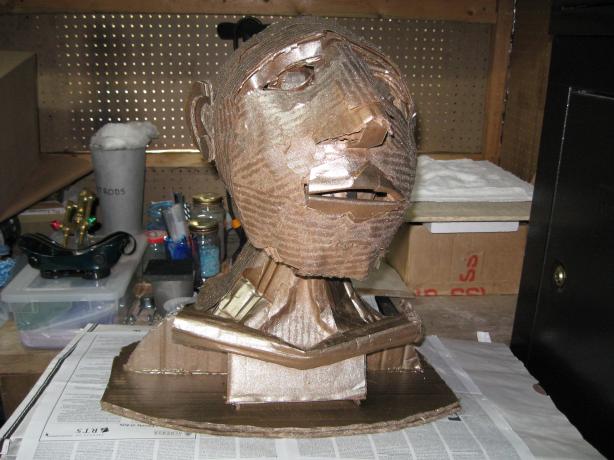
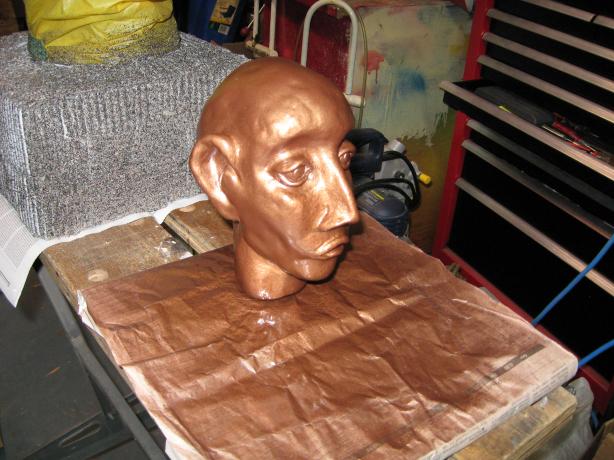
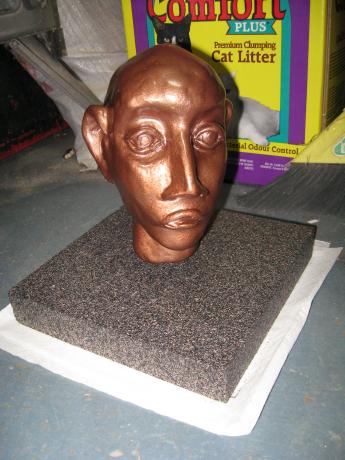
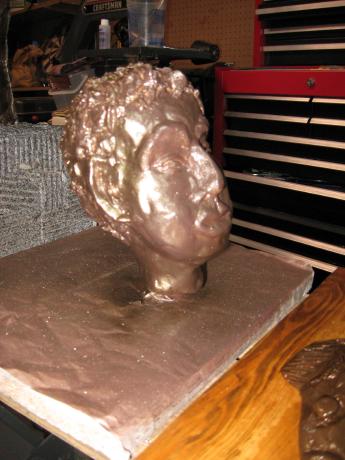
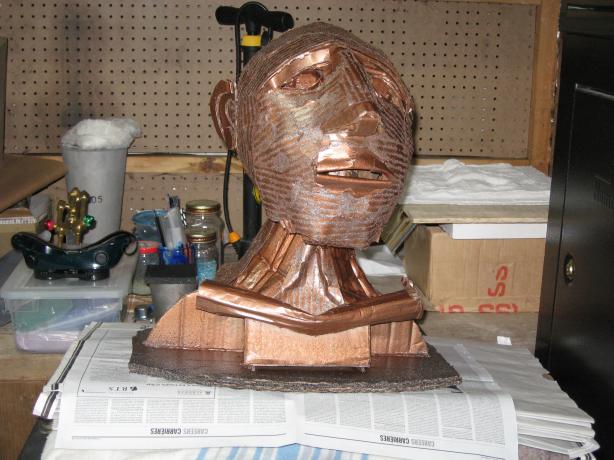
Linda's clay head was first sprayed gold, then brown, then misted with bronze. My clay head was first sprayed with brown, then 'hammered copper'.
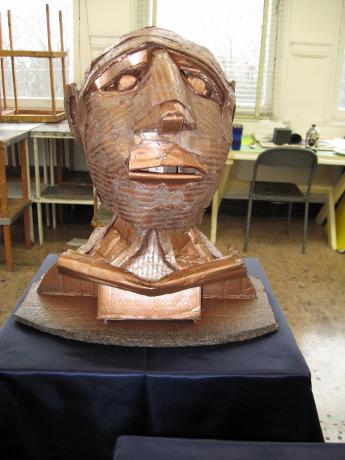
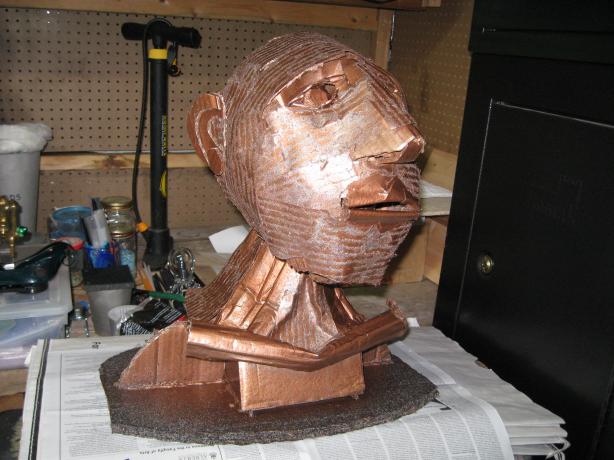
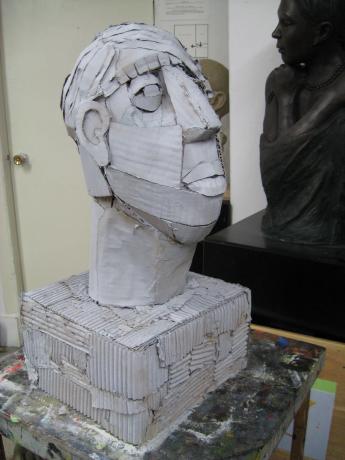
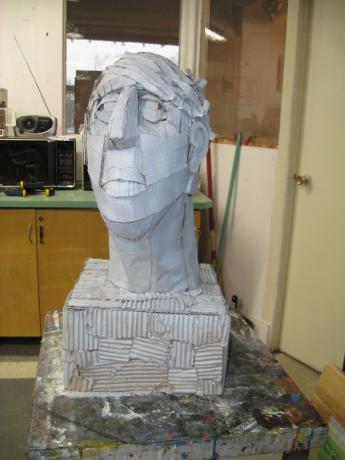
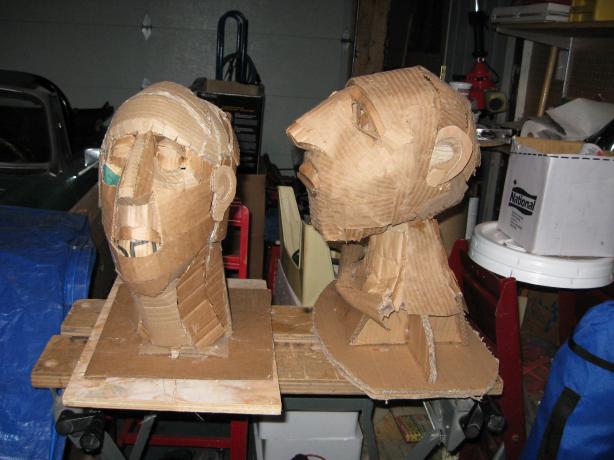
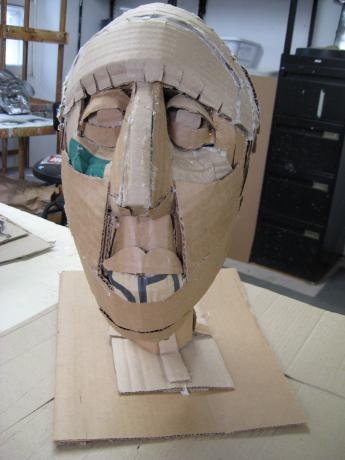
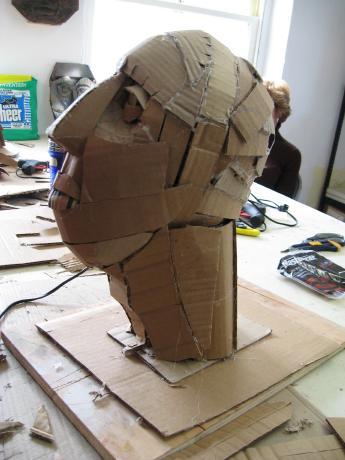
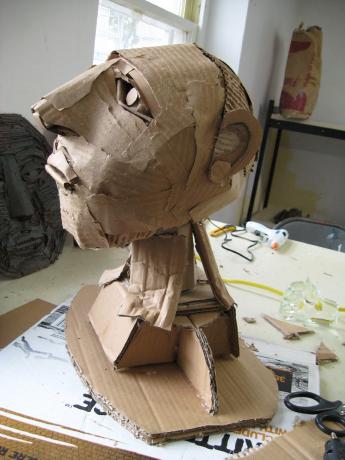
Linda's cardboard head was now mounted on it's box stand (last weekend's work) and had been primed with grey spraypaint. Today we first masked off the head, then sprayed the base with the "textured rock" paint. Once that was dry, we masked the base and sprayed the head first with brown, then misted it with bronze. My head was similarly sprayed first with brown, then misted with bronze, and finally the stone spray was used to highlight the base.
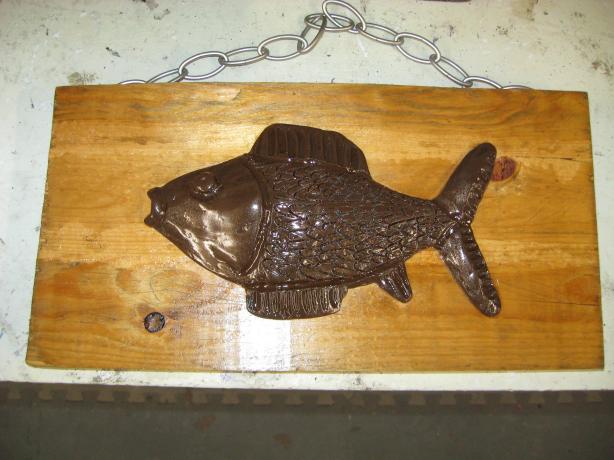
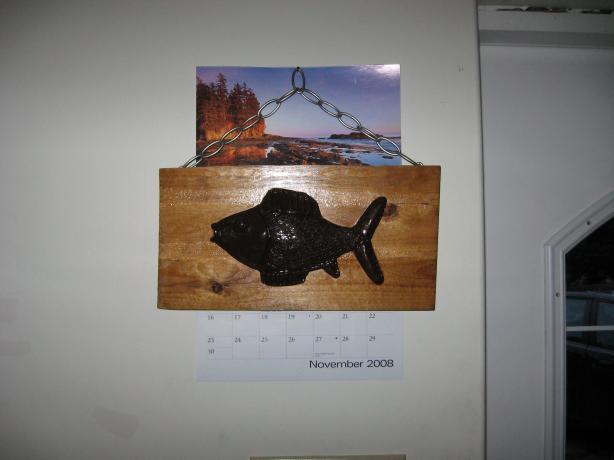
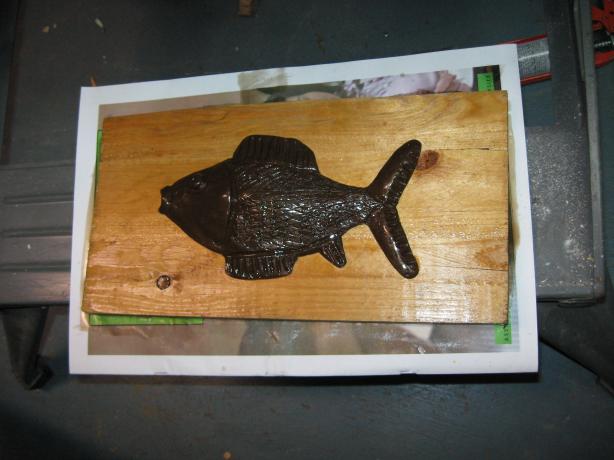
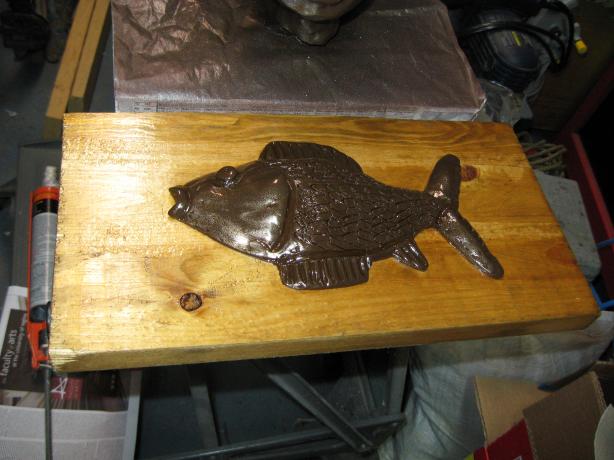
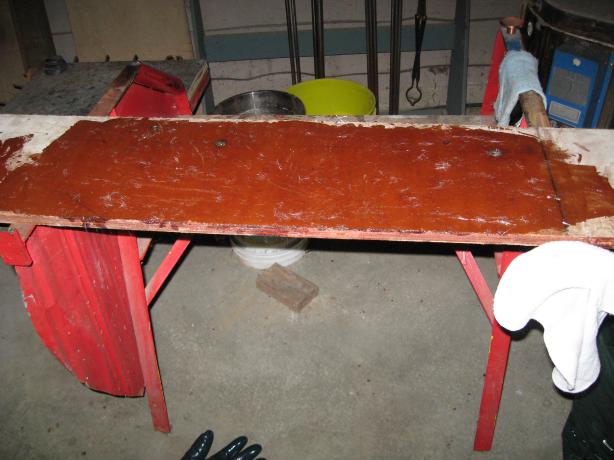
I decided my fish should be mounted on a plank, so I trimmed a 1x6 board to length and glued the fish onto it. I finished the piece with shellac on both the fish and the board, to very nice effect.
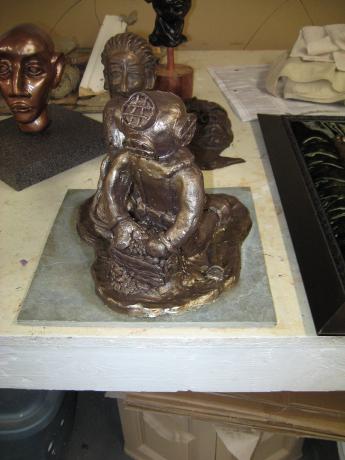
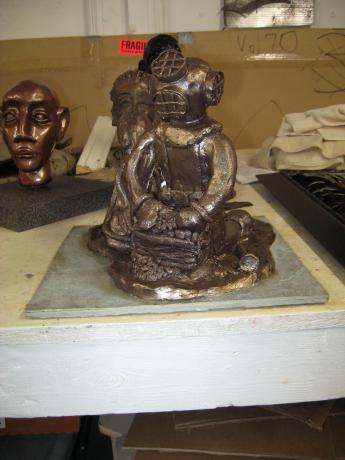
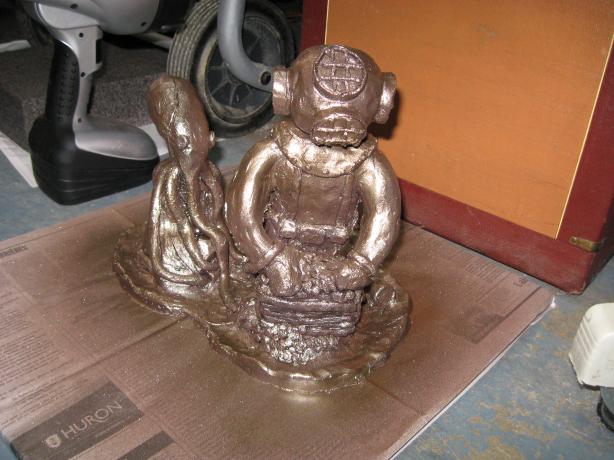
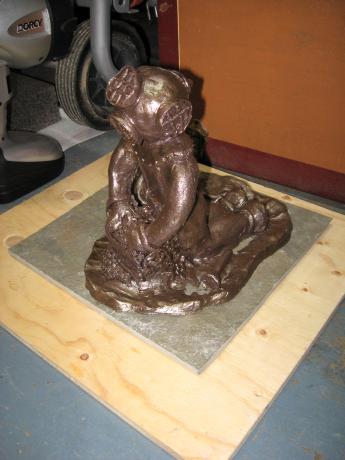
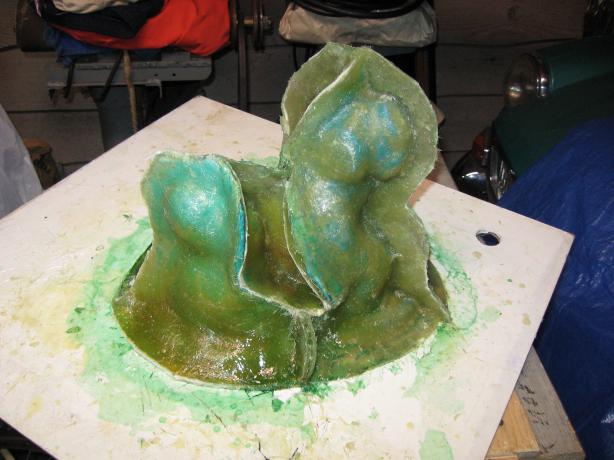
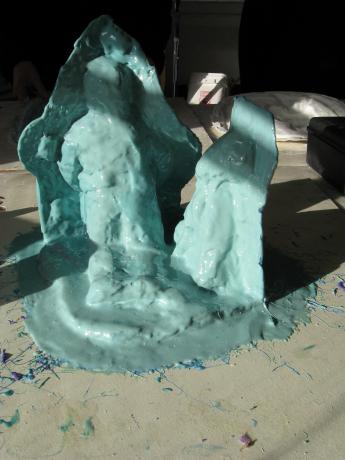
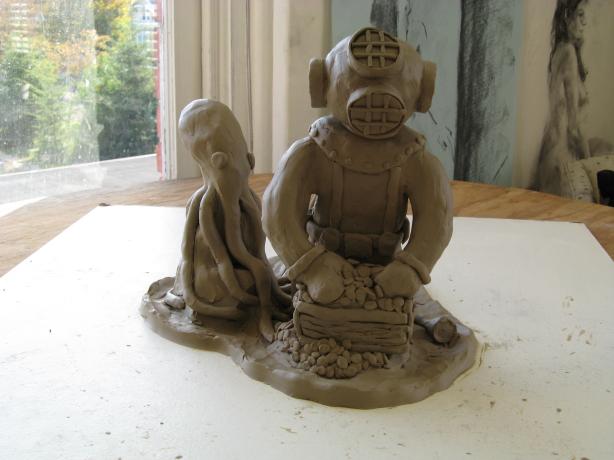
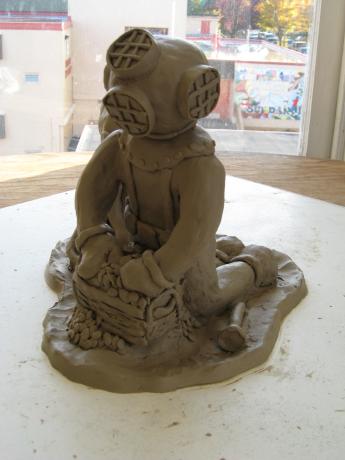
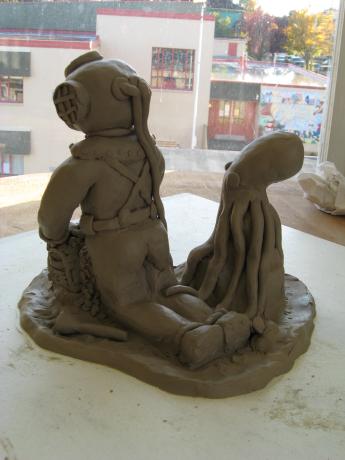
The diver casting was not very "show quality" in it's original pale transparent green clear-coat. It looked more like a Jello-mold than anything else, and the details were lost in the transparency. I decided to give it the same treatment as other work - first a coat of brown spray paint followed by a misting of bronze spray paint. This really perked up the sculpture. To finish it off, I will mount it onto a 12x12" slate tile.


Week 11 (November 29)
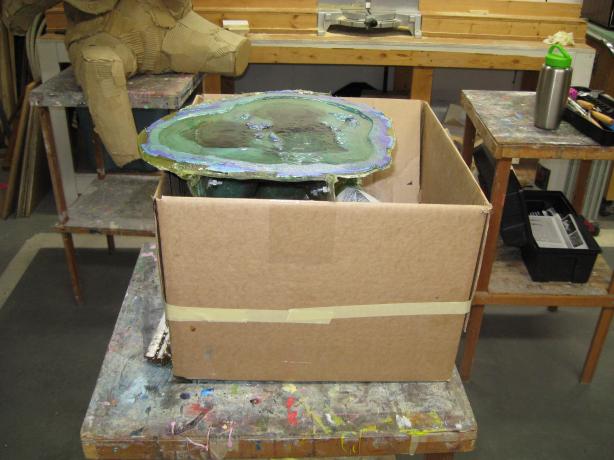
Thanks to the work I did during the week, I was able to return to the class this week with a completed mold, ready to prepare and make a casting of my diver. Linda's plan was to add a pedestal to her cardboard head and then finish as much as possible, in preparation for final painting this week.
Linda began by removing the wooden board that I had glued on to the base of her head for support, then trimmed the base cardboard and glued it to the box we had brought. Then she spent the day adding ears, hair and trimmings to deck out the base.
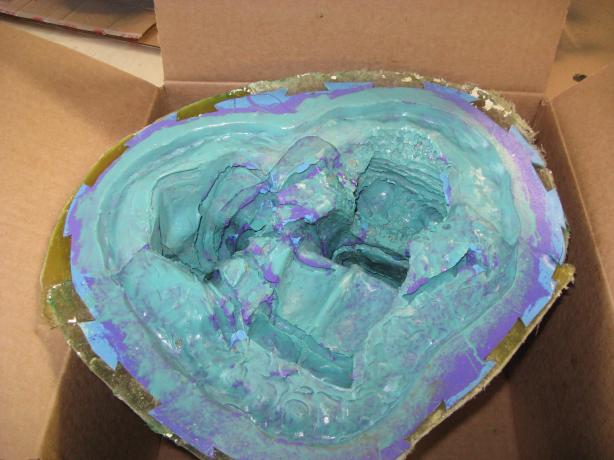
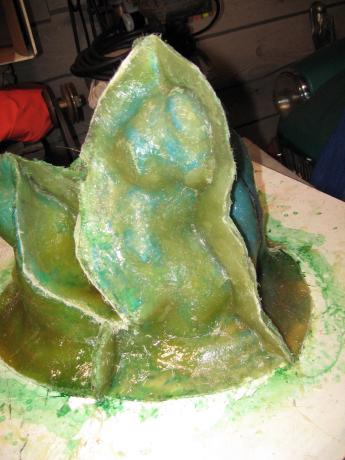
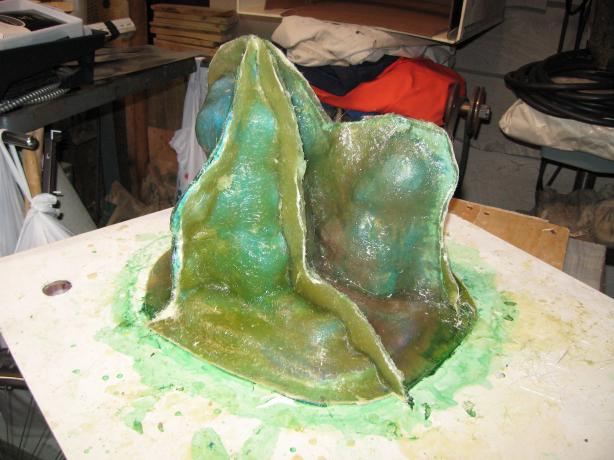
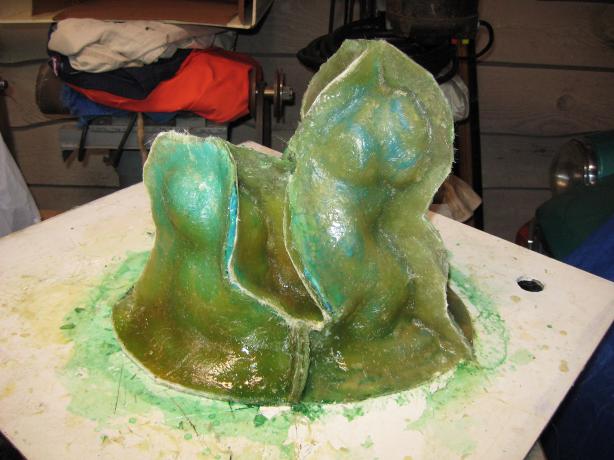
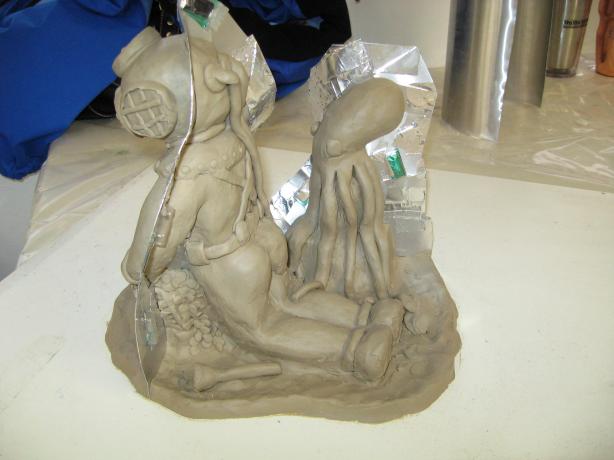
My day began with me drilling more holes in the edges of the mold to secure the mold together when casting. I had drilled holes in the glas-to-glas joins, but was unsure of what to do where the rubber division had been created. Turns out just drilling holes and adding the nuts and bolts was all that was necessary. After that, I carefully peeled off the fibreglas mother mold sections, using a large flat screwdriver and a hammer (gently!). This turned out to be quite easy, as the mold release had done it's job well. Once the fibreglas sections were removed, I carefully peeled the rubber mold away from the original clay sculpture. The only difficulty here was the gum-wrapper keys and the place where I'd built up a large (2") rubber dam between diver and octopus. Still, it wasn't too difficult. After the rubber was removed, I used a clay pick to remove any clay bits remaining in various nooks and crannies of the rubber mold. Then I took all the mold parts upstairs and washed them thoroughly in warm water to remove the outer mold release.
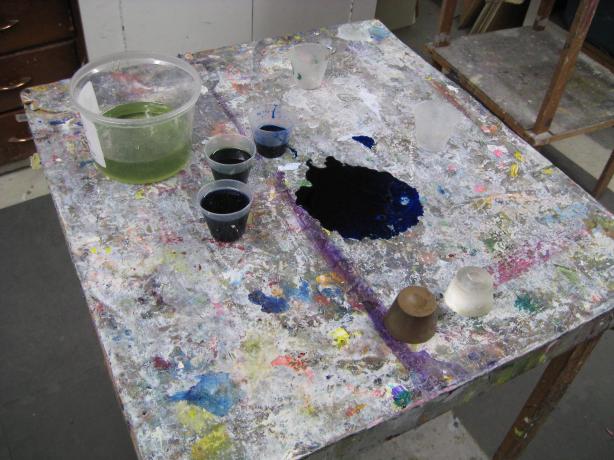
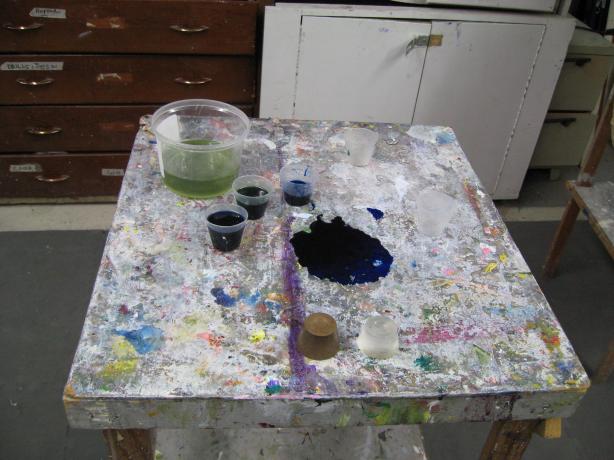
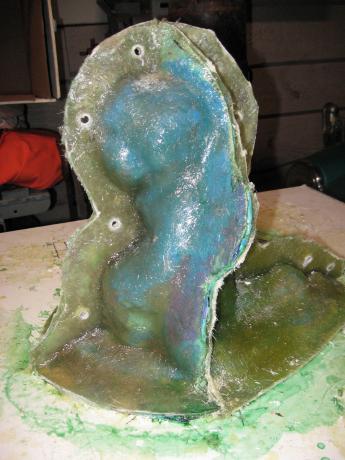
I brought a box to place the mold for casting, so after washing I sprayed the inside of the rubber mold with mold release, then reassembled the mold and the mother mold sections, bolting everything together - first loosely, then finger tight, then 1/4 turn more. Then it was time to prepare the resin. We agreed to cast the figure using clear fibreglas casting resin, but we weren't sure of how to color the figure. The options were clear, bronze powder, grey, tan, brown, or perhaps one of the colors used in the 2-part rubber mold process. We decided to try some test samples, so using the little mixing cups, I prepared several samples and set them out to harden. I knew that I was not going to use pounds of bronze powder ($$$), so I tried "just a pinch" in the sample. It cured quickly, but looked like mud - and the bronze settled in the clear so there was a defined gradient. I didn't try the grey or tan or brown, but the clear sample set next. It was Ok, just not very inspiring. The "rubber color" samples were another matter. The first (a lot of blue) did not set before we left for the day. The sample with less blue and the one with less green were just starting to set by the end of the day. I elected to put one drop of green in my figure to give a transparent green.
Color decided, I then measured the crystal casting resin into a large mixing bucket. I used 3 x 900 ml or 2700 ml resin, then added 2 x 30 or 60 ml of catalyst and one drop of color. The result was a nice pale transparent green. I then carefully poured the resin into the mold, making sure no bubbles were trapped. Then it was time to have a tea break and wait for the resin to begin setting up.
By this time, it was apparent the heavy dose of color in the test samples was interfering with the setting time, so we were all a bit worried about my casting. "Worst case, dump it out, then wash everything with acetone. Should take only an hour or so...". In the end, the small amount of color did not increase setting time by much. Near the end of the day the resin began to set. It was then we noticed how incredibly HOT some of the samples got while setting. The bronze was very hot, but the pale green (excess) was too hot to touch! Noticing the heat starting to come from my figure, we decided to put the casting outside in the cool. As it was now set enough to move, I place it in the truck for the ride home.
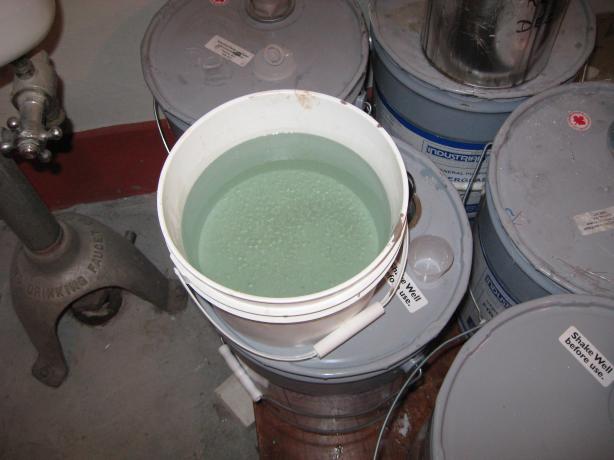
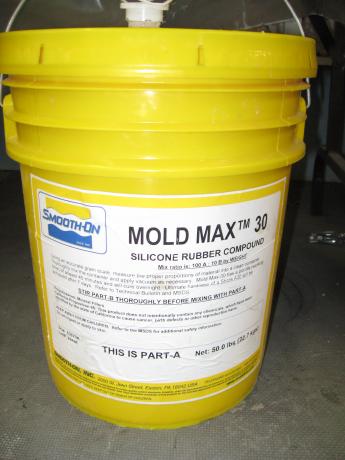
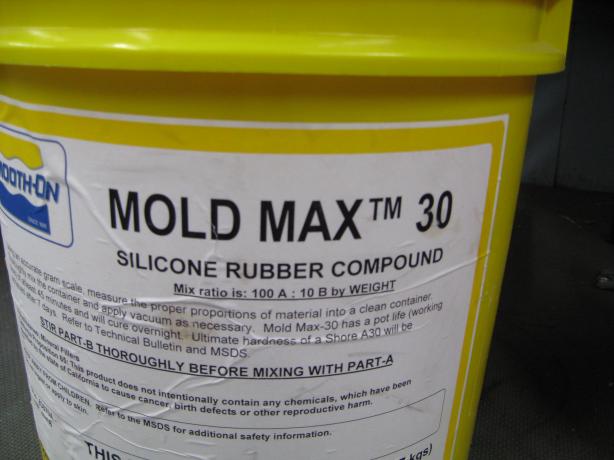
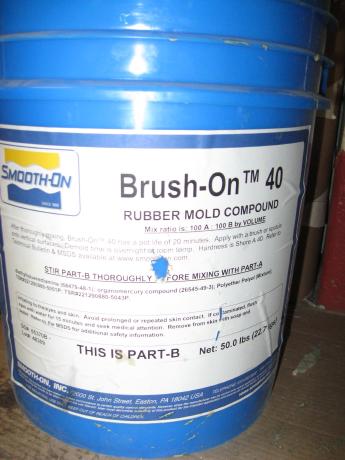
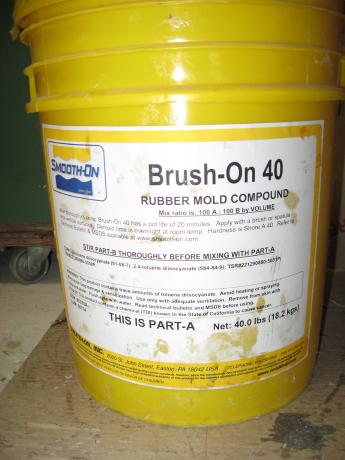
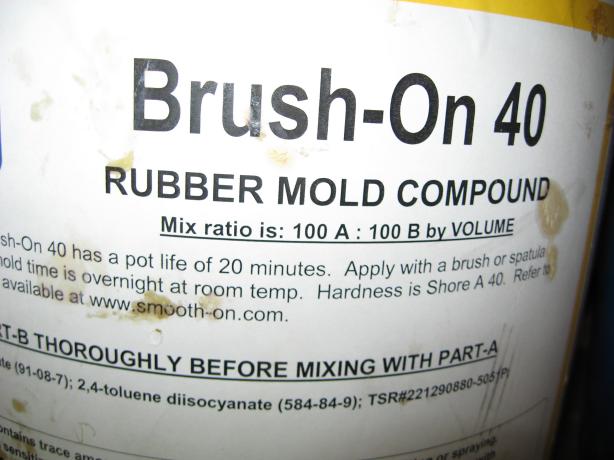
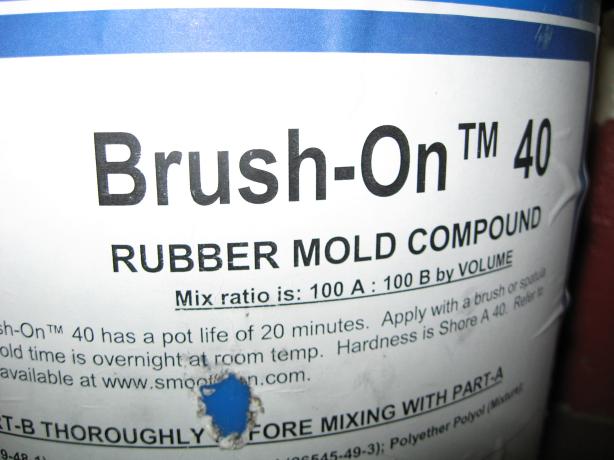
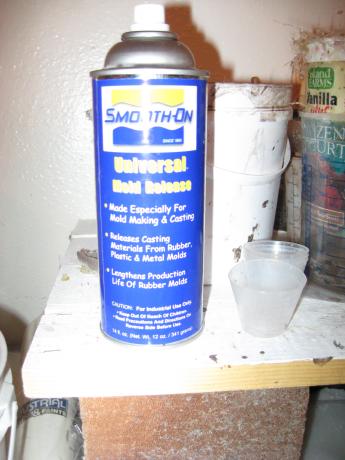
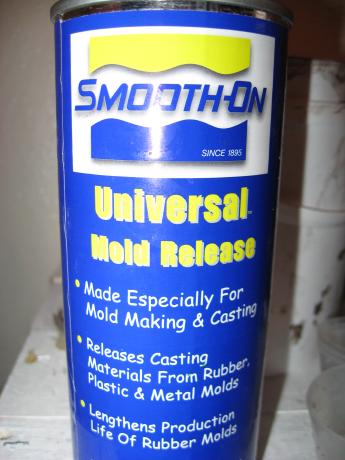
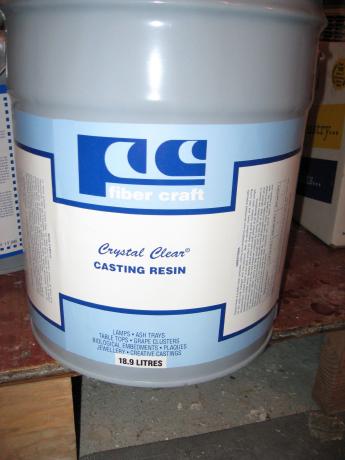
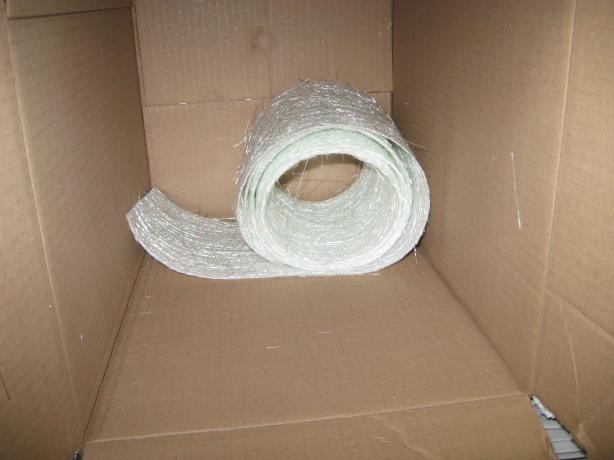
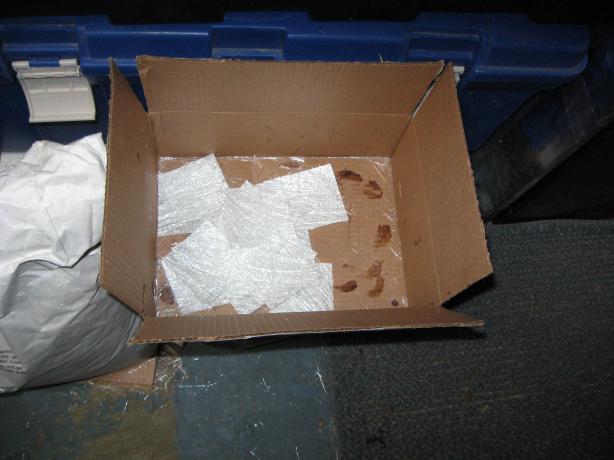
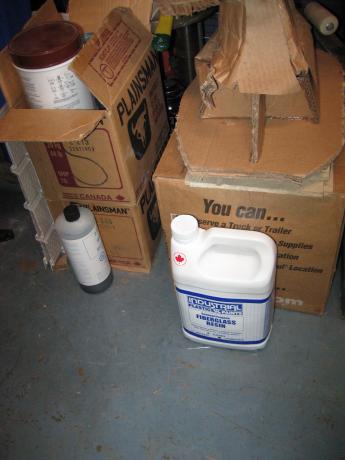
I've included some pictures of the supplies we used, including the 2-part rubber molding compound and the spray mold release
Linda's work
Richard - crystal resin color tests
Richard - making the casting
Unmolding the casting
 112908 01.jpg)
 112908 02.jpg)
 112908 03.jpg)
 112908 04.jpg)
 112908 05.jpg)
 112908 06.jpg)
 112908 07.jpg)
 112908 08.jpg)
 112908 09.jpg)
Supplies
Mid-Week (November 23-28)
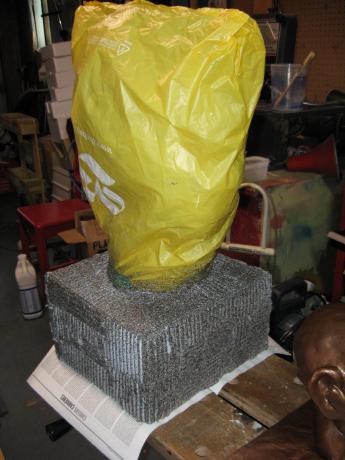
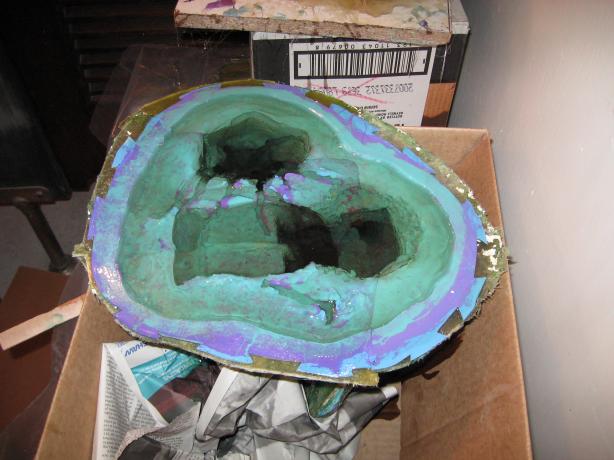
With class time running out (only 2 weeks left!), the only way I could possibly complete my sculpture was to finish the mother mold at home. After a quick trip to Industrial Plastics in Nanaimo and $90.00 later, I had the materials I needed - 4L of fibreglas resin (unwaxed), catalyst, 10 meters of roving (8" roll), mold release, brushes and measuring cups. I added another coat of mold release to the two segments that were ready to go from Saturday, then set up a work area in the garage and got to work. In no time, I had the two segments complete.
The fellow at Industrial Plastics drew my attention to the proper catalyst mixing guide, which called for about 1/2 what we were using in class. With this ratio, it took almost an hour (instead of 20 mins) for the resin to set up enough to trim, but all was well. The garage was 15C, which was well within the proper fibreglas guidelines (10C, 15C, 20C or 25C). After the resin was hard, I removed the clay dams and applied the mold release to the second last segment.
Due to the complexity of the model (and thus the rubber mold), the last section was a "plug" that filled a negative space. This would have to be covered last, and probably cut in two pieces in the final mother mold. In the mean time, the mold release on the second last segment was dry, so I created the fibreglas mother mold for that segment. After trimming and time to set, I applied mold release to the final segment, and then cast it. Due to it's shape, it was quite the challenge to create, as the fibreglas didn't want to mold to some of the surfaces easily. However, with persistence I was able to finish the last segment.
The final step during the week was to drill registration holes in the "glas to glas" flanges and install bolts and nuts to hold the mold together.
This saturday (Week 11), I will remove the mother mold, then unmold the clay figure. After cleaning up the rubber mold, I plan to cast the figure using casting plaster. I am choosing plaster as it's easy to mold, requires no special process, ventilation or room (unlike the gel coat fibreglas), and will be easy to clean up the figure using a knife or sandpaper. I plan to paint the plaster cast to look like bronze.
Tuesday - Thursday

Friday
Week 10 (November 22)
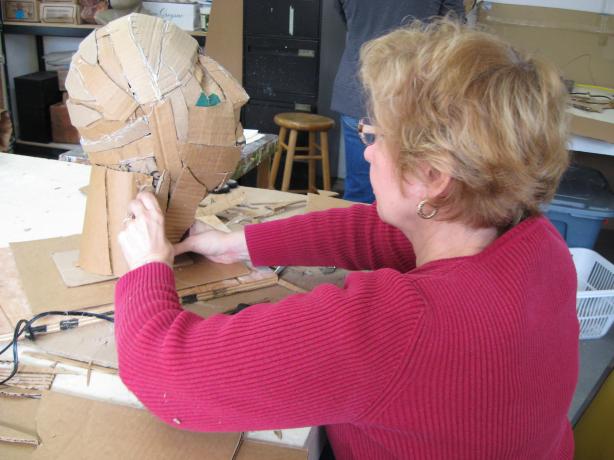
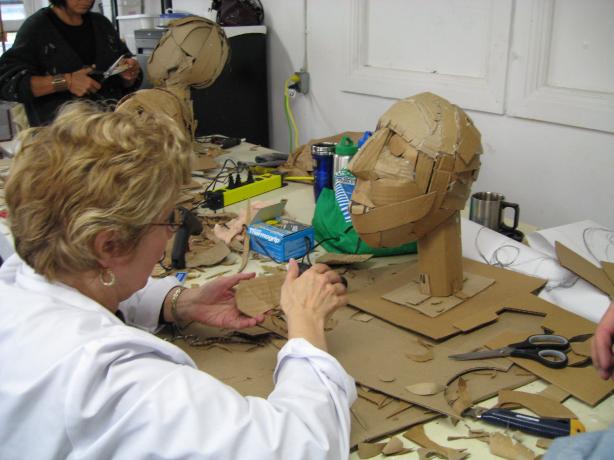
This week Linda worked on her cardboard head, finishing it up for the final show.
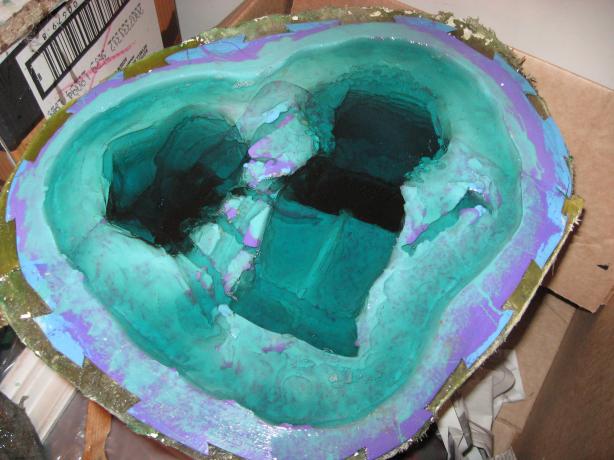
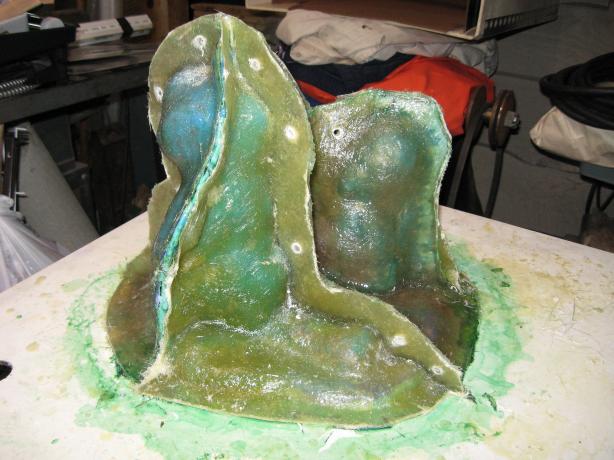
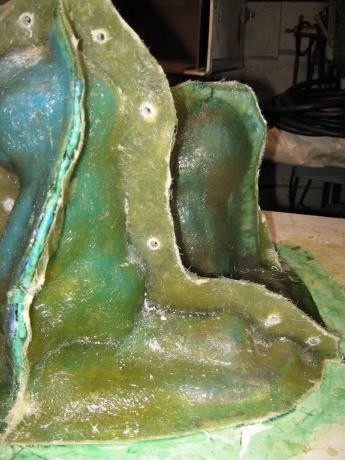
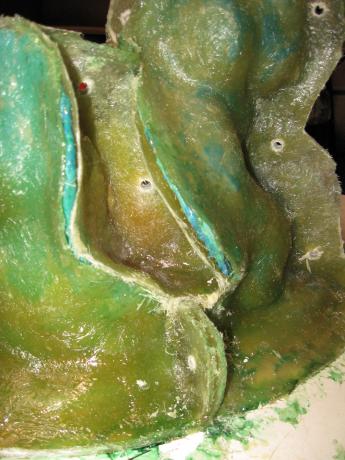
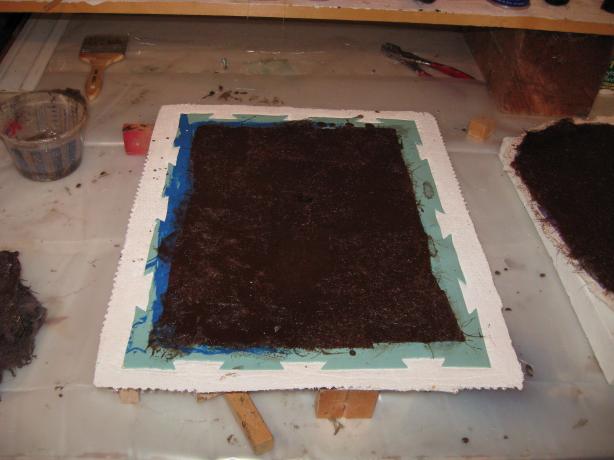
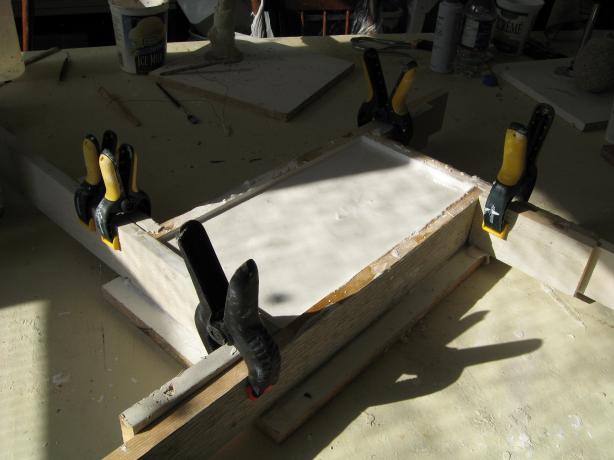
I had a full day ahead of me, as the rubber was now set and ready for the fibreglas mother mold. First we had to divide the piece into segments for the mother mold, then build clay "dams" to create flanges in the fibreglas segments so they could be matched and bolted together. Then I had to paint the segments with a mold release (3 coats) and let it dry. It was after lunch before I was ready to apply fibreglas to the first two segments.
The fibreglass process involved approx. 300 ml of resin and maybe 24 squares (3" x 3") of fibreglas mat (roving) cut from a bolt of material. The resin was applied to the squares, then the squares were dabbed into place on the rubber with a brush. The process was repeated until the rubber was covered with at least two layers of fibreglas. As the resin was setting and getting stiff, I used a knife to trim the excess from the edges to create a nice finish.
After the resin had set, I was ready to remove the clay dams, build new clay dams for the next two segments, and brush the mold release. This process took until 4pm. Time was getting very tight, so we had to head home with my mother mold incomplete.

Week 9 (November 15)
A wildly busy day today!
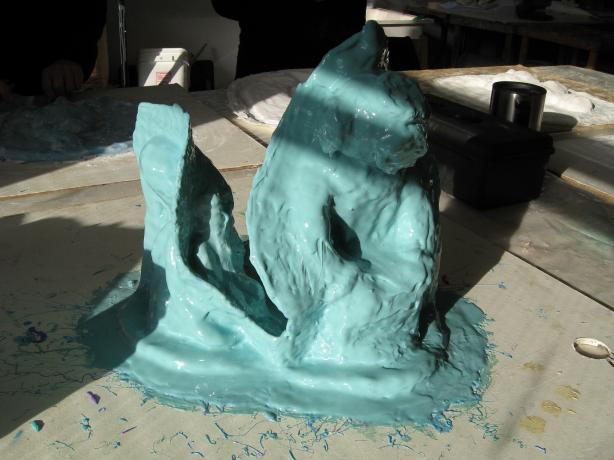
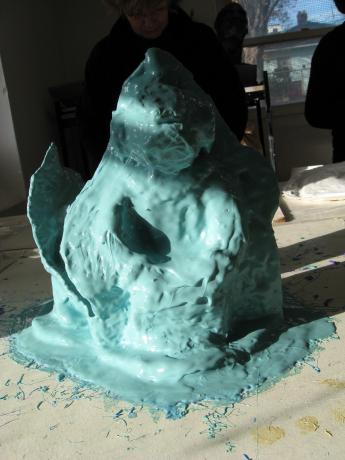
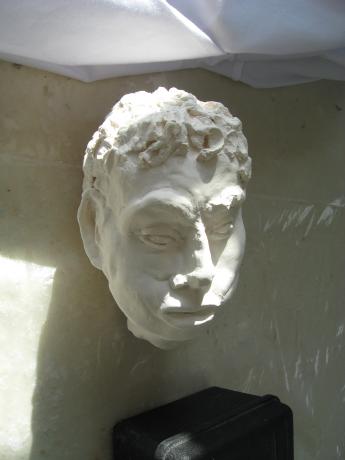
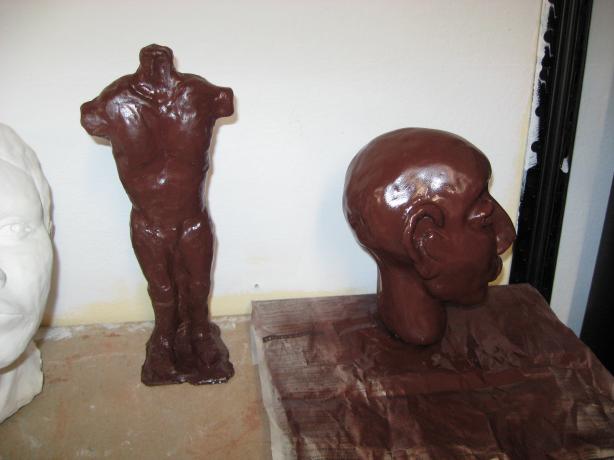
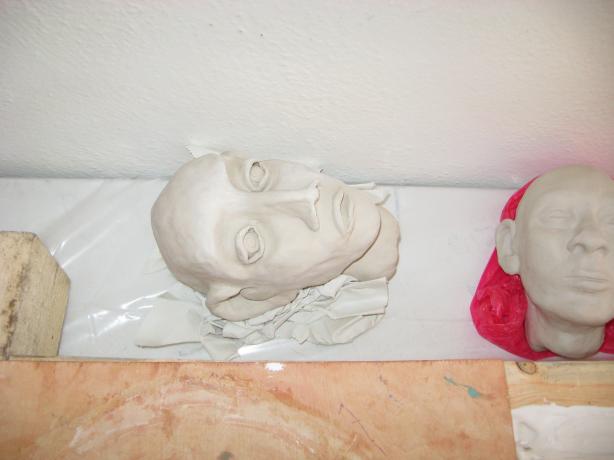
We were informed that the clay work had been fired the week before, and so rushed to remove our pieces from the boxes and newspaper like kids on Christmas morning. They were all pretty good, but would now need finishing. Many of us chose to paint the sculpture heads with spraypaint for speed as there was no time to glaze anything before classes would end. Linda painted hers gold, with the aim of adding other colors once the gold drys. I painted my clay head and homunculos a mohogany brown.
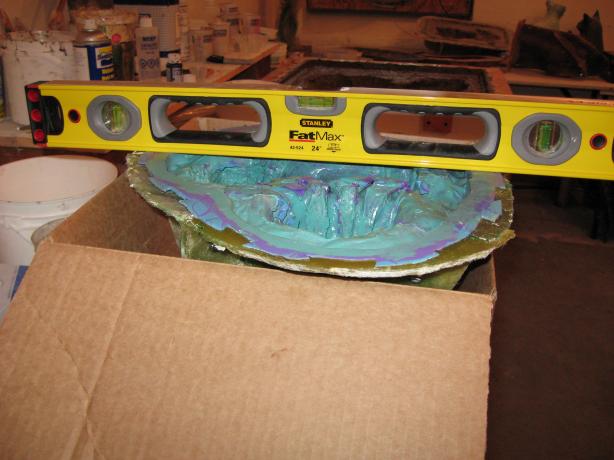
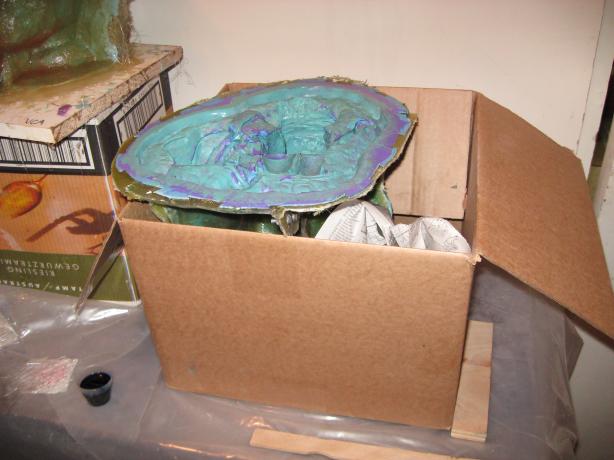
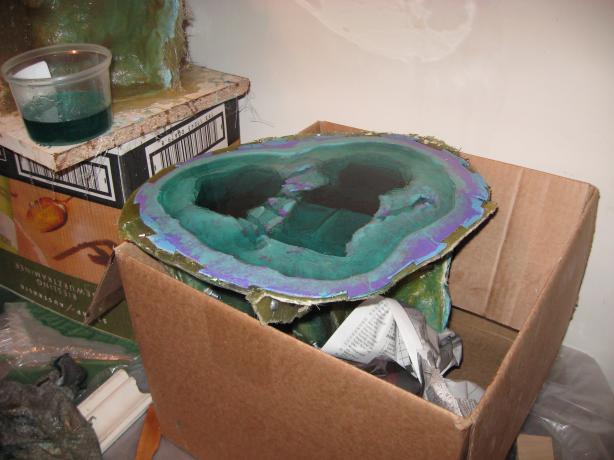
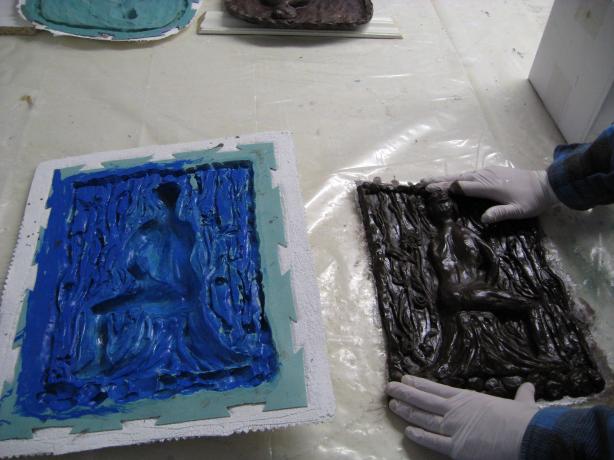
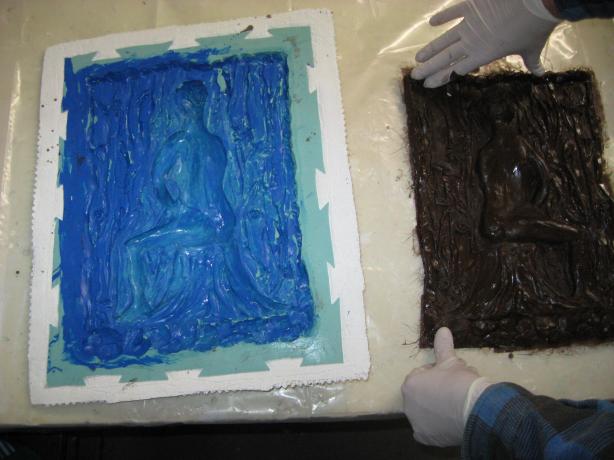
Before the painting, Linda unmolded her relief figure molds (both rubber mold and mother mold), and then I cleaned up her clay while Linda cleaned out the rubber mold, ready for casting. My fish was ready from the week prior, so we were also both ready to cast using fibreglass resin with bronze powder embedded in it. That would wait for after lunch.
My figure was not quite ready for the mother mold process. There were recesses in the rubber that would trap the fibreglass and make unmolding a nightmare. Rather than take a chance, I opted to spend the entire day adding more rubber "en mass" to fill all the large spaces. Once done, the fibreglass mother mold will still be done in multiple sections, to allow easy removal.
After lunch, we mixed up the fibreglass and poured our figures. Mine was just a single pour of material, while Linda's was a two-part pour. The first part was, like my fish, filling the mold with resing containing bronze powder. However, because of the thinness of the backing, a second layer of fibreglass resin and glass fibre mat was added to strengthen the finished casting.
As the pictures below show, a quite productive and busy day. (Oh yea, I brought one glass octopus for 'show and tell'.)

Week 8 (November 8)
This week was "mold prep" week. We had demos in laying plaster (bandage) on molds to create mother molds, laying fibreglas on molds to create mother molds, and other mold work. Most had to add another coat of rubber to their molds, then were able to begin creating the mother mold with figreglas or plaster.
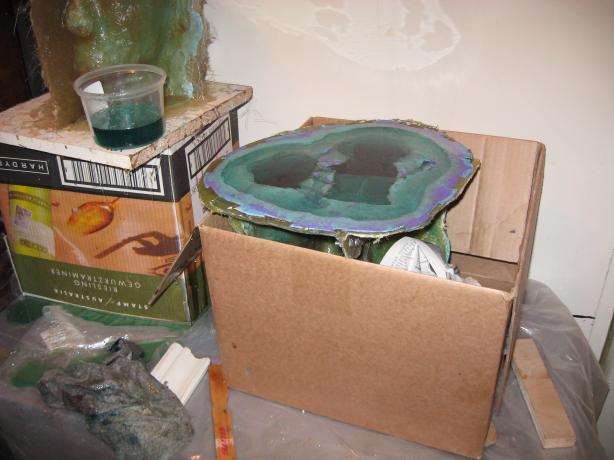
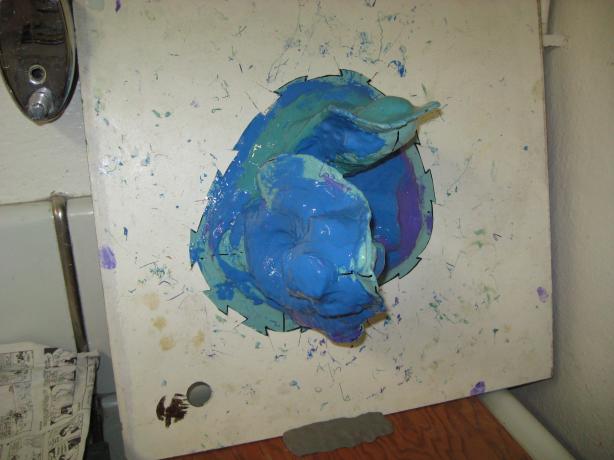
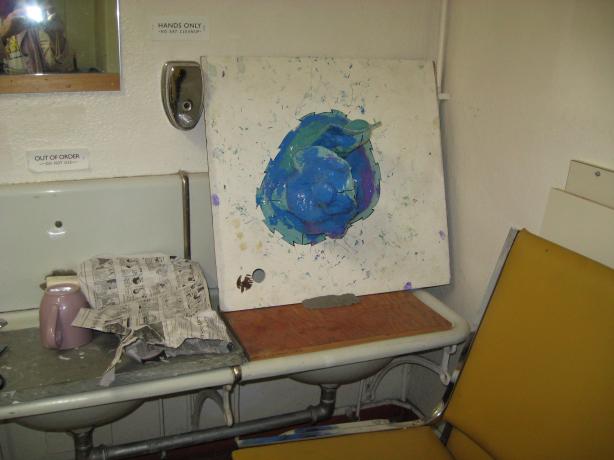
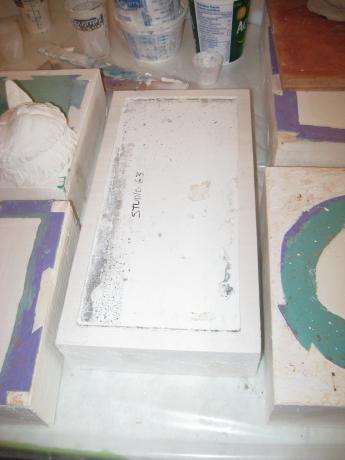
Linda's relief was in need of additional coats of rubber, and she finished that up in the morning. In the afternoon, Linda made the mother mold from plaster bandage.
My sculpture was more complex, and I had not begun making the rubber mold. So this week I started with the detail coat, then gradually added 3 more coats (4 total) during the course of the day. By the end of the day I was pretty much ready to begin work on a fibreglas mother mold next week. It will be complex - perhaps 4-6 sections in total.
I managed to forget my camera, so no pictures from this week.
Week 7 (November 1)
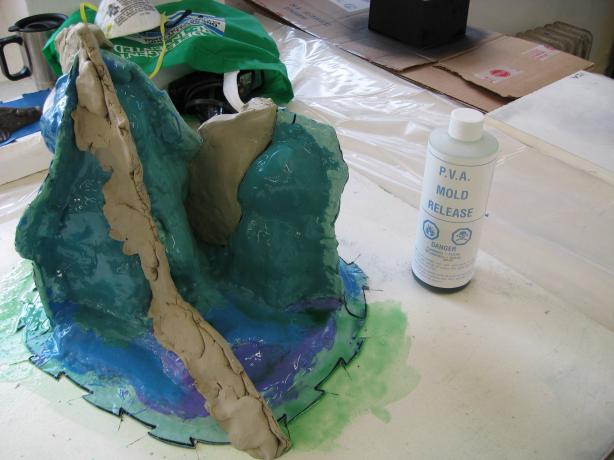
This week was a week to begin the process of turning our sculptures into molds for casting. We started with a refresher on how to mix and apply the 2-part rubber mold compound to the 2-d relief pieces. After that, we spent the rest of the day preparing our works for the rubber and/or applying the rubber.
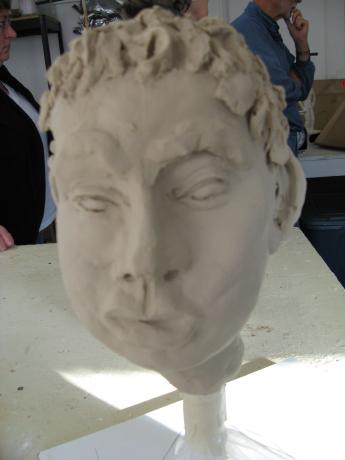
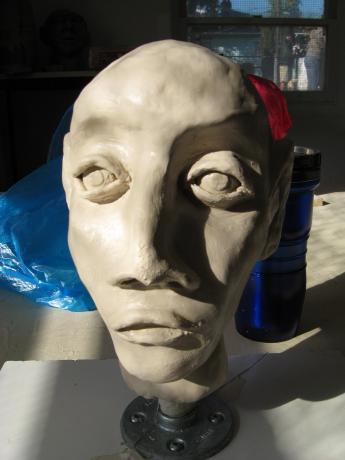
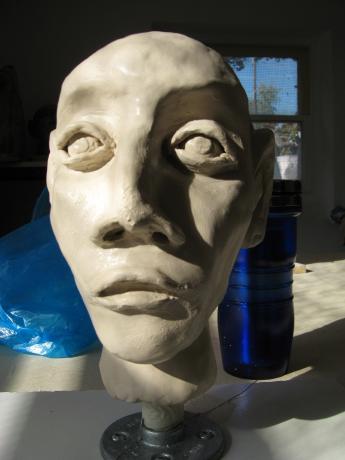
I started by sanding off my clay head from several classes ago. It had dried and was ready to fire, but had some lines from the joining process. So I sanded it down with foam sandpaper, a green cleaning pad, and 600 sandpaper.
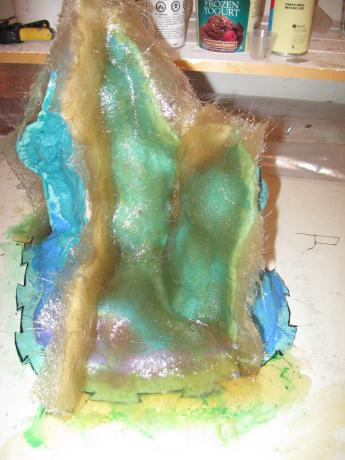
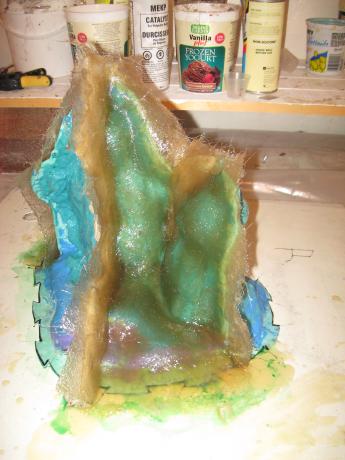
Linda cleaned up the background on her relief, then began the process of applying the 2-part molding rubber. Doing the detail coat was very tricky - the rubber would set up before she was completely done, so she had to do it in several sections. By the end of the day the first (detail) coat wes on.
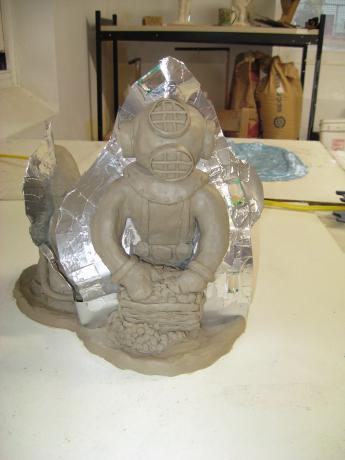
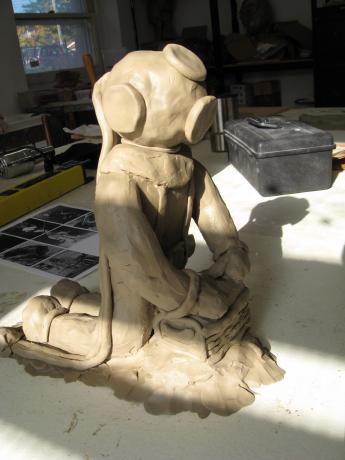
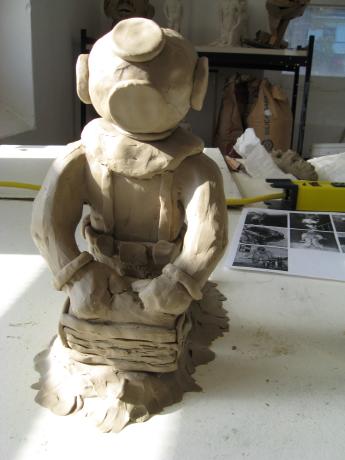
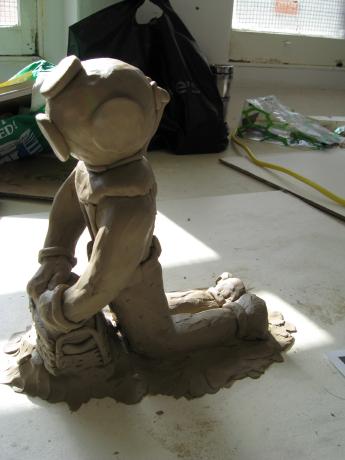
My diver sculpture was not really a releif, so needed much more preparation before mold rubber could be applied. Dave and I discussed the various options (1-piece vs. 2-piece), and I opted to create a 2-piece mold. Unfortunately, this meant a ton of work, as the sculpture had to be divided into two sections along areas that had less detail AND that would otherwise create undercuts, voids or loops in the mold. This meant filling some gaps with clay, others with metal (thin aluminum flashing), and then applying rectangles of aluminum flashing all along the chosen dividing line. Registration keys also had to be incorporated using gum packing material. Finally, all joints had to be taped off with metal duct tape. It took the whole day, but finally I was read for the rubber - next week.
Note: I've also added pictures of our two "hanging men" in the photos for week 4
Linda's work
Richard's work
Week 6 (October 25)
This week we continued working on our relief pieces. The model returned for the afternoon session.
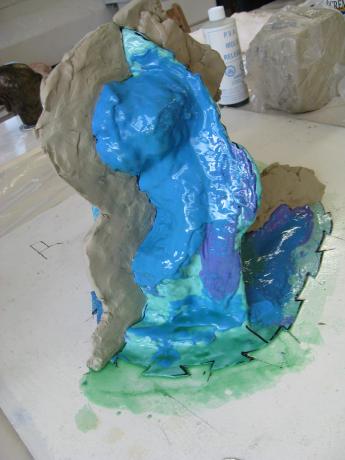
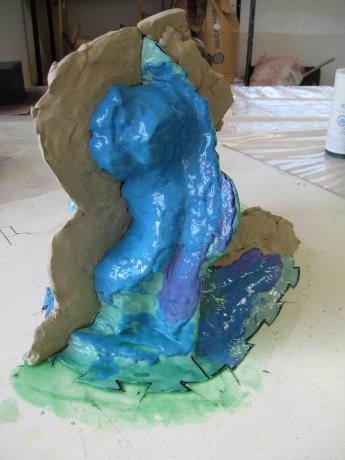
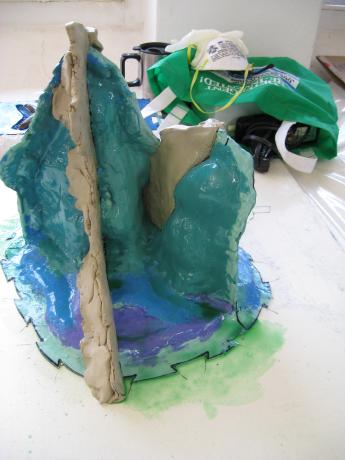
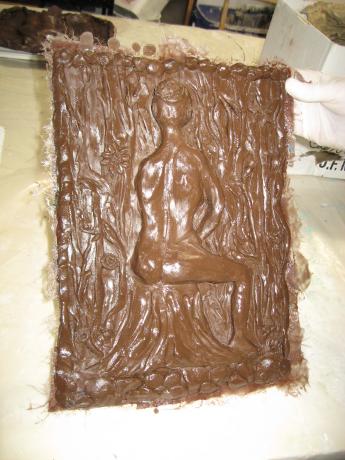
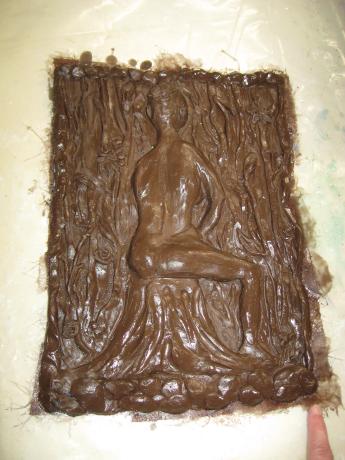
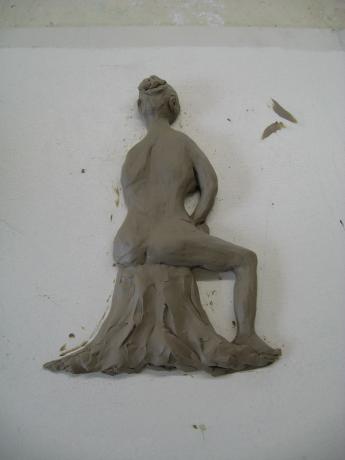
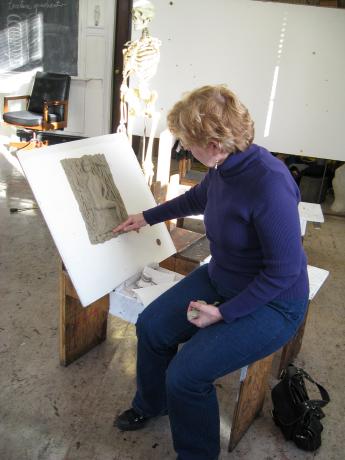
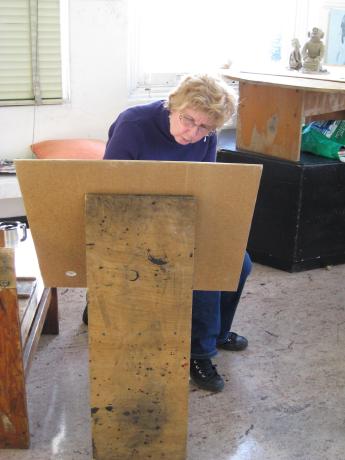
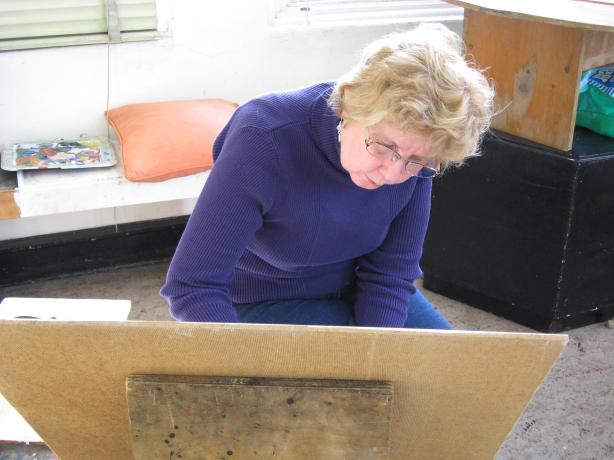
Linda's relief was coming along nicely, though she was not thrilled with the figure she had made. She spent much of the day working on her background. The pictures show Linda's relief at the start of the day and at the end of the day, as well as a few of Linda working
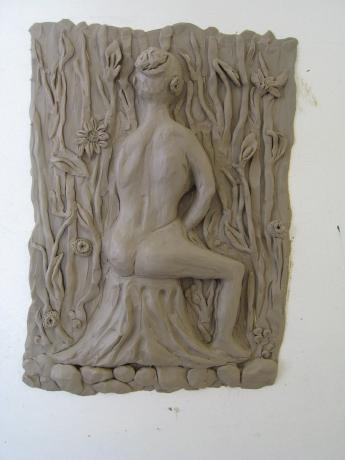
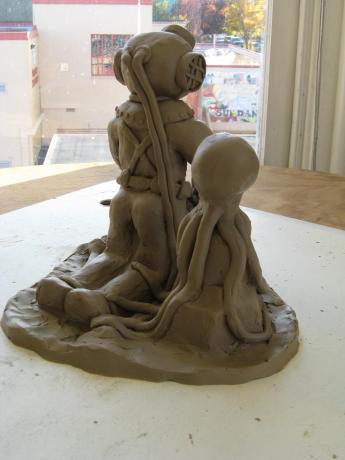
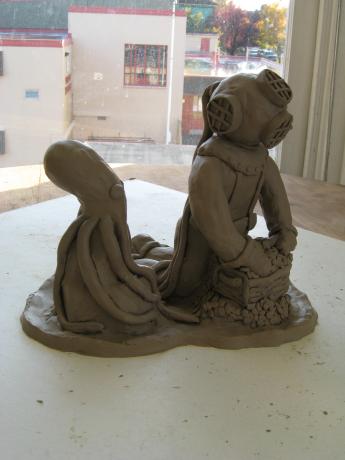
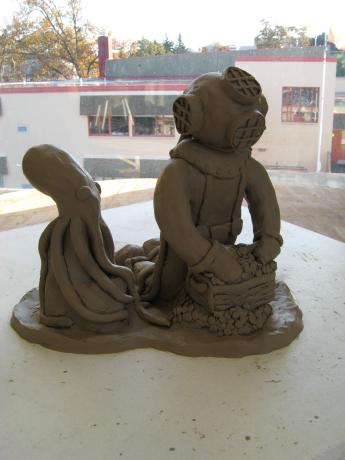
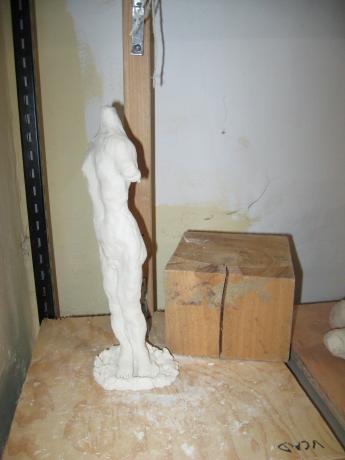
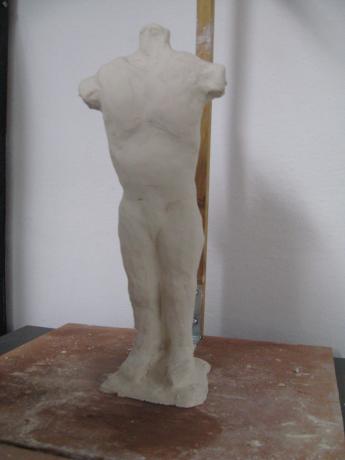
My relief from last week was anything but (a relief). After a week reflecting on the awfullness of it, I decided to scrape it off and start again. This time, I had a vision of what I wanted, and kept to the plan. It's more of a full sculpture than a relief, but I'm really happy with the final result.
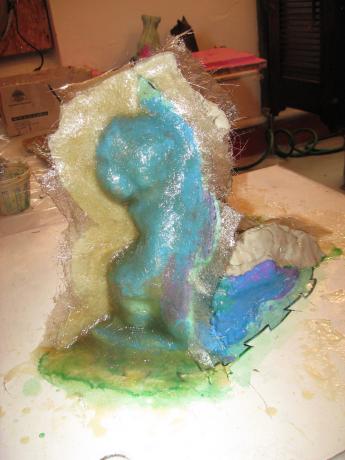
We took the pieces home this week to work on the textures and finish them up so that we can mold them next week.
Linda's work
Richard's UGLY relief from last week...
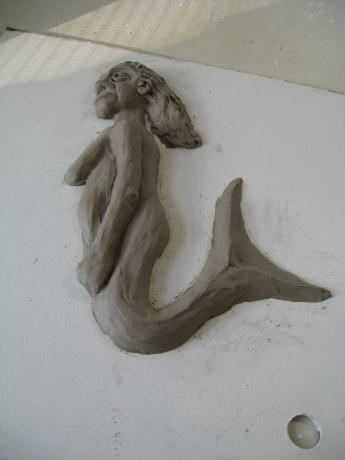
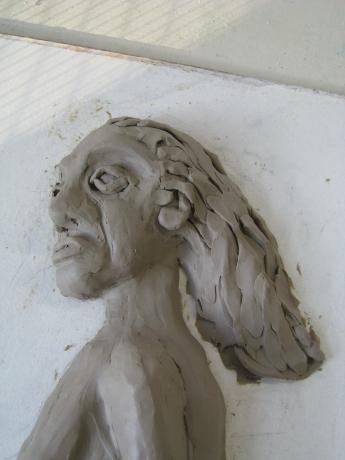
Richard's 'revised' work for this week

Week 5 (October 18)
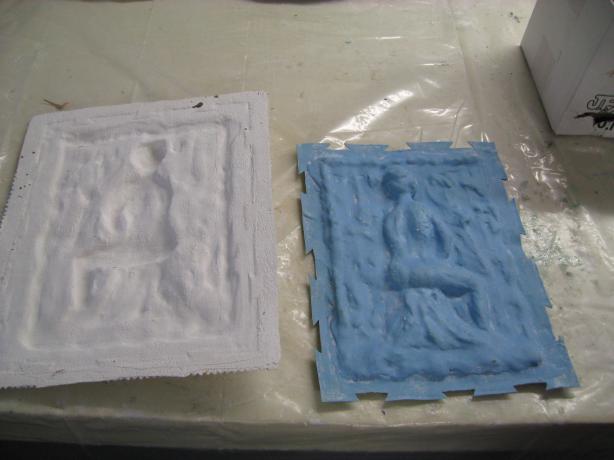
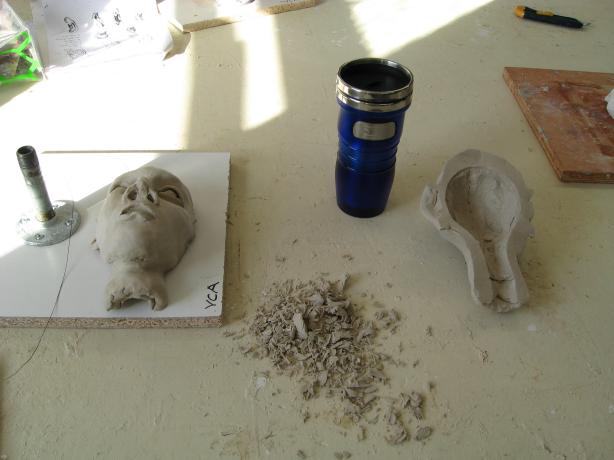
The morning session started with all of us splitting our clay heads into two sections by pulling the wires we had embedded in them at the beginning, then scooping out the core to make it uniform thickness in preparation for firing. After splitting, the heads were then rejoined using slip (that I made for the class to David's directions) and cleaning up the head for firing.
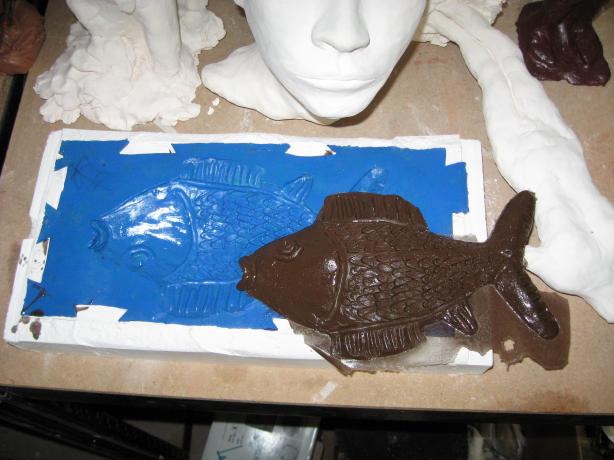
Then David and I did a demo showing how to cast the paster "outer shell" around a mold. In this case, we used the mold I had made the week prior by putting 2-part rubber around my fish relief.
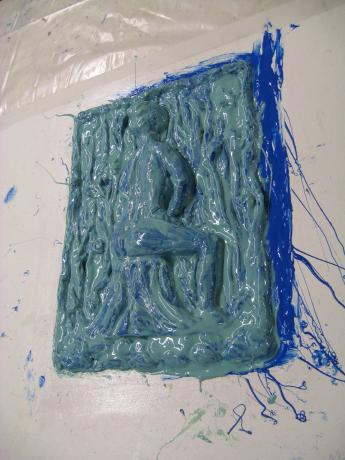
In the afternoon, David asked us to begin a relief piece (a 3D work on a 2D plane), using a female model (Amanda) who came to pose for us.
Linda's came along nicely, though she wasn't thrilled. Mine was an absolute HORROR. I went home not at all happy with what I had done.
Richard and Linda's split clay heads
Richard's plaster casting (2-D fish mold inside)
Richard and Linda's 2-D relief sculptures

Week 4 (October 11)
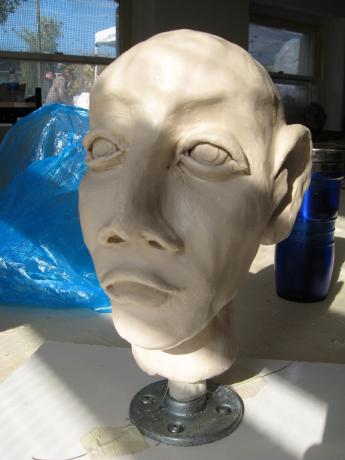
The morning had us continuing to work on our clay heads, refining the overall look of the work.
In the afternoon, David brought in a male model who posed for us. We started by building a wooden structure to hold a string armature. The wooden structure was a base with wooden upright and wooden "L" piece. Then coming down from the top piece we tied a string for the body, then strings for legs and arms to make the armature. Once the model arrived, we added clay from the bottom up to make legs, then torso. Arms and head were "optional".
The technique was very interesting, as the armature was not "stiff" but had to be accomodated in the design of the figure
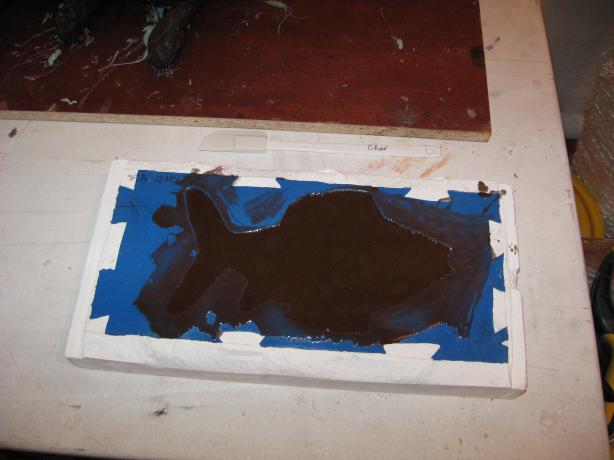
Also in the afternoon I spent some time encasing my 2-D fish in rubber mold compound (a 2-part rubber) for later casting.
Linda's figure
Richard's homunculus
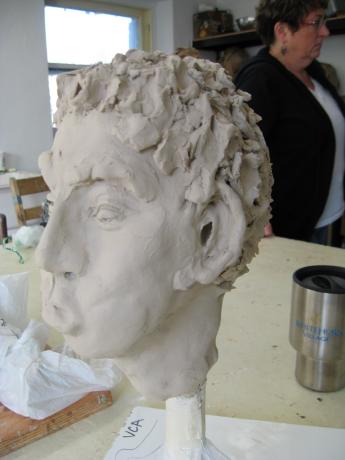
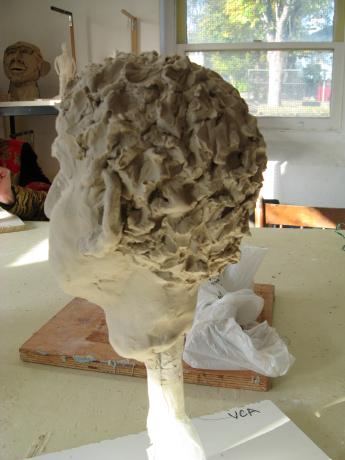
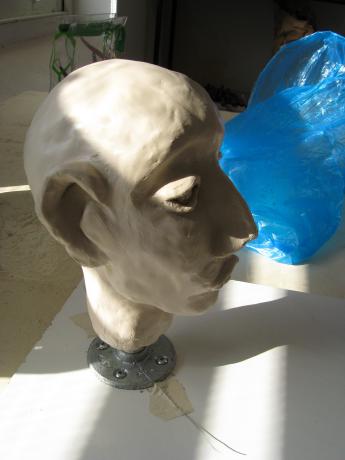
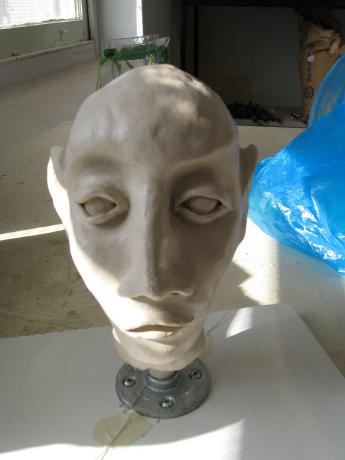
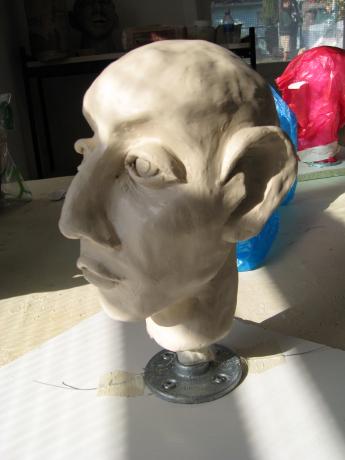
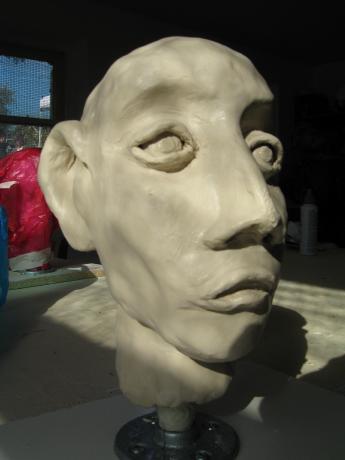
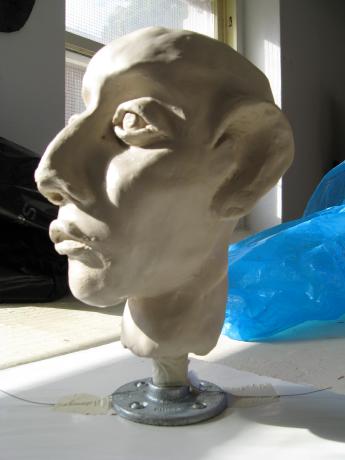
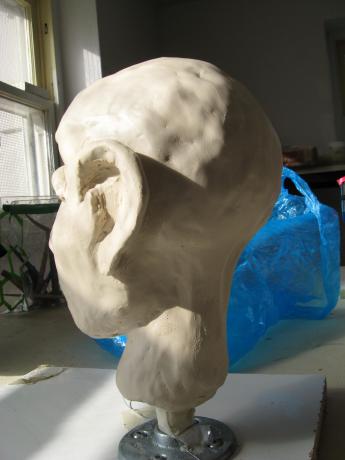
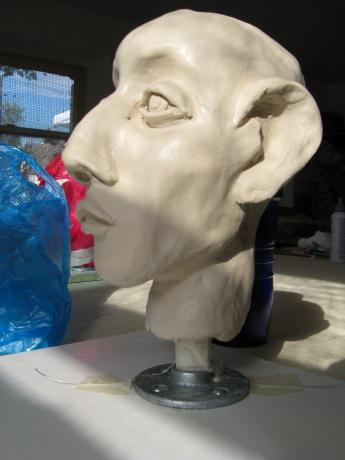
Richard's clay head
Week 3 (October 4)
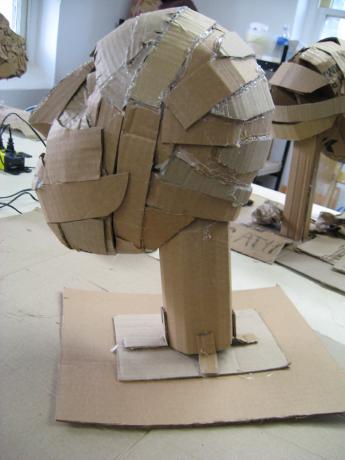
This week we started by building a "lightbulb" armature using aluminum "cane", masking tape and a short piece of 1/2 inch NPT pipe mounted to a wooden base. On that, we started work on a clay head that would be fired later in the class.
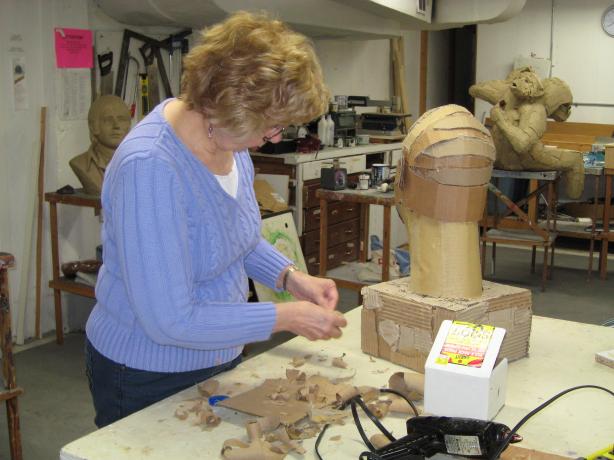
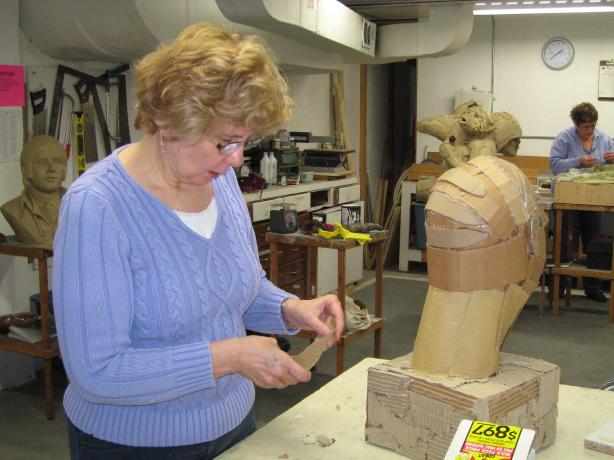
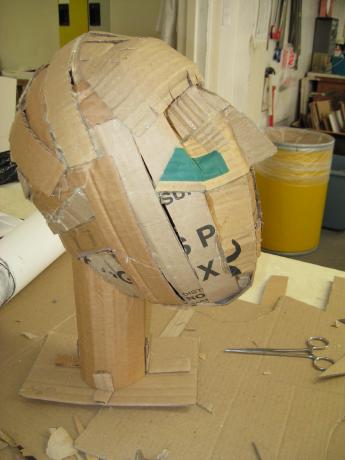
Linda's 3-D cardboard head and Linda working

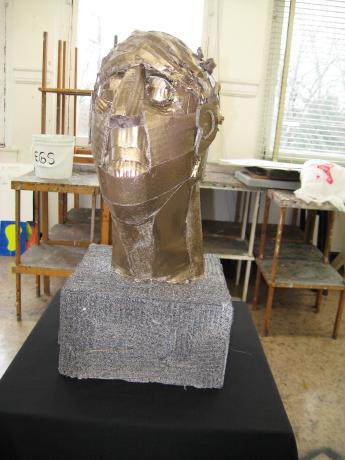
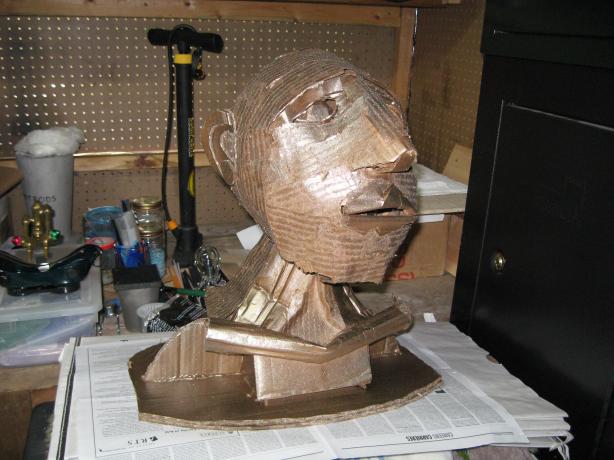
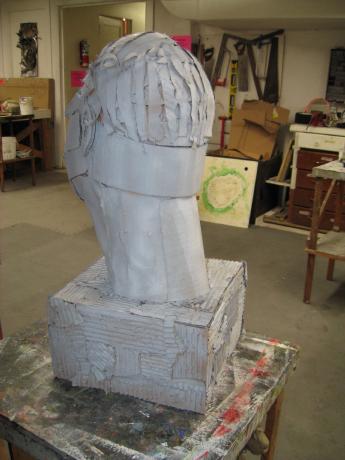
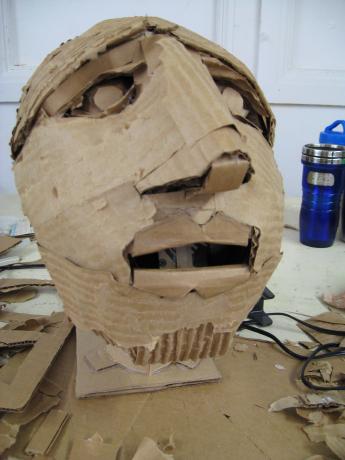
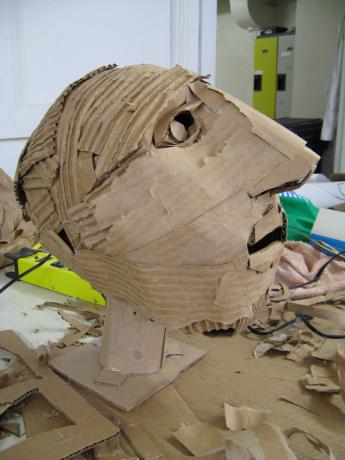
Richard's 3-D cardboard head

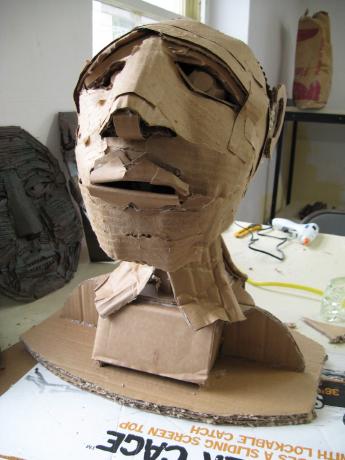
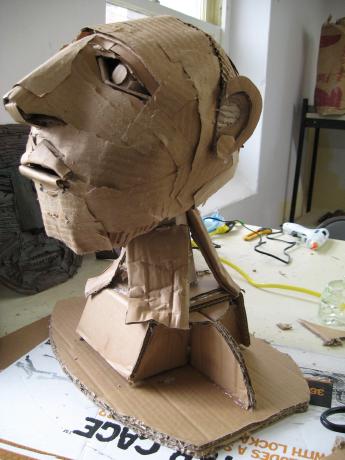
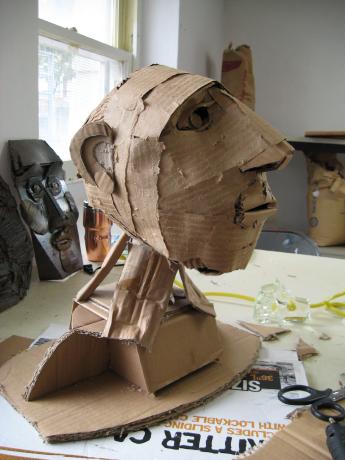
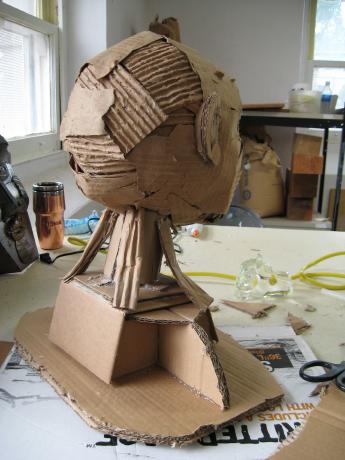
Week 2 (September 27)
We stared the week by drawing heads according to "rules and divisions". This exercise helped us see the proportions of various head features in relation to the overall head.
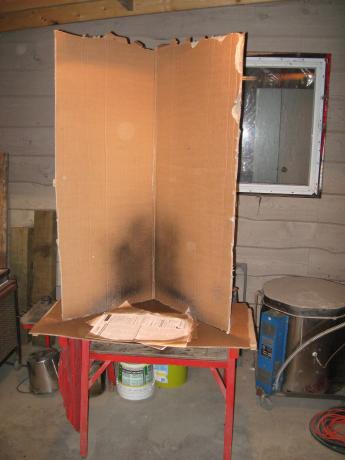
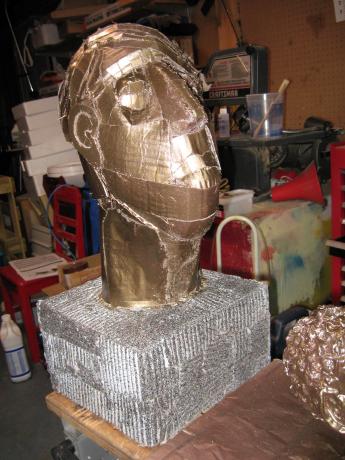
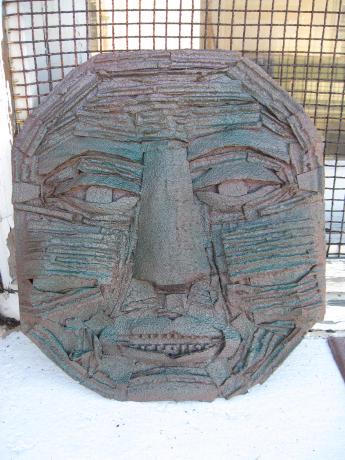
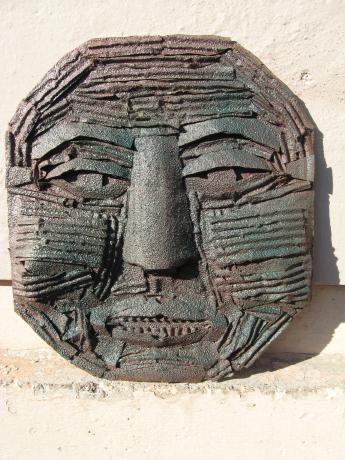
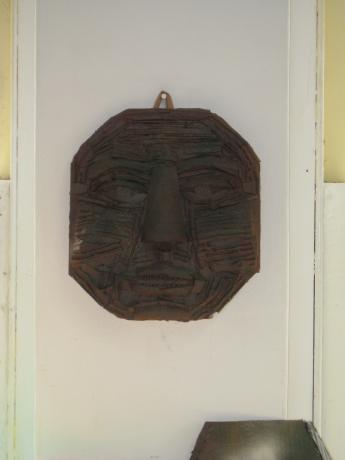
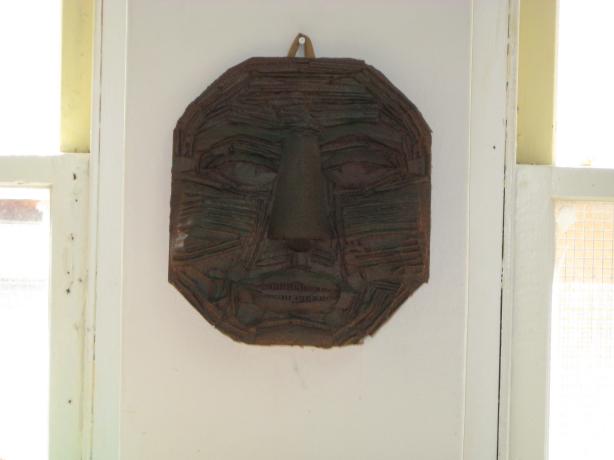
Then, David continued our exploration of cardboard, glue guns (and burns) by demonstrating a cardboard armature which was the basis for a cardboard head. He also discussed the final "show", and I decided to make the 2-D face from last week. By the end of the morning, I had my face completed. In the afternoon, I painted it with textured spray paint and other colors.
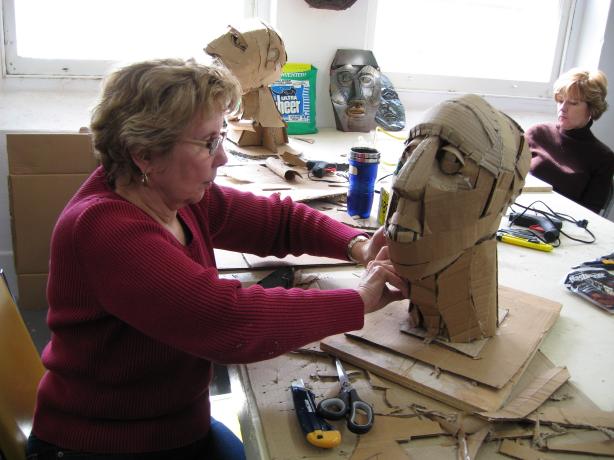
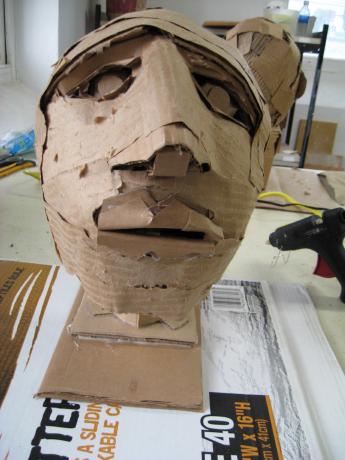
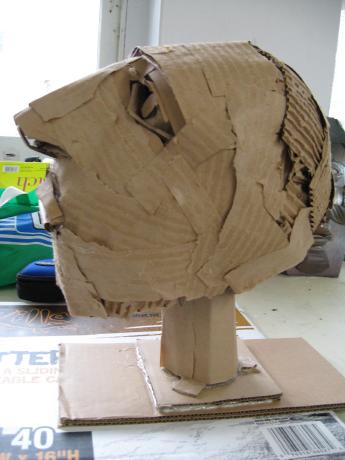
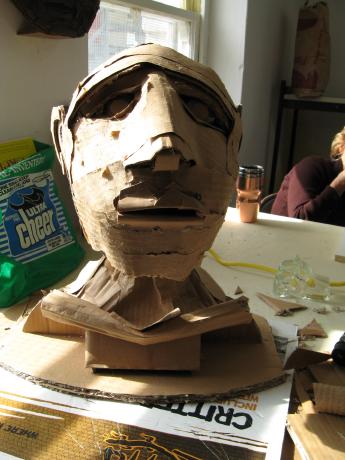
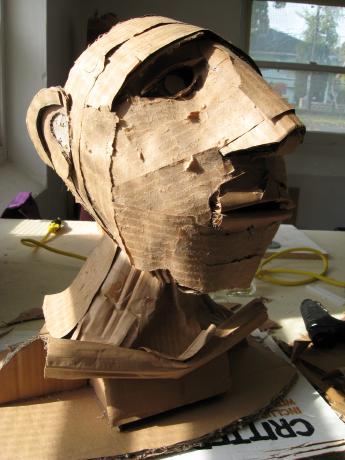
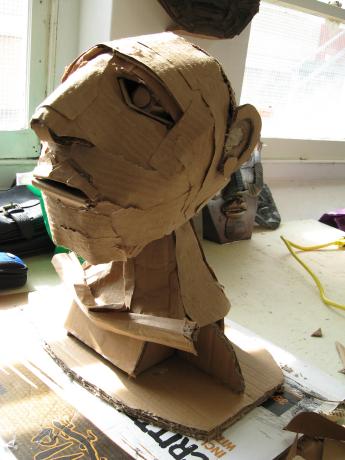
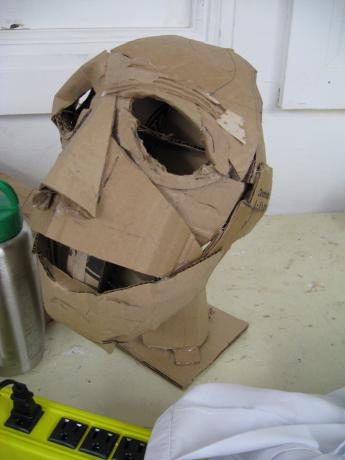
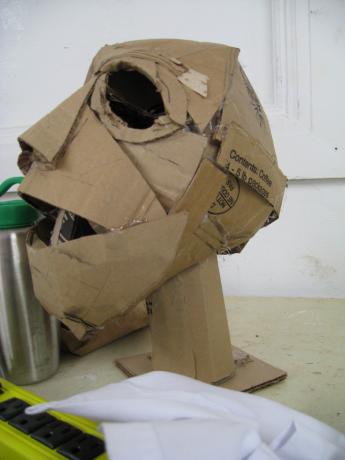
After that, both Linda and I started working on our 3-D heads. I seemed to impress the class by "engineering" my armature to be extremely strong. By the end of the day, both Linda and I had the start of some large cardboard heads
David also did a demonstration in the use of the 2-part rubber mold compound, which we will be using later to create molds from pieces made out of the oil-based clay (like the fish I did in week one).
Linda's 3-D cardboard head and Linda working (with David demonstrating)
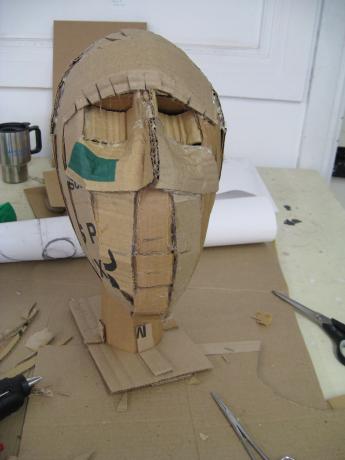

Richard's 3-D cardboard head
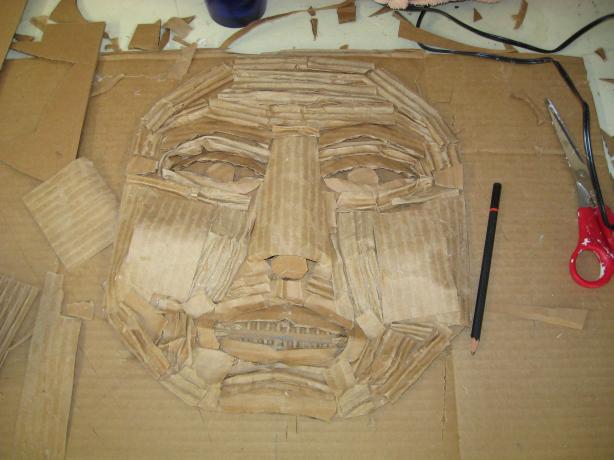
Richard's 2-D cardboard face

Week 1 (September 20)
Our instructor, David, started off with a discussion of how the class would proceed. He then talked about textures, materials, and using objects and materials "at hand" to create sculpture. He then had us begin by creating a face using only corrugated cardboard and hot-melt glue.
Linda started in right away after the demo, but I was reluctant. So David gave me a lump of some "oil based" clay (like plasticene but harder) and I made a relief 2-D fish on a wooden board.