Yard Work, July 2010
Front and Side Gravel Pad
In conjunction with the generator project for summer 2010, I needed to create a pad to place the generator. The installation guide suggested 6 inches of pea gravel as a good base. My friend Brent also bought the same generator, and build a box out of 4x6 timber to hold the pea gravel and raise the generator above grade for further protection. This sounded like a good idea, so I will be following suit.
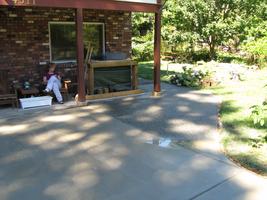
First, however, is that I need somewhere to place the generator. Code requires 5 foot clearance with any opening window, which meant that the current storage location of the front patio was no good. However, just around the corner is the house main electrical panel and power feed, and just back of that places the generator more than 5 feet from any window. PERFECT!
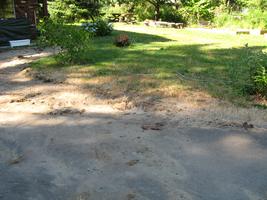
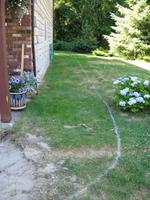
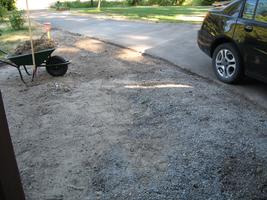
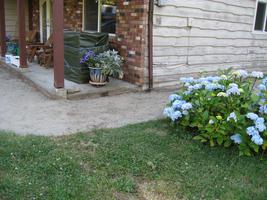
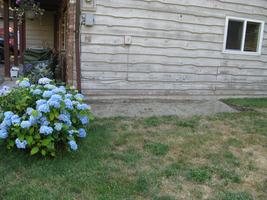
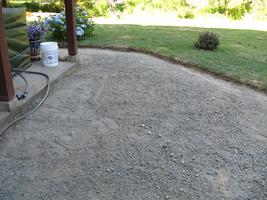
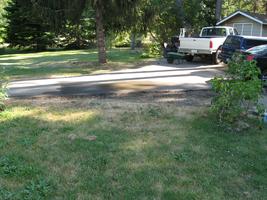
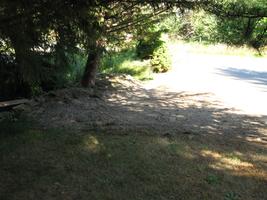
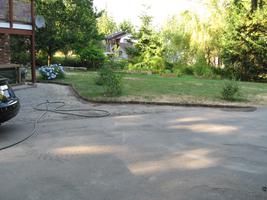
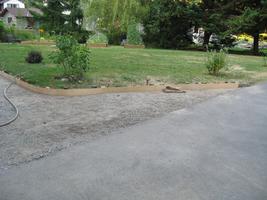
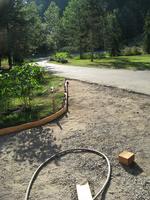
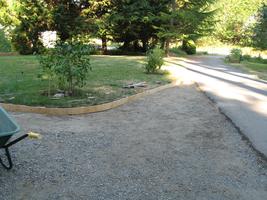
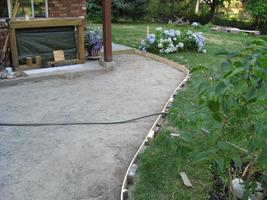
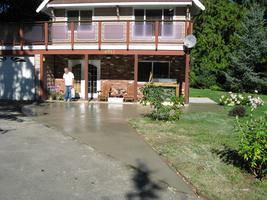
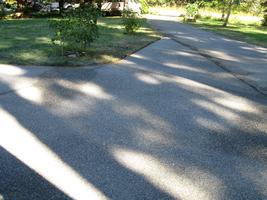
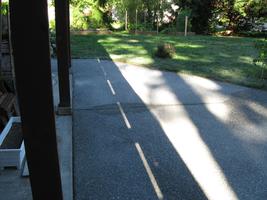
The area is currently grass on sand, which drains well but does not grow that well. Linda also wanted me to enlarge the gravel patch beside the driveway to allow more parking, and to eliminate the really crummy lawn that is there currently. With that in mind, I laid out a proposed gravel pad with string, and after we both agreed on the layout, began by spray-painting over the string to establish the layout.
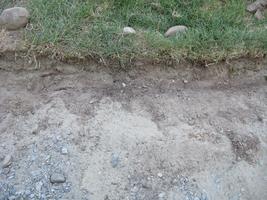
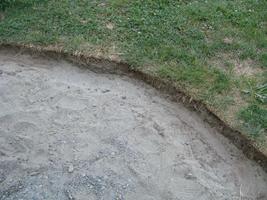
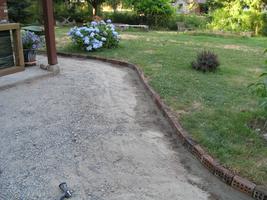
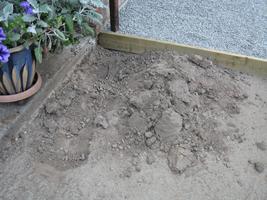
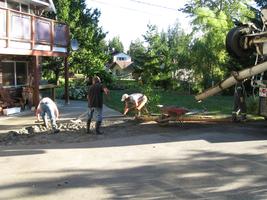
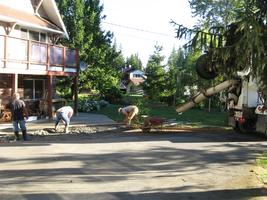
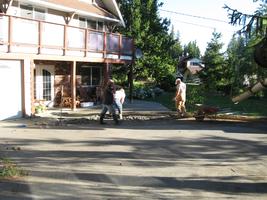
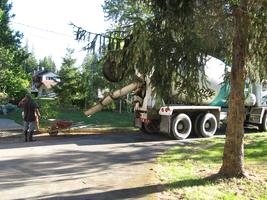
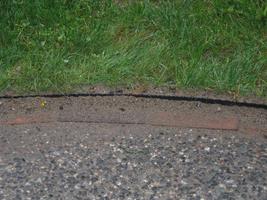
I tried using the bobcat to remove the sod, but even though the grass grows on sand only (no soil at all), the bobcat could not cleanly dig it up. I was able to scrape most of the large front area, but all the edging had to be done by hand. I used a sharp shovel to cleanly cut the painted line, then it was easy to slide the shovel under the sod and remove it. Giving each sod piece a good shake left a pile of clean sand on the ground, and grass with roots in the hand. I placed the better sod at the front of the property, and used the dead sod as fill in a hollow in the same area.

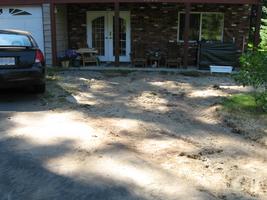
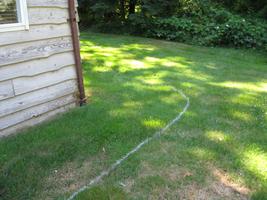
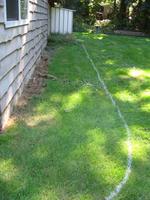
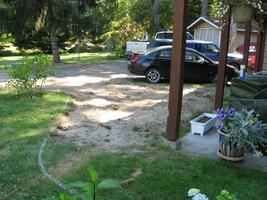
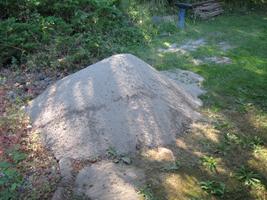
The side of the house was not convenient to reach with the bobcat, so I dug it out entirely by hand. This was again helped by the fact that there is no dirt - just grass on sand. Work was complete in a few days, leaving a nicely cut area and quite a pile of sand. We decided to sieve out the rocks and ended up saving almost a full cubic yard of sand from just the side.
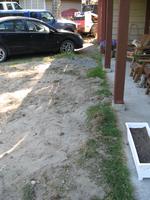
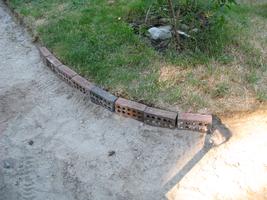
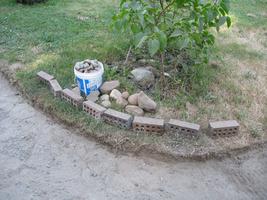
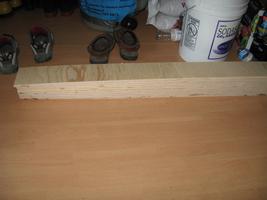
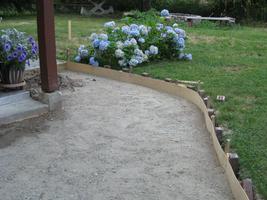
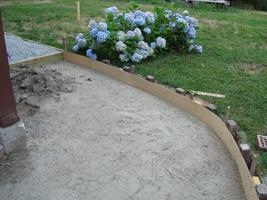
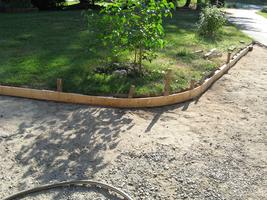
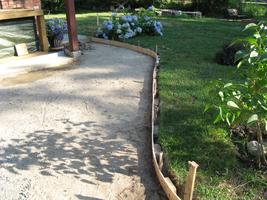
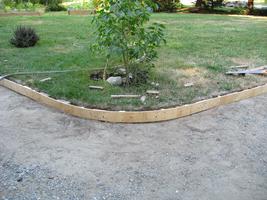
For the side of the house, I will use 2x6 to shore up the sides and back. For the curved front, I plan on using bricks I scavenged from construction on the house by previous owners. I have 100 regular bricks, and should have sufficient if laid end-to-end.
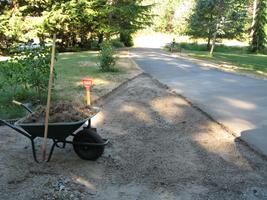

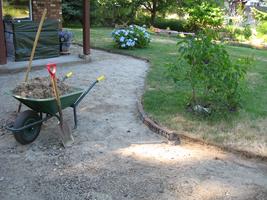
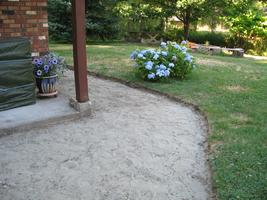
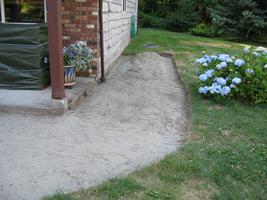
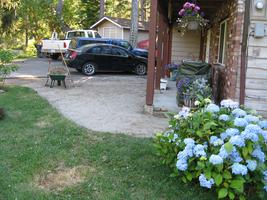
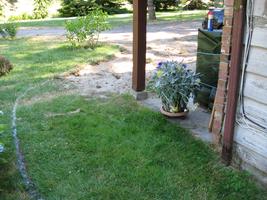
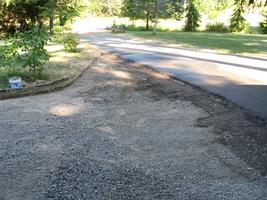
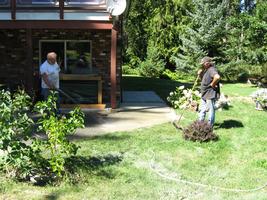
After my birthday, I finished up the gravel area prep work by removing excess material from the front area (mostly dirt and some gravel), then leveling out the area and finally distributing the gravel 'driveway chips' from near the driveway to the overall area. For this job, the bobcat was a great help - picking up piles of dirt and gravel to move near the front of the yard, then levelling off the area and distributing gravel. Only a bit of hand raking was needed to complete the prep work.
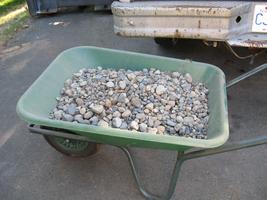
In the end, I had a nicely prepared area for pea gravel, one wheelbarrow full of rocks, one cubic yard pile of sand, and more dirt in the front where the land needed raising (near the drainage ditch).
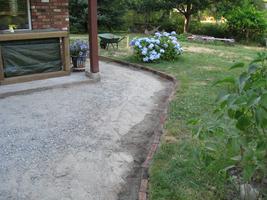
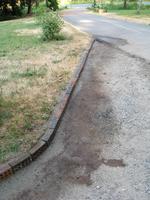
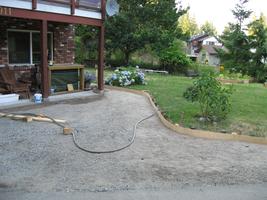
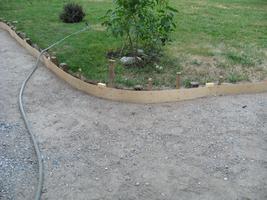
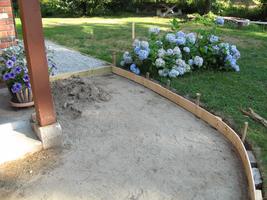
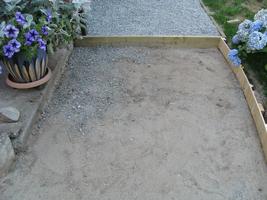
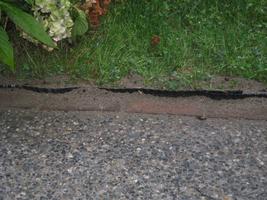
One of the last steps for the gravel prep work is the edging around the gravel bed. By the house, I am using 2x6 pressure treated wood, while at the front I am using some reclaimed bricks. Today's work involved preparing the edge to receive the wood and bricks. This was hard hand work involving a small hand shovel and the wood or a brick. Digging down, levelling the bed and ensuring the edging was at the proper level, plus allowing for bedding sand took quite a while.
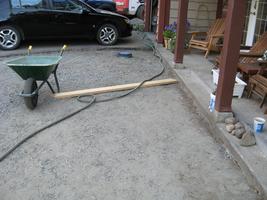
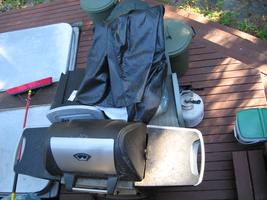
I also used my sliding mitre saw to cut the 2x6 edging and the 4x6 generator gravel frame boards to size (not pictured).

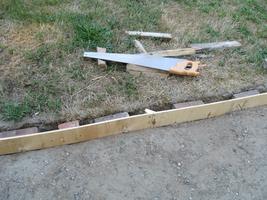
It was the last day of July, and time to finish up the gravel area prep work. Today I started by drilling the 2x6 boards for two 1/4in. lag bolts to hold the corner secure, then bolting things up. After checking for square, I had to do some fine tuning on the edge and base to ensure a proper, level rectangle. Once done, I bedded the edge with sand and sprinkled it with water to help set the wood.
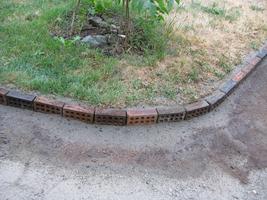
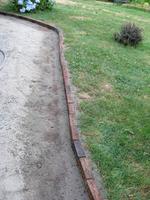
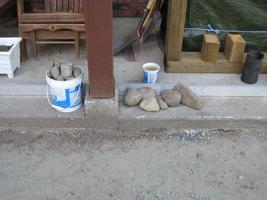
For the brickwork, first I had to clean up the reclaimed bricks. This involved hammering out the old mortar that was stuck in the holes (of all 100 bricks!). Once cleaned up, it took around 70 bricks to complete the edging. First I laid a bed of clean sand (sieved from several days ago), then the bricks were laid and tapped into place with my orange (vinyl coated) 'deadblow' hammer. When all the bricks were in place, I used the hammer and more sand to ensure all were level and straight. Then I poured sand into the space between the bricks and the lawn, plus some sand at the base of the bricks. Finally I wetted the area down to help set the bricks in place.
The prep work was complete. Now time to obtain and place approximately 7 cubic yards of pea gravel (washed 3/8in mix).

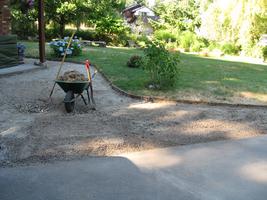
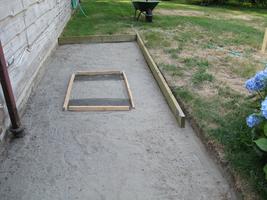
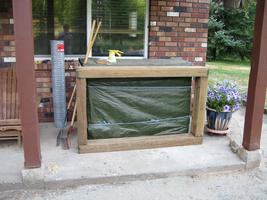
After drilling and lag bolting the 2x6 edging, I drilled the 4x6 boards to make the generator gravel frame. This frame is approx. 2in larger in each dimension than the base of the generator, and will hold an additional 6in of pea gravel. The generator will sit on top of this gravel, ensuring that it is above any water pooling during the rainy season. After drilling, I lag bolted the frame together with 8in 3/8 lag bolts and washers. For now, the completed frame sits in front of the generator, which is under the tarp in the photo.
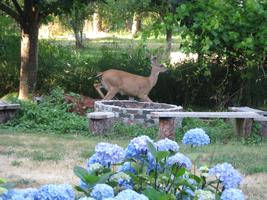
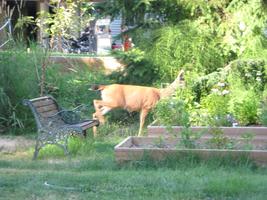
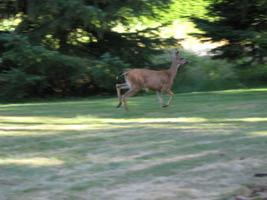
After supper, as I was doing some general yard cleanup, I surprised this marauding deer. This critter, and probaly more just like her, are responsible
for decimating our garden beds this year. No tomatoes, no blueberries. Probaly no peppers or pumpkins in time.

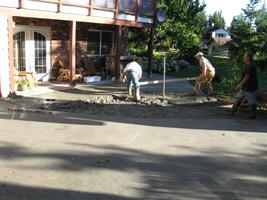
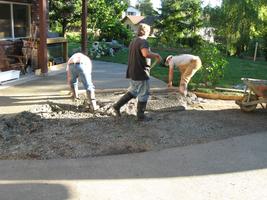
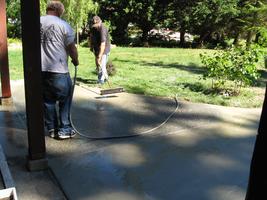
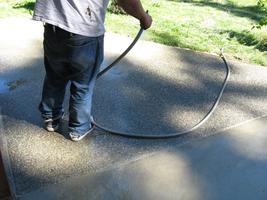
On August 6, I finally talked to Bedrock about obtaining some gravel to finish the front and side areas. Brian from Bedrock could not get me a price on pea gravel (3/8" washed gravel mix without the sand) as it was reserved for concrete (in high demand). He decided to come out and have a look at the site in order to suggest options.
Upon arrival, his first comment was "why not concrete?". In the end, he offered 3/4 crushed rock with sand - known as "road mix" because it's used on gravel roads and packs really well. He offered to supply a couple of scoops of pea gravel to fill the generator frame.
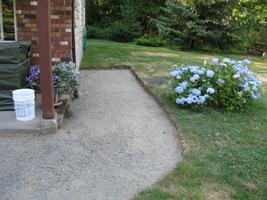
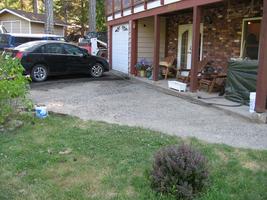
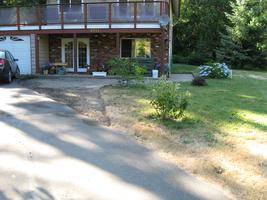
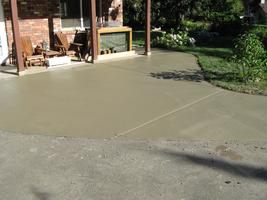
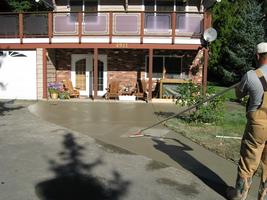
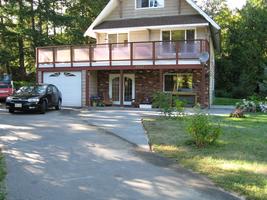
This got me thinking - Linda originally wanted concrete for the front area, and Bill (my neighbor and good friend) does concrete for a living. He says he hates concrete, but does an awesome job. After a quick consultation with Linda and Bill, we have decided to do the front area in concrete. The finish will be washed aggregate, which will blend in with the asphalt driveway very nicely. Bill said that the brick border should be fine left "as is" for the pour, which he estimates for Friday, Aug 13. The asphalt driveway has to be trimmed cleanly with a cutoff saw to prep it for concrete.
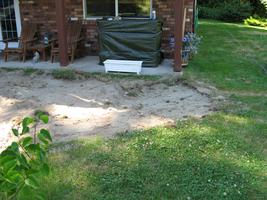
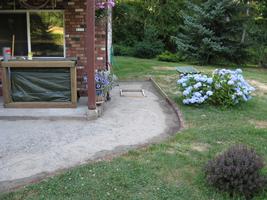
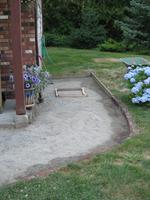
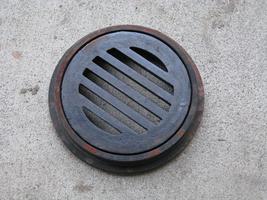
In the end I also elected to curb off the 12x6 side area and fill it with pea gravel as a bed for the generator. I won't be using the framwe as the gravel will be above grade as required and will also be 6in thick as required. In the end will be a simpler approach for the generator.
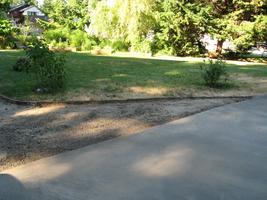
On August 8, I bought another 8ft. length of 1x6 to crib the open end of the side area (for gravel) plus lag bolts. Once home I added the 2x6 to complete the gravel frame and also repositioned it to make a nice transition edge for the concrete.
Pictures of the completed side area can be found on the generator page.
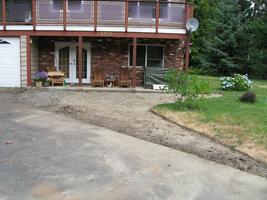
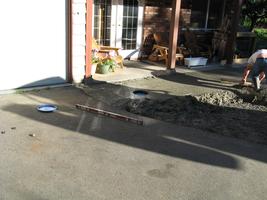
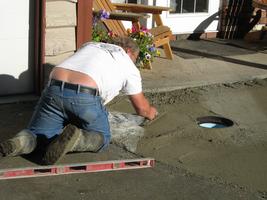
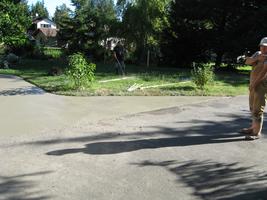
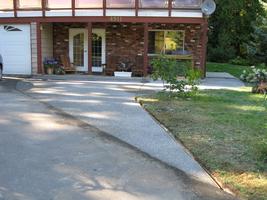
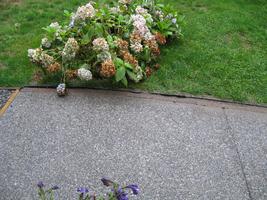
This week the plan was to complete work on the pad area to prepare for concrete on Friday, Aug 13. With that in mind, I took a hard look at the whole area, and decided that trying to pour concrete to the bricks was not ideal. As a result, I removed the bricks and some of the packing sand, then cut up some old masonite into 6in. strips (4 ft. long) to create cribbing. I used 2x4 pieces to join the sections, and then pegged the masonite at various places to hold it in place. Using a level and an aluminum screed, I set the cribbing to be level with the current front cement patio. I then used a scribe to mark a line 1in. down from level to allow for drainage. This worked perfectly near the current front patio and also at the far end of the driveway, but left a large area of new pad that I could not effectively measure for level.
Using pieces of 4x6 to create level piers in the large area, I was able to determine that most of it was good for level and therefore for drainage with the line marked on the forms. Unfortunately, right beside the garage the driveway had a drainage channel formed in it, and the driveway by the garage door was at least two inches lower than the front patio. There was no effective way to raise the new cement pad without causing a drainage problem between the garage door and the front door.
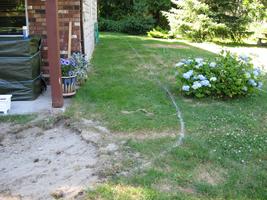
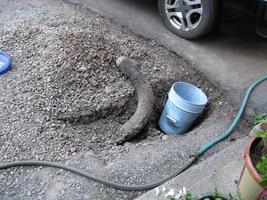
Talking to Bill, we dug near the house to find the main drainage pipe that surrounds all houses around here (code requirement for house on a pad). This is a 3" drainage pipe that runs around the house and then off to the drainage ditch. Gutter drains are also connected to this drainage system to prevent flooding of the pad (and thus the house) in a downpour like we get every fall. We found the front corner drain pipe, which seemed to curve under the existing patio. Bill told me to dig a new ditch around the pad to the driveway. We would place a new drainage pipe there, tee it to the existing system, and create a drain in the concrete by the driveway.
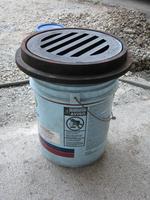
This was now Friday, but that was Jerri's birthday, so we postponed the concrete. I decided to start digging by the driveway as it looked to be drainage gravel. To my delight I discovered a capped (with a rock) drainage pipe that went along in front of the current patio from the driveway towards the drainage ditch. I unplugged the pipe. put a garden hose into the end and turned on the water full. After 5 min, the water was still running through the pipe with no signs of blockage or backing up, so I figure this drainage pipe is good to go. I buried the few feed I'd dug in front of the main door as it was a really good "ankle break" trench. Near the driveway I dug a pit that will contain a 5-gal. plastic pail. I'll cut a hole in the pail near the top for the drain pipe, and purchase a frame and drain to fit the pail. This will create a drain for the concrete pad with a cleanout that will take water away from the front of the house and solve the drain problem.
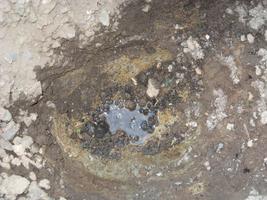
Digging the cleanout pit I discovered this really neat blue clay. I'll have to save some and try playing with it - even firing it in my annealer to see whether it might be good for some art.
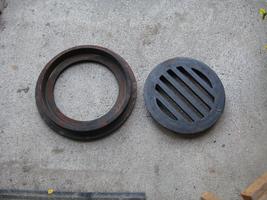
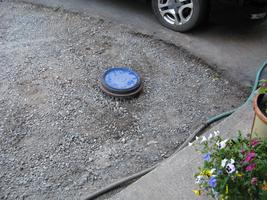
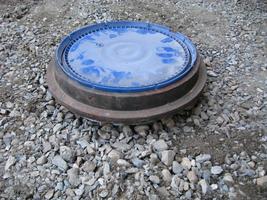
Today I went to Duncan and bought the drain cleanout collar and cover from Dan's Pre-Cast. It's a very nice (if pricey) item. I also purchased some 3/8in plywood, as the 1/4in stuff was just too expensive, and there's really only one curve that has an extreme bend - so I'm thinking of plywood for all but that bend, and doubling up the masoninte for that bend. Should work, but we'll see. Today I took pictures of the work so far, including the various drainage holes (not complete) and the drain collar and cover.
Once home I cut 1/2 the plywood into 10 4.5in strips, each 4ft long for easier bending.
Started installing the 3/8 plywood strips by marking the stakes where the 1" below level mark was located, then removing the existing masonite strip and replacing it with a plywood strip. It worked pretty well, except the masonite turned out to be longer than 4ft (don't know why I never noticed before) and so each plywood strip was a couple of inches shorter, meaning I had to adjust stakes and join blocks as I went. I also rotated the join blocks so they were below the top of the newly installed plywood form, allowing a screed to be run the entire length. I'm sure Bill will have me cut off the stakes before the pour to facilitate this as well.
Still, while I planned only to try one or two, I ended up doing all 10 of the plywood strips. The plywood strips even bent around the sharp corner where I had planned to use doubled-up masonite. In the end the plywood worked out for the entire form! I added a few stakes to firm up the form, and finished the evening by laying the bricks down lengthwise between the form and the grass edge to give added support. This is where the brick border will eventually end up, so it provides support and proper spacing.
Tomorrow I plan to finish up the forms at the end farthest from the house, where I cannot drive a stake, and where there is a short piece still needed. I also plan to finish the drainage cleanout hole and test fit the cleanout pail. I won't set the pail until Bill has a look and helps me set the drain level.
It's still super hot and sunny here on Vancouver Island, so no work at all in the morning sun. After lunch, the shade moved such that the pad area was starting to be in shade, so I was able to begin work on the drainage system. At the end of our walk for the mail, I asked Bill about the location of the drainage system, and confirmed with him that the current location (in the pictures above) was too close to the driveway and existing patio. We agreed that about 3ft from the driveway and patio would allow him to sculpt the drainage area properly.
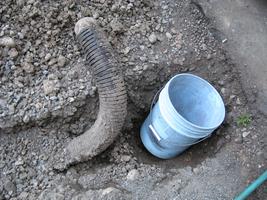
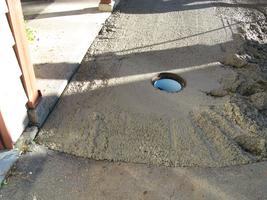
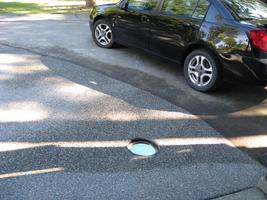
With that information, I filled the existing hole with gravel and dug a new hole for the drainage cleanout pail. Again, the hole quickly entered thick clay, which I placed in my wheelbarrow for placement elsewhere. When I was done, the drain collar was 8in below the level of the patio. I knew this was too deep, so asked Bill for a proper height, and was told about 2in was good. I added some gravel to the hole until the level of the pail and bottom collar was about 3 1/2in below level.
I removed the pail and cut a 4 1/2in hole in the side just below the thick collar, and used a piece of drain pipe to test the hole. Once I was certain it would fit, I refit the pail in the hole, levelled the pail and then cut off the excess drain hose and placed the end into the drainage cleanout (the pail). Then I placed the collar on the pail and covered it with the pail's lid to prevent dirt and rocks from entering. I then set the pail in place with gravel and sand from the area and buried the pail and drain hose with gravel to a level about 2in below the collar.
I rechecked level frequently and was happy with the result. I then realized that Bill would be setting concrete to the top of the collar, which I measured at 2in below the patio level - exactly what Bill had wanted.
I finished up the day's diggin by removing the material Bill and I had dug up by the house drain (the other end of the patio) and filling the space with smaller gravel and sand.
Finally, I used a hand saw to trim the stakes to the level of the forms - this allows a screed to traverse the entire form without difficulty when setting the concrete. I also cut a final piece of wood to finish the forms at the far end of the pad. I used some surpls wood for this, and cut the form long to allow for fitting once the asphalt is trimmed.
Today I checked with Bill about cutting the asphalt. The cutoff saw was rebuilt, but would not work well. I bought a new sparkplug for it, and was sent home with the saw and instructions.
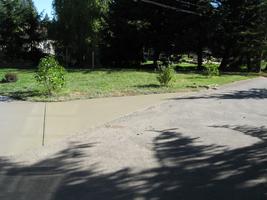
No matter what, I could not get the cutoff saw to start. Two pulls and it was totally flooded. Finally took it to Bill, who discovered the choke was sticking "on". Once that was cleared up, the saw started right up and ran fine. I marked the asphalt cut line with chalk and a straightedge (where it's straight), and began cutting. The saw quickly finished off the first blade, which had been almost gone anyway. Bill found another blade that fit the arbor, and I kept at it until this blade was also used up. I have a good cut for over half of the distance, and a "scribe" mark for the rest. Tomorrow I'll get another blade and finish the cut.
Meanwhile, with half the cut done, I grabbed my axe and a 2lb hammer and started whacking. Put the axe in the cut, whack it with the hammer, and "SMACK" the asphalt is cut clean away! I trimmed the edges for half the driveway where my cut was good, then removed the larger asphalt chunks. I finished up by using a shovel to scoop out the excess gravel from the trimmed area to make a nice neat cutoff.
Finally today I installed the last form section.
Today at lunch I went out in the MG to Friesen's Rentals (Cedar) and picked up another blade. I had to borrow the owner's adapter bushing to get the blade to fit, but that was no problem. Later in the afternoon I fired up the cutoff saw and completed the cut in the asphalt. The cutoff saw ran perfectly. Once the cut was done, using the axe and 2lb hammer I quickly finished off trimming the remainder of the asphalt. After a few adjustments with the saw and axe, it looks really good!
Checking the last form, I could see it was higher than the asphalt. After much fussing and even a bit of trimming (to avoid a few really large rocks that could not be removed, the final form was fit and properly levelled for drainage. Some sand to seat the last two forms and some water to pack it and the concrete prep work should be done.


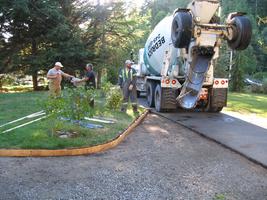
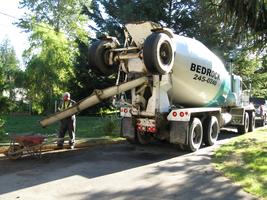
Today I received an early morning phone call from Bill... today was concrete day! I was informed that Brian was coming to measure the job in about 10 minutes, and then I would have to move the vehicles for 10am (sooner was better). After a quick shower, I headed down to find Bill and Brian ordering the concrete. Turns out it was better to have it now rather than for 9 or 10 (now being 8am).
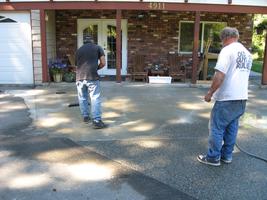
I quickly moved the vehicles, then headed over to Bills with my coffee to wait with the fellows for the concrete truck. Once it arrived, we all headed to my place and proceeded to start placing the concrete.
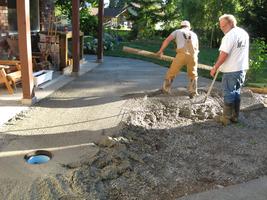
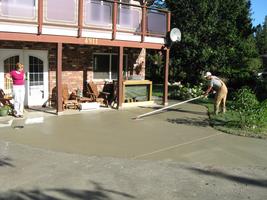
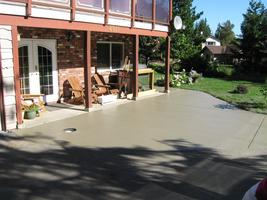
The concrete was poured with speed and precision. Bill and Chris worked on the concrete while Neil delivered wheelbarrows to the desired locations. Within an hour the concrete was poured and levelled, and Bill and Chris proceeded to edge and finish the concrete. Once that was complete, it was allowed to dry for some time, after which Bill sprayed on the chemical to allow the exposed aggregate finish. By now it was 10:30, and so we broke until after lunch, to allow the concrete to set up.
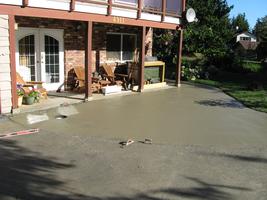
By 1pm the concrete was ready for exposure. Bill and Neil started washing the surface sand and cement off the concrete, exposing the pea gravel aggregate. It sure looked super as the water carried away the sand leaving a beautiful pebble finish. Overall drainage of the pad was excellent; a combination of my prep work and Bill's skill creating drainage contours in the surface.
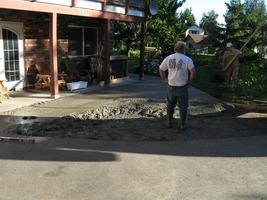
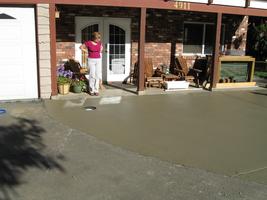
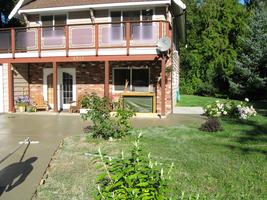
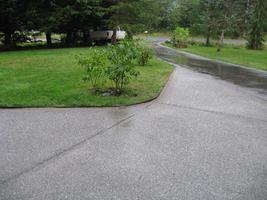
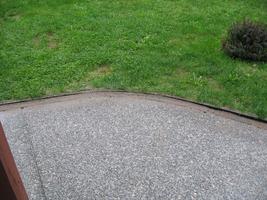
Once the aggregate was all exposed, Bill and Neil headed home, leaving me with a beautiful new concrete pad. I can walk on it tomorrow, but it will be a week before Linda can park her car on it. It's a beautiful new pad / patio for our front!


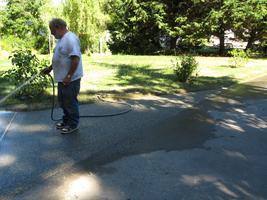
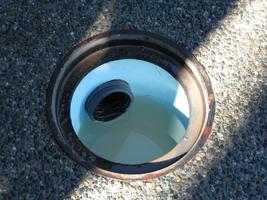
Now that the concrete pad has set up for a day, I added the metal grate to the drain. I also removed the forms, separated the various wood bits and either stacked them for reuse or put them on the backyard firepit. I also used the hose and a broom to clean up the asphalt driveway so it would not stain from the concrete wash.
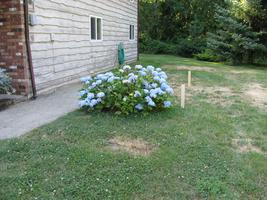
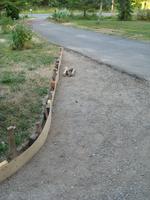
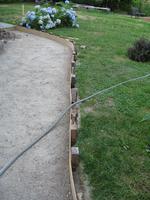
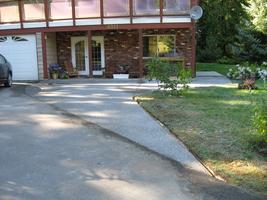
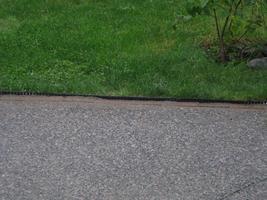
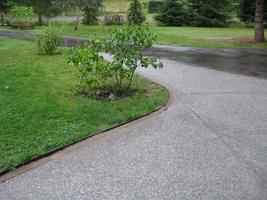
Today I laid out the plan for the brick border - very similar to the brick border originally planned when it was going to be a gravel pad (shown in earlier photos). I set a few bricks to judge how high to place them, then distributed a few buckets of sand in the trench to help level and raise the bricks. As it was going to rain, I stopped there to let the rain pack the sand.
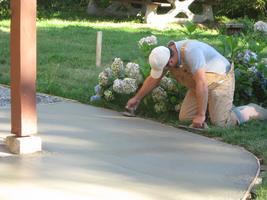
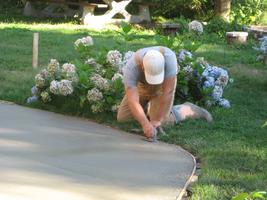
Today I laid the bricks in the prepared trench to finish the border. Most bricks went in easily, but a few were more challenging as the concrete wash runoff hardened in the trench and had to be chipped away before the bricks would sit properly. After laying all the bricks, Linda and I grouted the bricks into place with dry sand removed from the generator pad area, sweeping and massaging it into place. Earlier in the day I purchased some very inexpensive lawn edging ($2.59 / 20ft roll) to keep the lawn back from the bricks, and we place that in the trench as we bedded the bricks with sand. The end effect is very nice. Tonight the rains are due for a few days, so that will bed the sand nicely to complete the work.
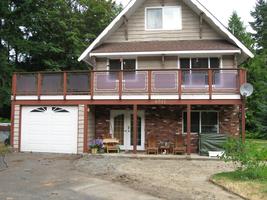
Second Floor Deck
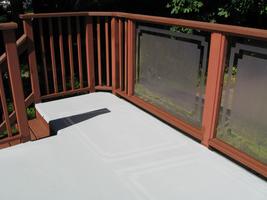
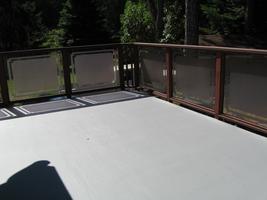
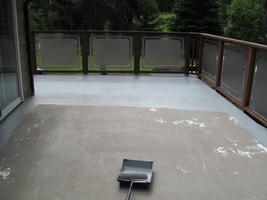
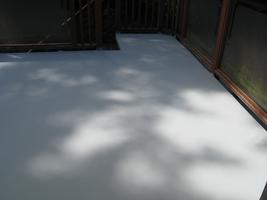
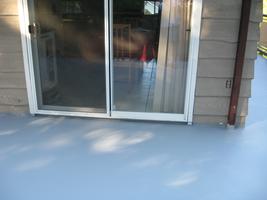
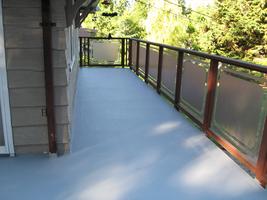
While the front gravel work was taking place, I got out the power washer to clean the dirt of my truck and Linda's car. Well, one thing led to another and I decided to power wash the upstairs deck that is also the garage roof. Last year at the end of the summer, I purchased two pails of Dekote to re-cover the deck as it was showing it's age. I didn't get to do the job last year as the rains came just after purchase, but the July weather has been sunny and hot - perfect for Dekote as it needs no rain and temperatures above 10C for at least 4 hours as it "flashes" from wet to a rubber surface after painting.
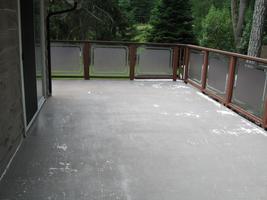
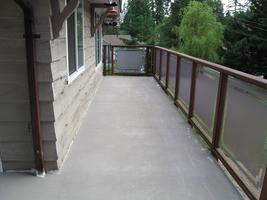
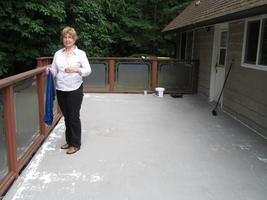
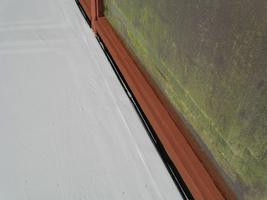
After I power-washed the autos and the deck, I let it dry. The next day was hot but cloudy, and the instructions recommend against applying Dekote in direct sun. Thus, the day was perfect for application of Dekote. I used a 1in. brush to paint the edges, then a roller to paint the whole deck. It only took an hour or so for the first coat. After allowing 4 hours drying time (as per the pail), I applied the second coat. In the interval, I used a ladder to paint the drip edge on the deck. By nightfall, both coats were done and the deck looked terriffic!
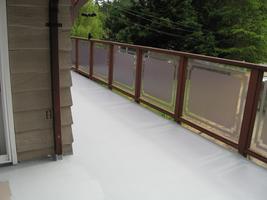
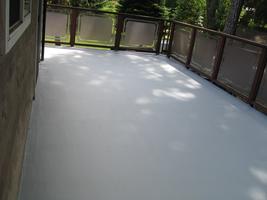

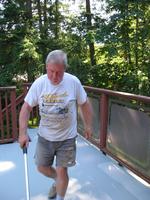

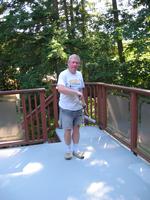
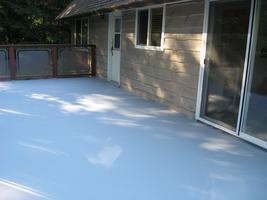
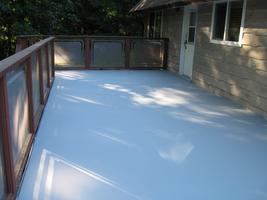
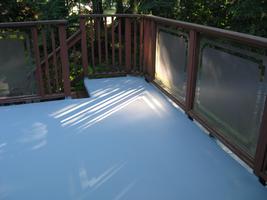
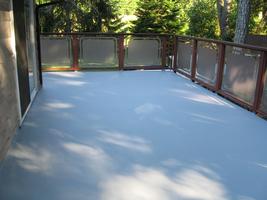
The deck must remain bare for 7 days as the directions indicated this was needed "cure" time before furniture could be replaced.
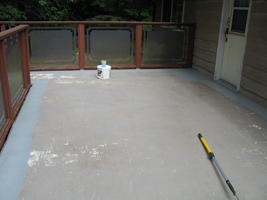
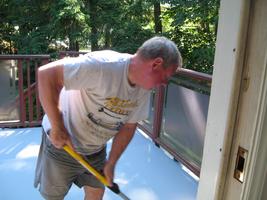
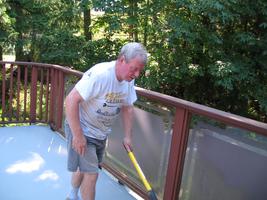
While the deck was curing, I decided to paint the lower railings as they were looking weather-worn. I started by taping off the railing glass on the bottom, then painted the lower railings (using a cardboard to sheild the new deck surface). Once complete it looked great!